

A Complete Guide to 'Shipped by Seller'
03/15/2024

How to Ship Your Orders
Check out this flowchart to see the simple steps for shipping your orders from start to finish.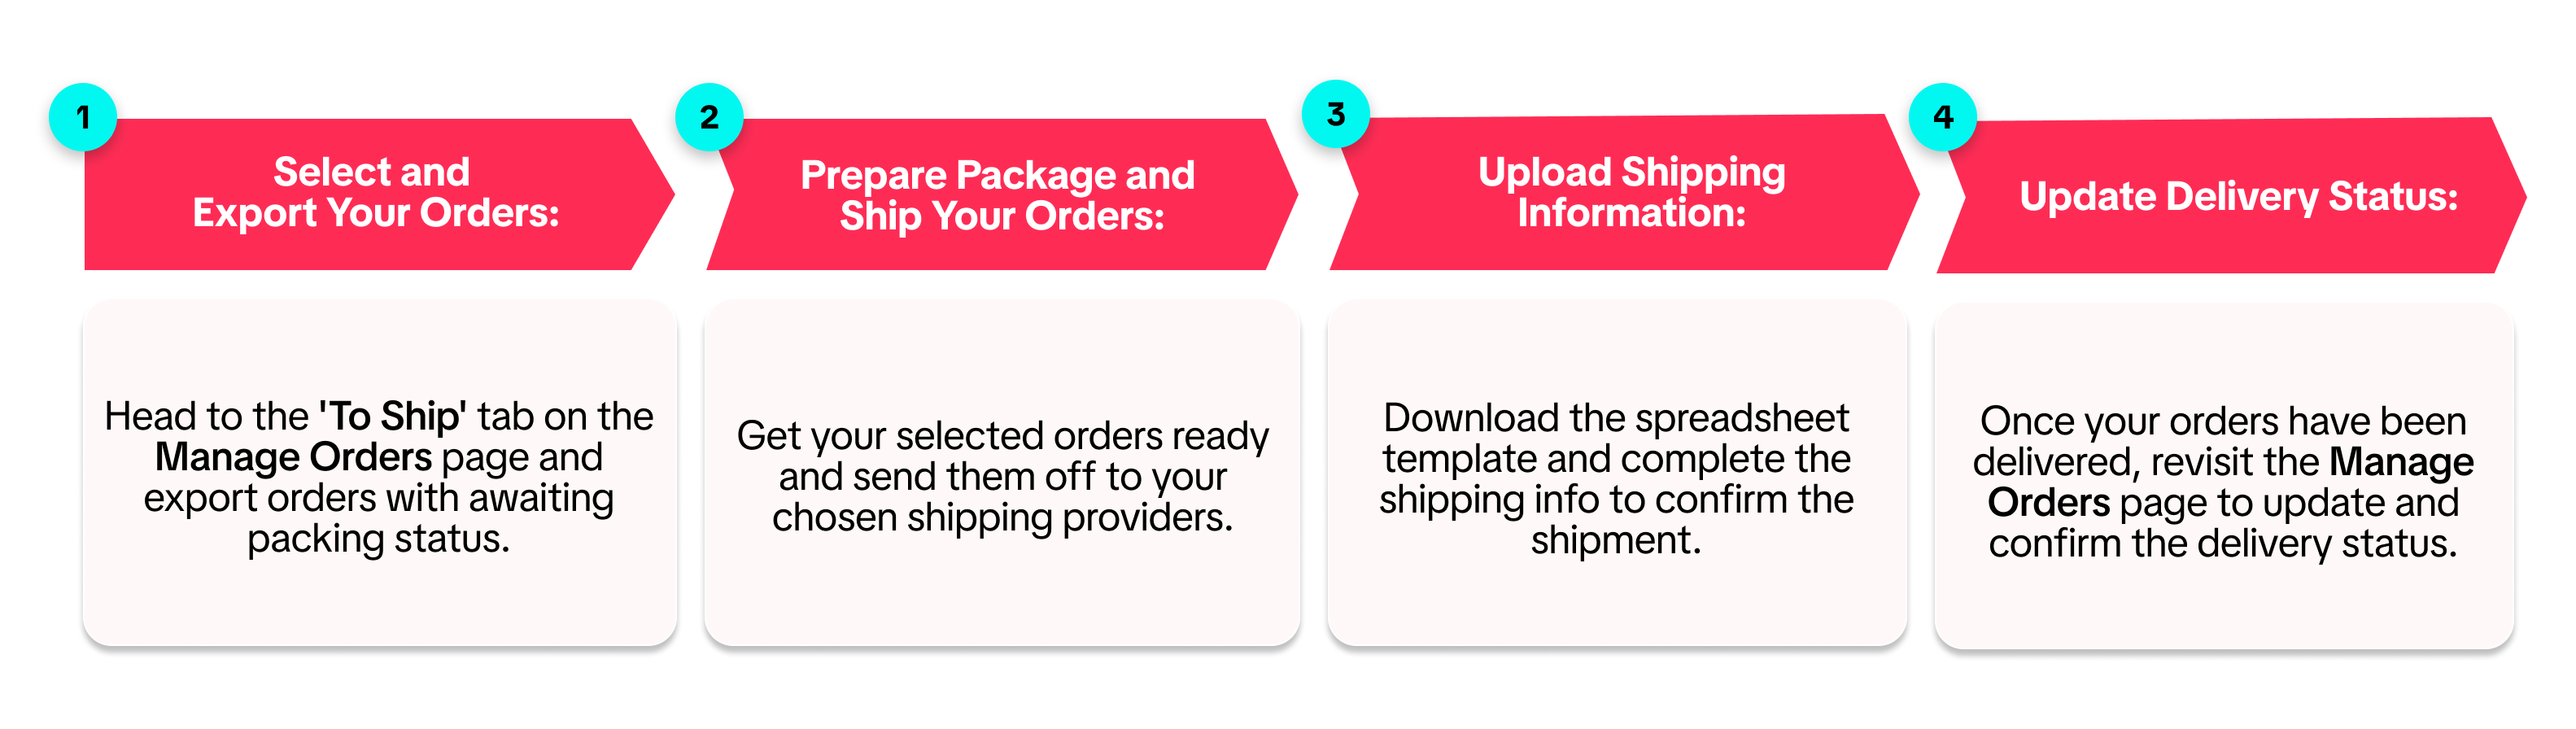
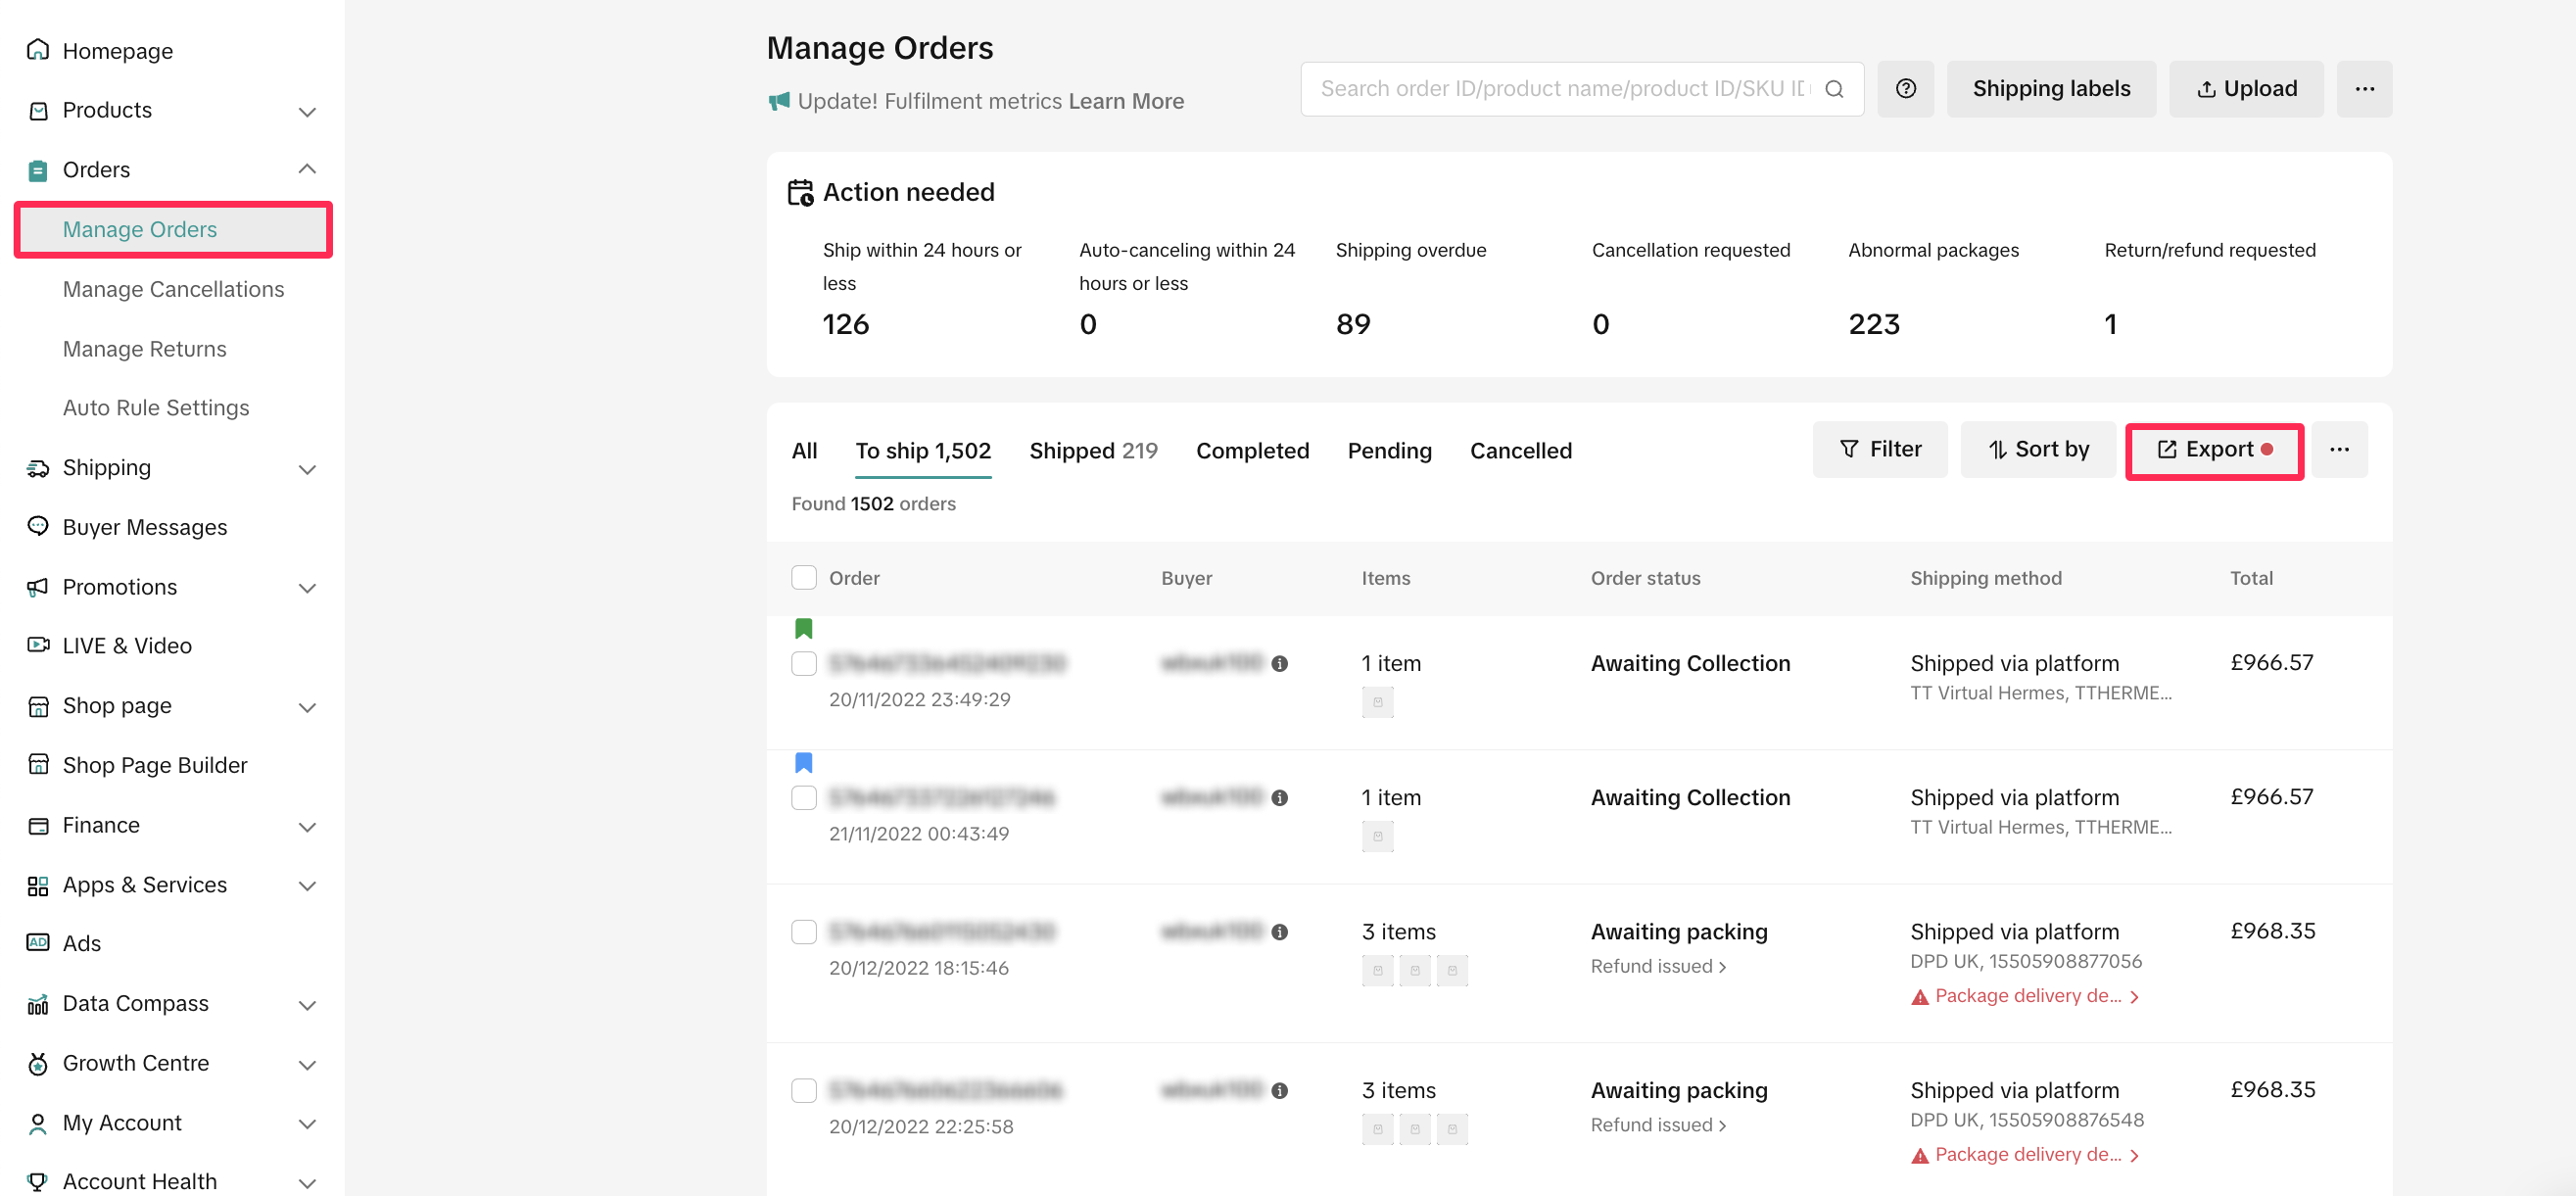
Select and Export Your Orders
- After customers successfully place orders, locate them in your Seller Centre under Orders > Manage Orders. To handle the shipping for these orders by yourself, navigate to the 'To Ship' tab, and click the 'Export' button to export orders.
- In the 'Export Orders' tab, select the export orders range as 'All Shipped by Seller orders awaiting packing.' Proceed to export your orders and download the file.
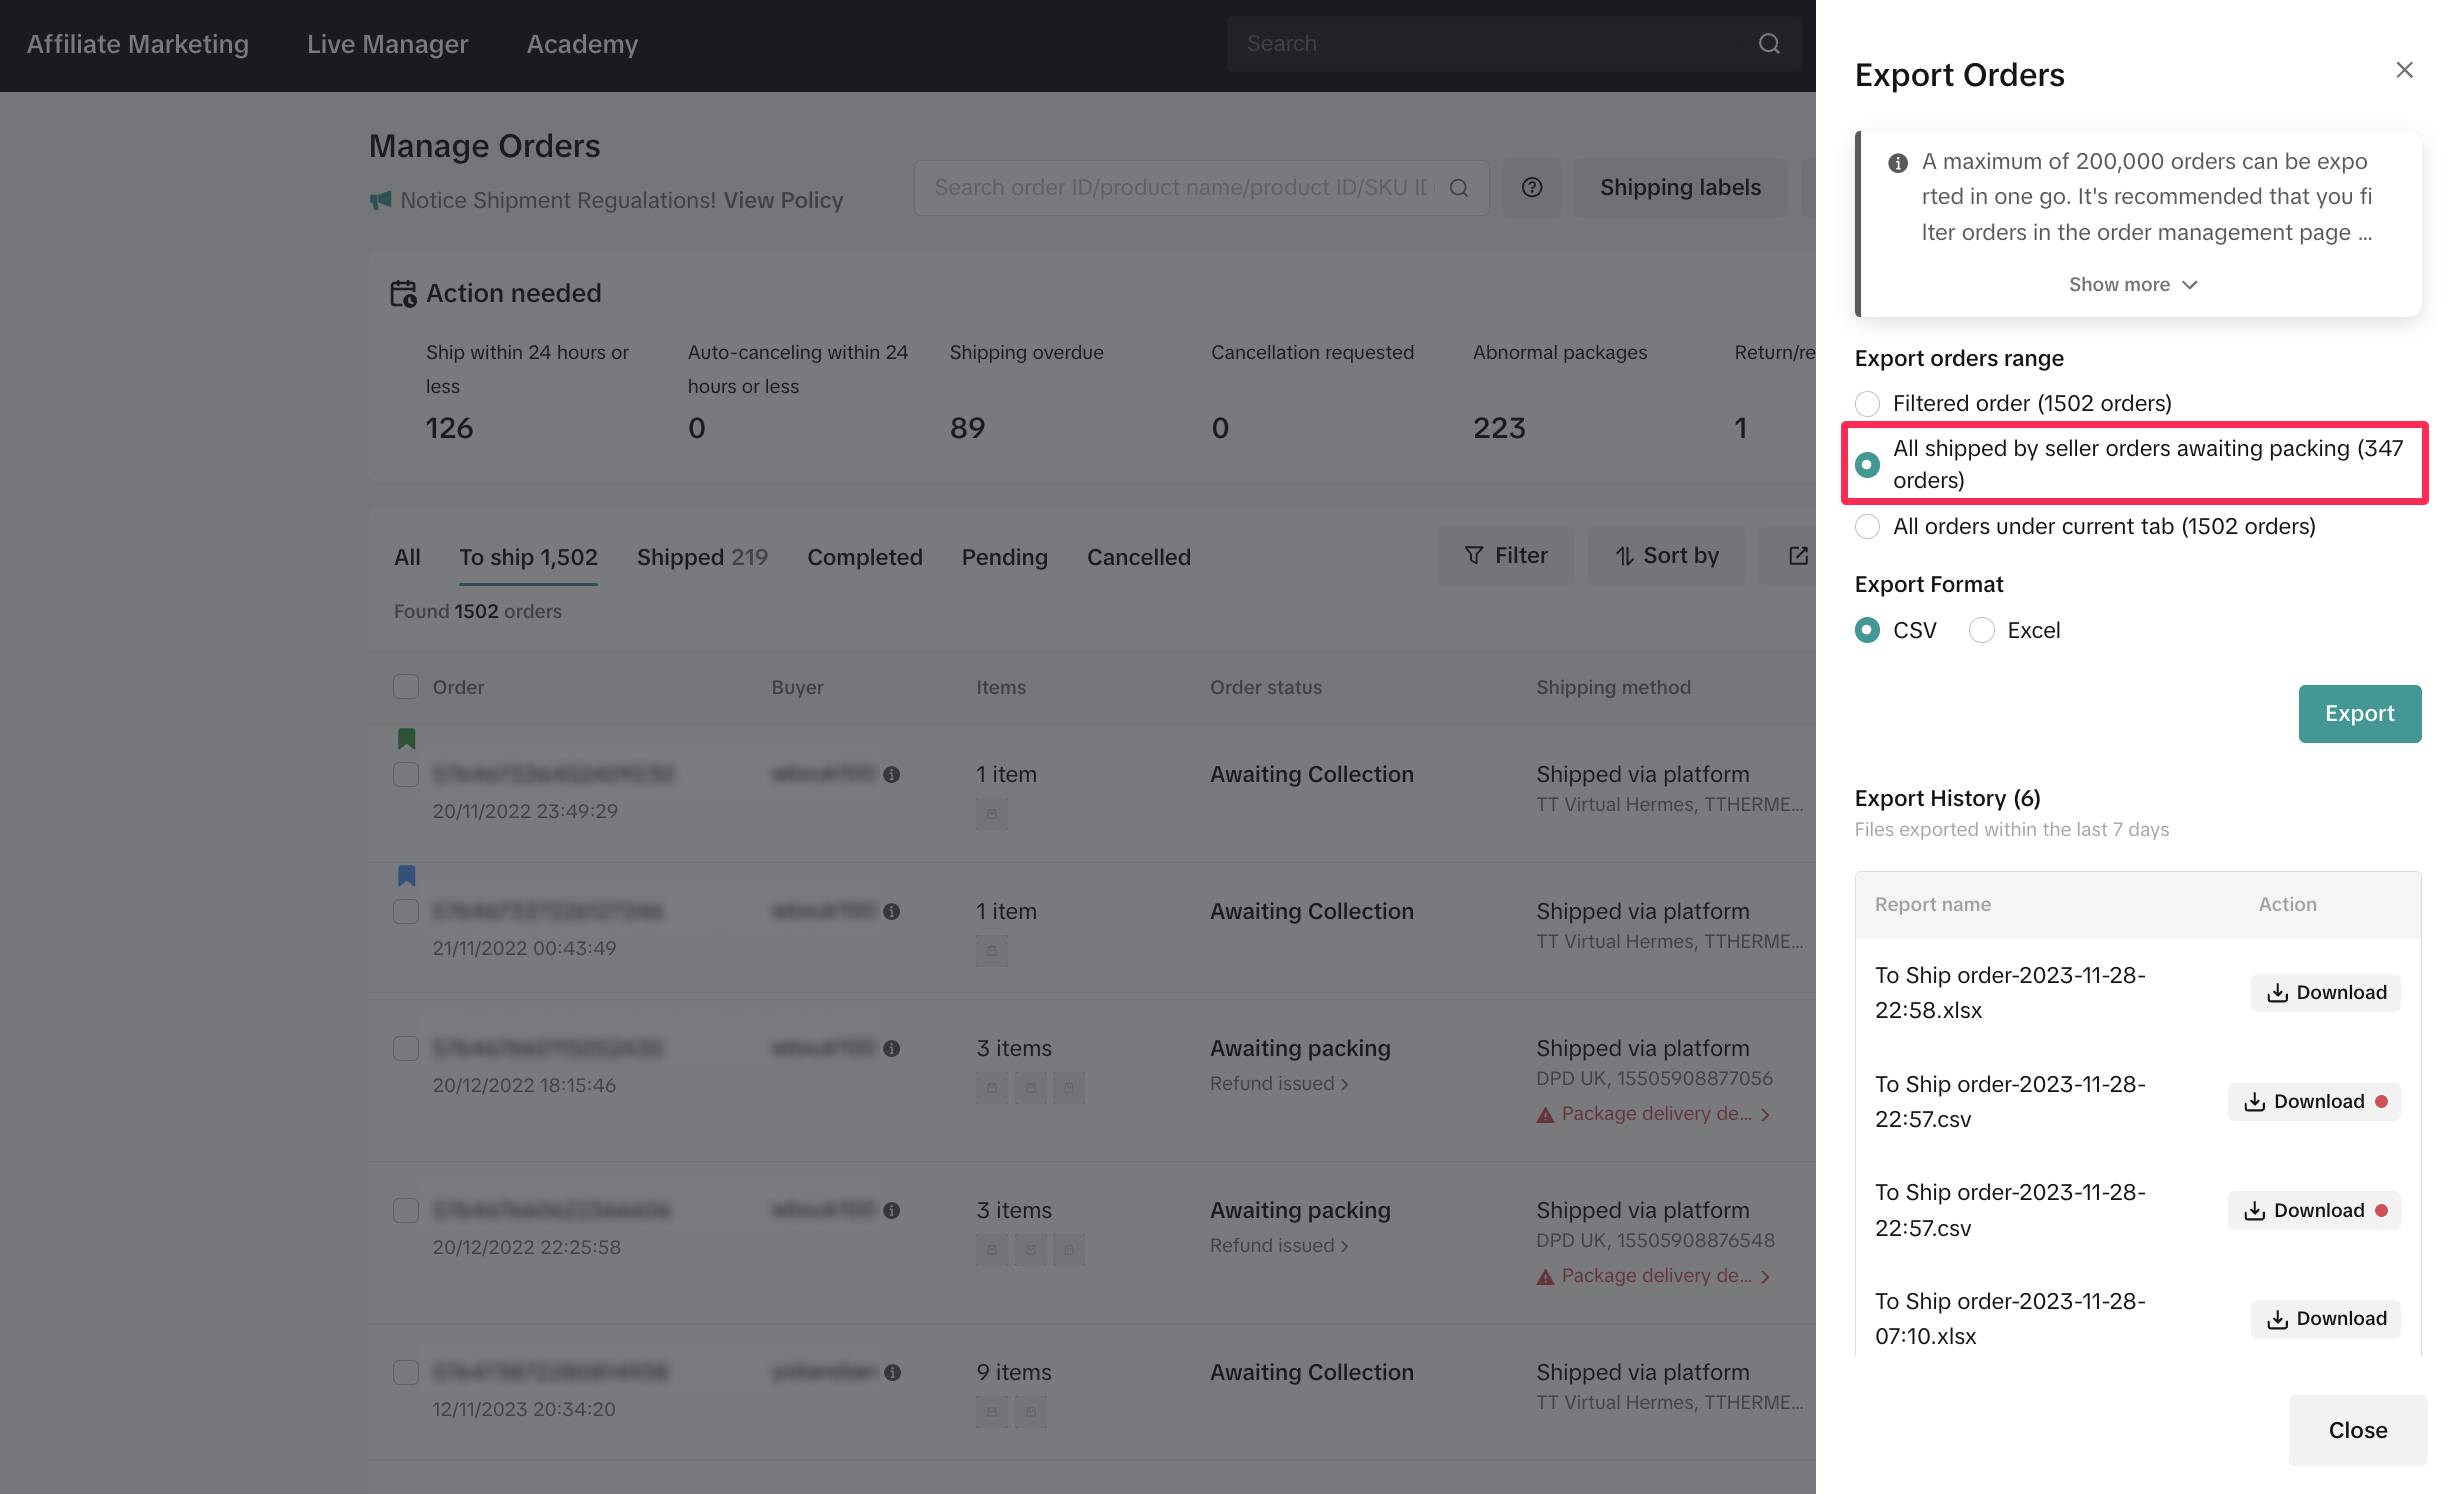
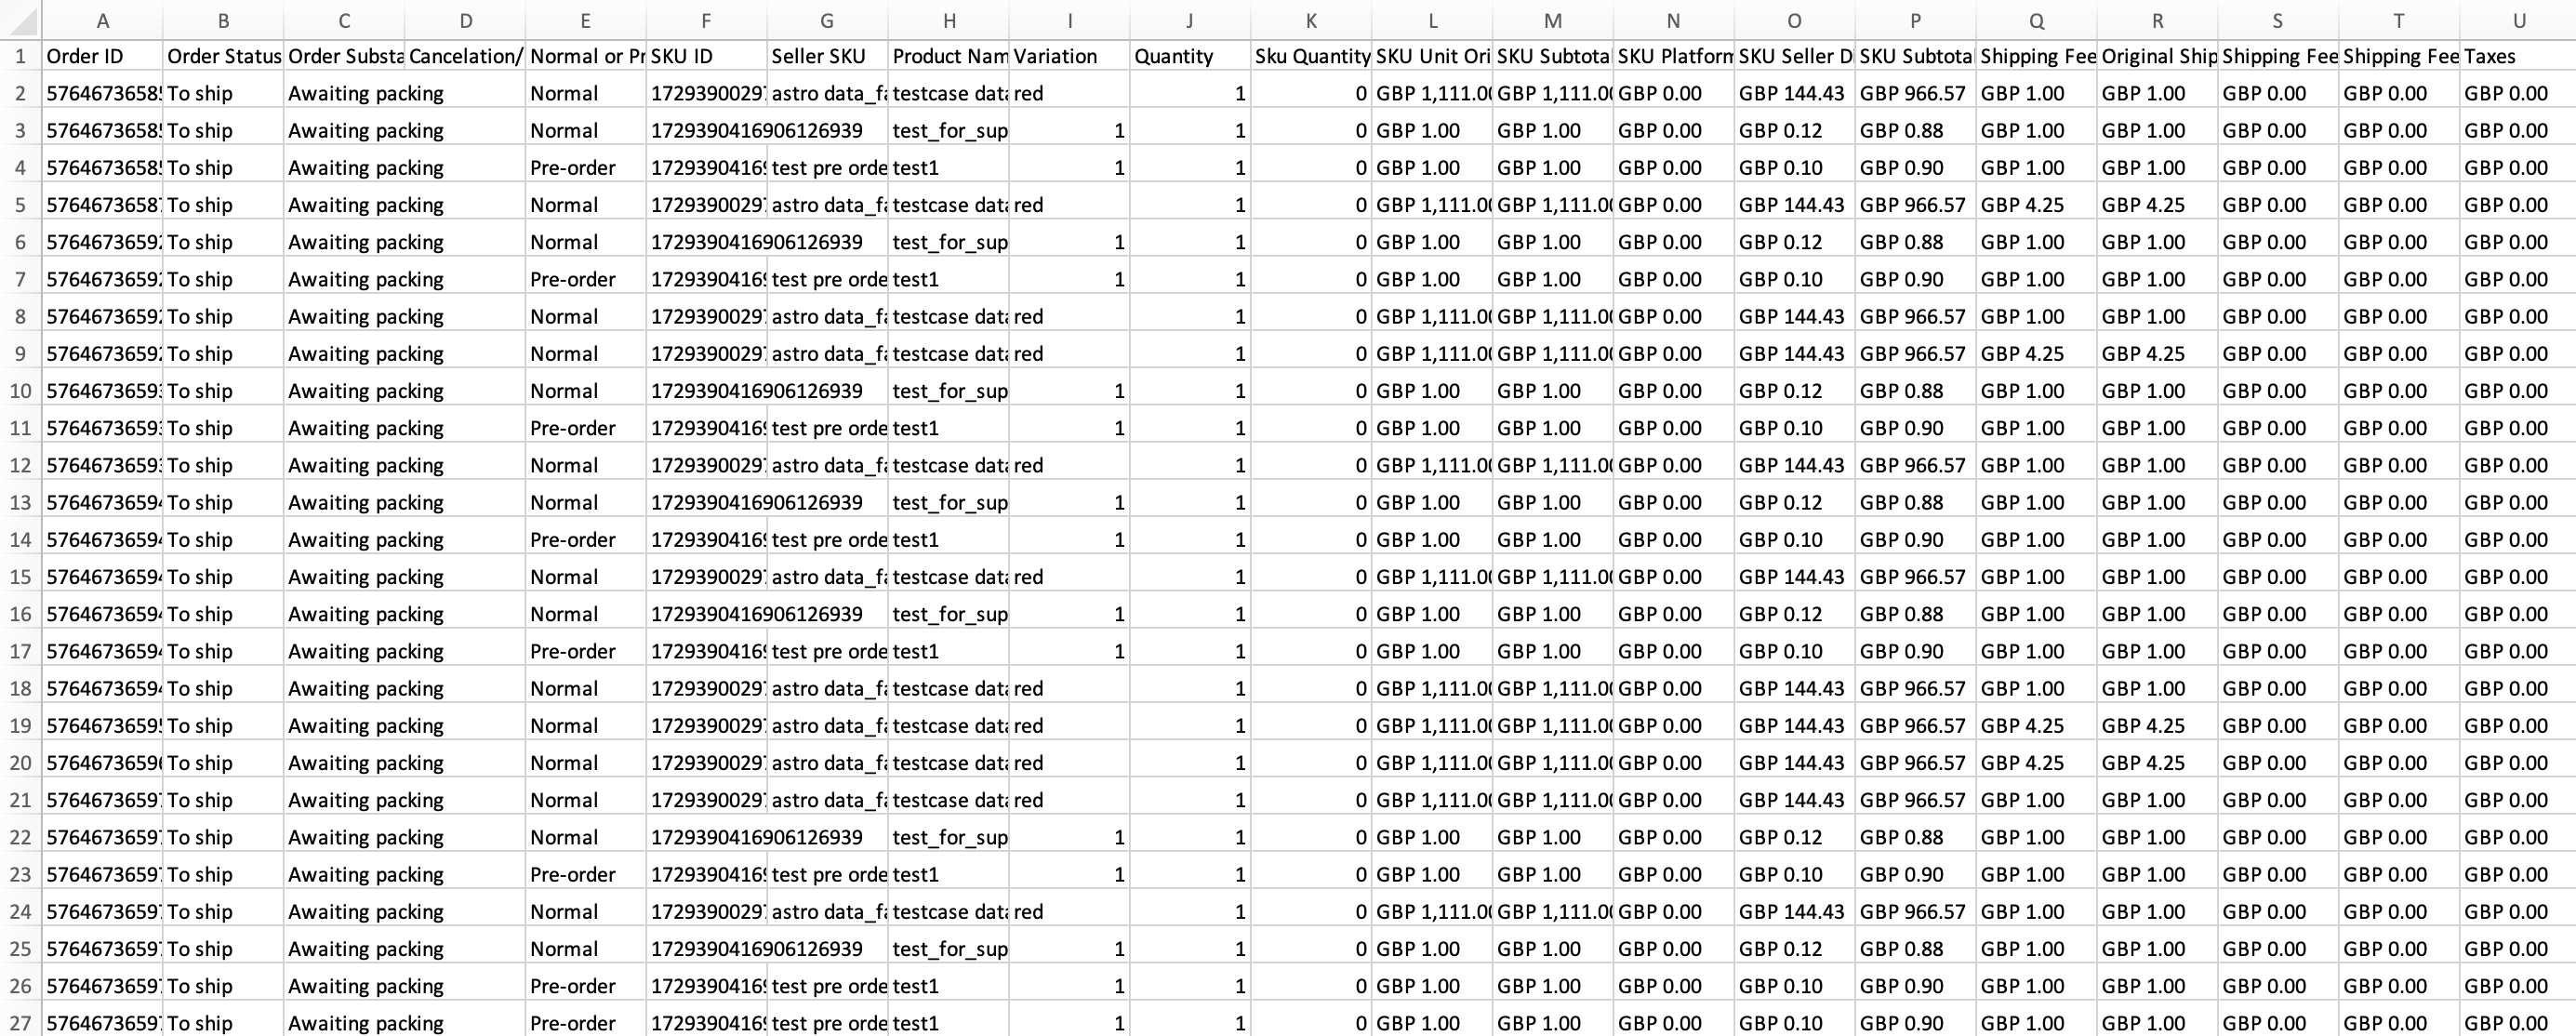
- You will find a spreadsheet containing all order information, including order ID, SKU ID, quantity, and customer shipping details. Please note that a maximum of 200,000 orders can be exported in one go.
Prepare Package and Ship Your Orders
- Once you have the order information, get your orders ready and arrange shipments with your selected shipping providers.
Upload Shipping Information
After completing the shipment arrangements, you must upload shipping information from your shipping providers to Seller Centre. This informs the platform that you have fulfilled the orders. There are two ways to upload shipping information:Upload Shipping Information in Bulk
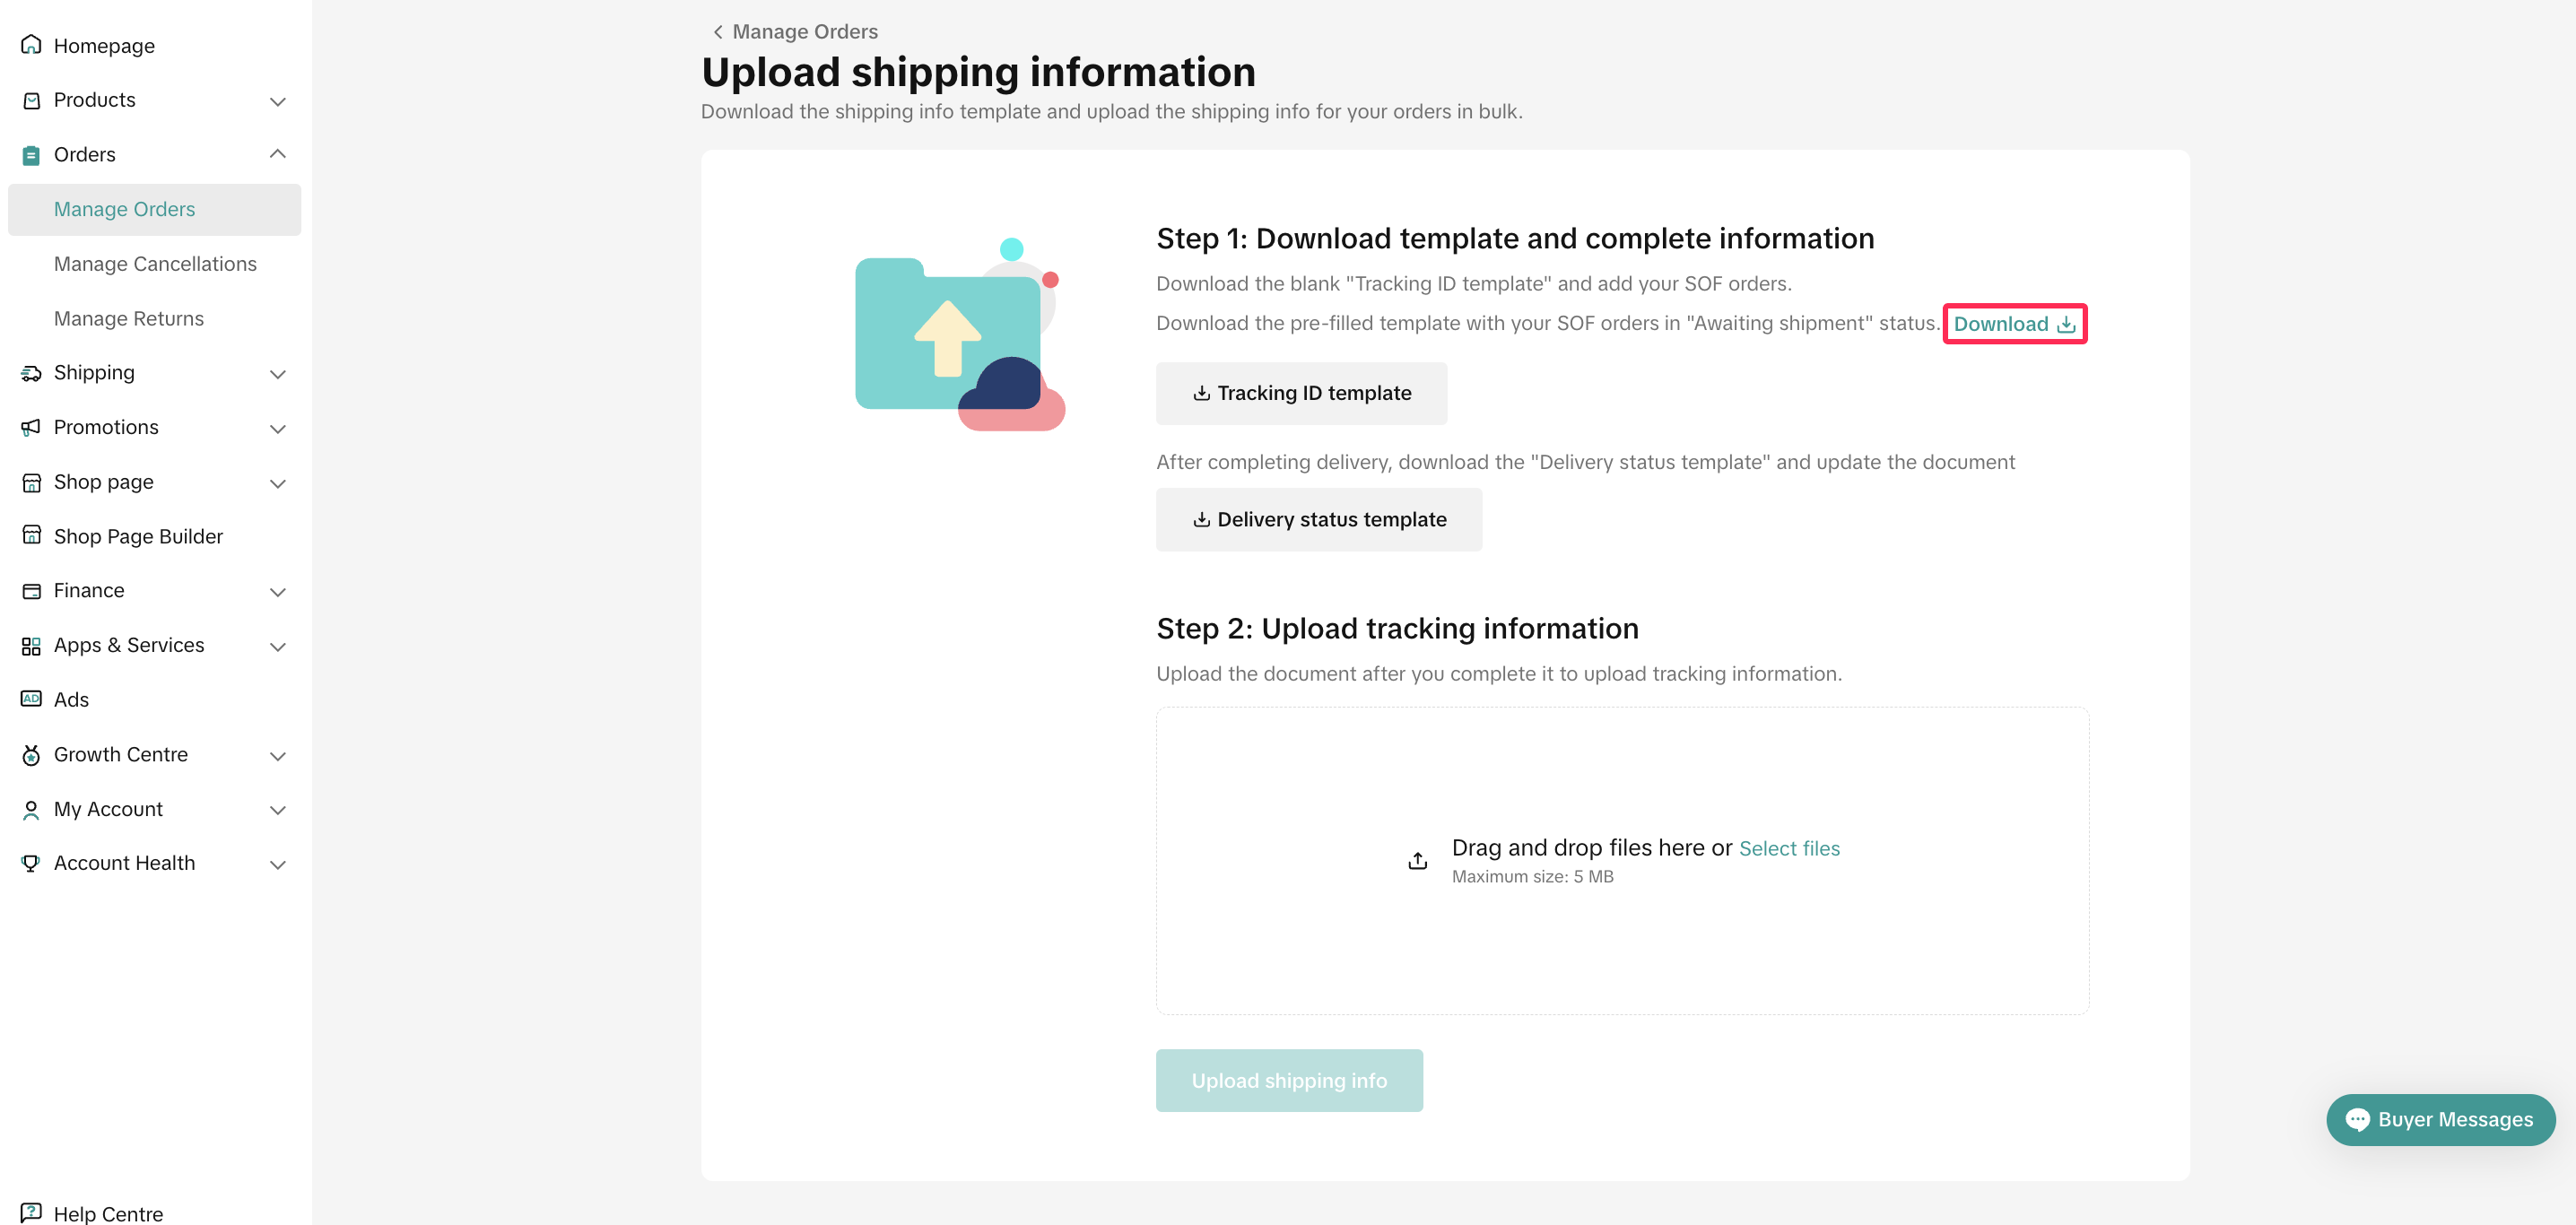
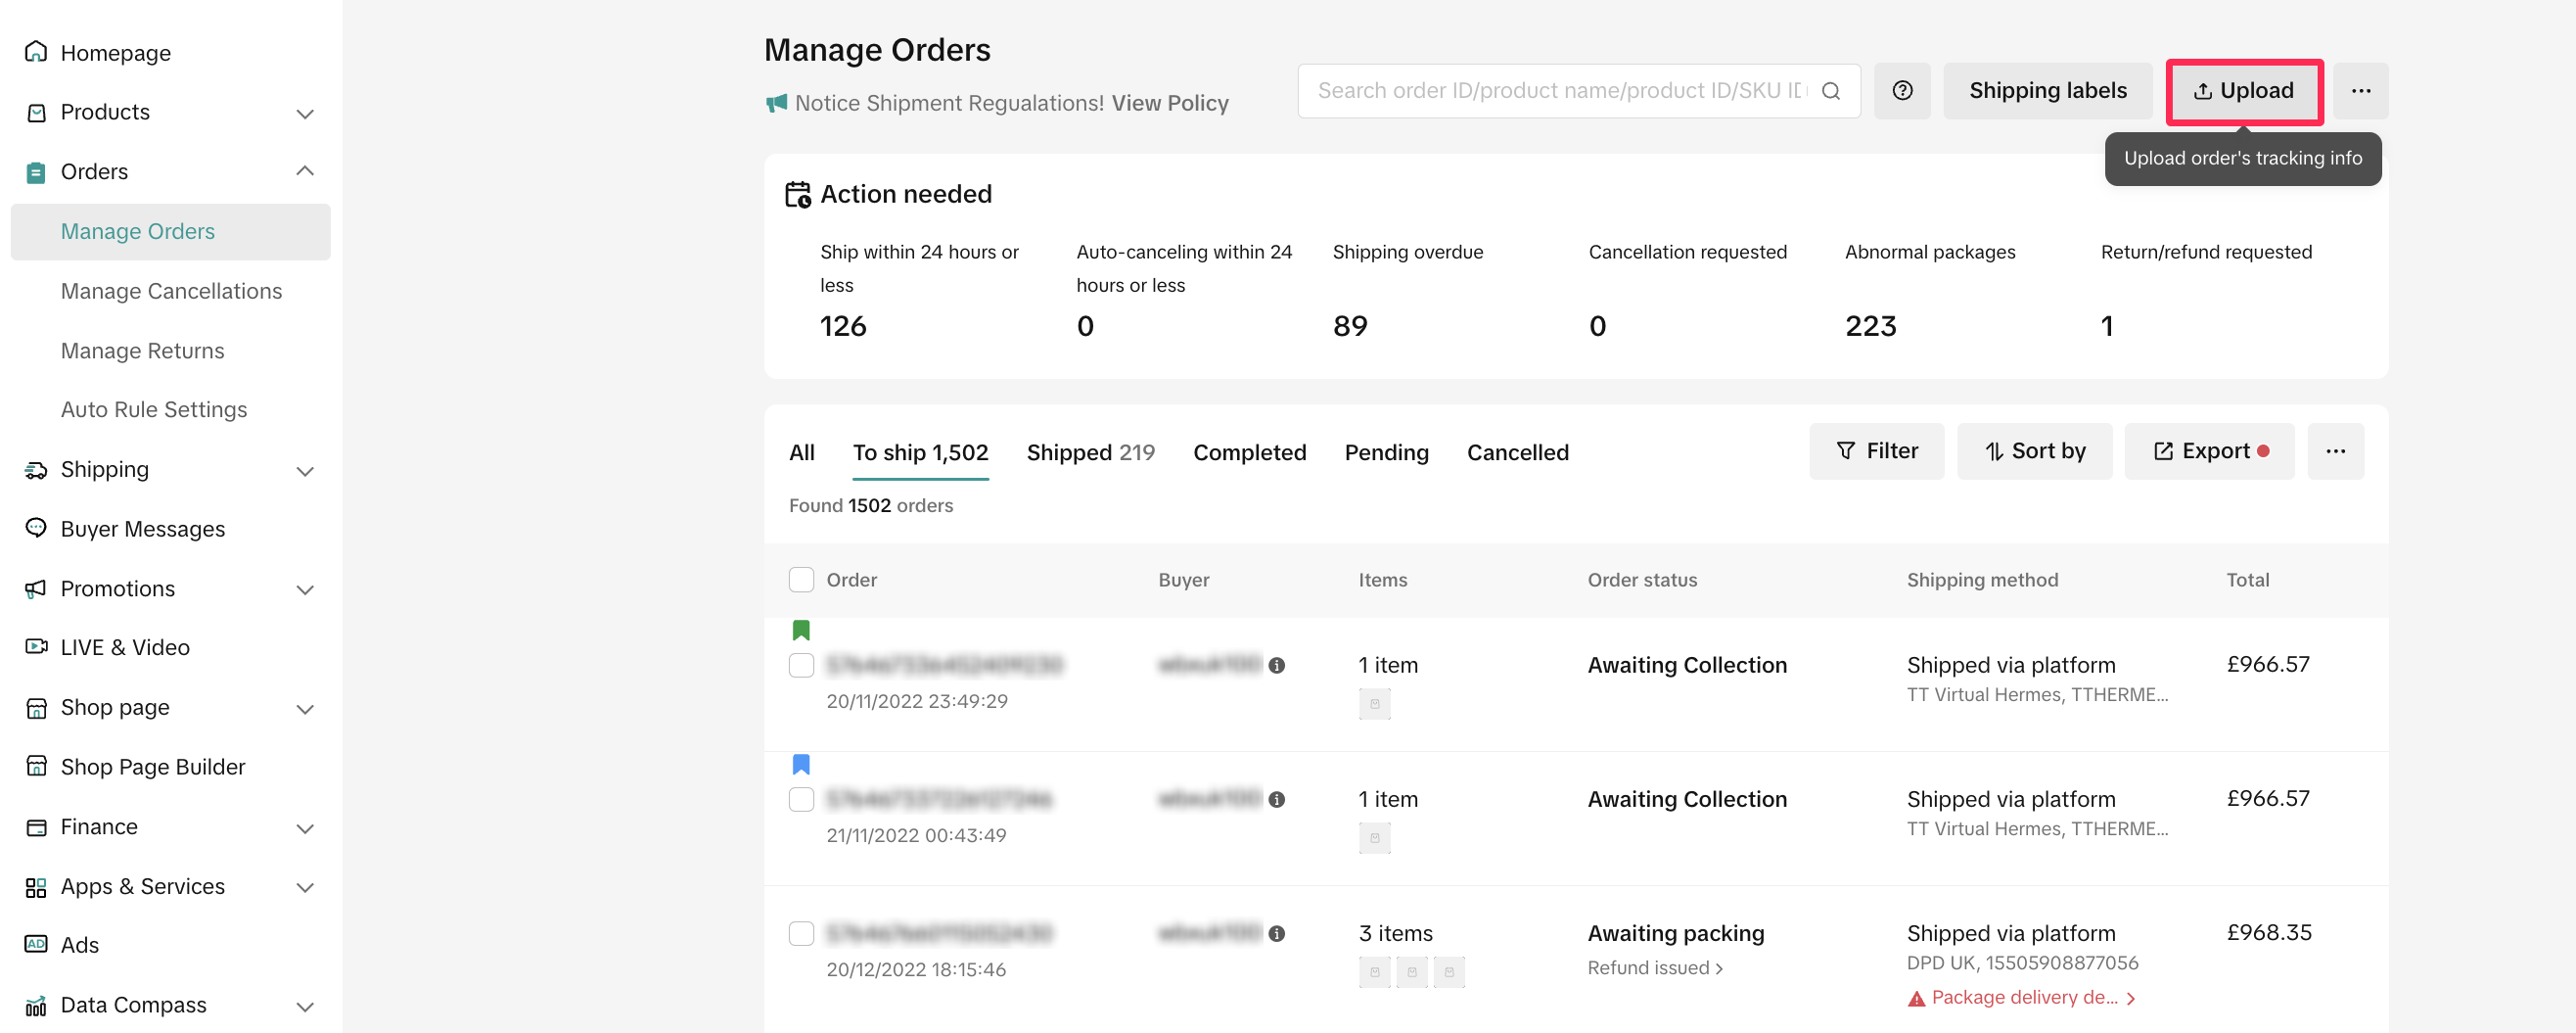
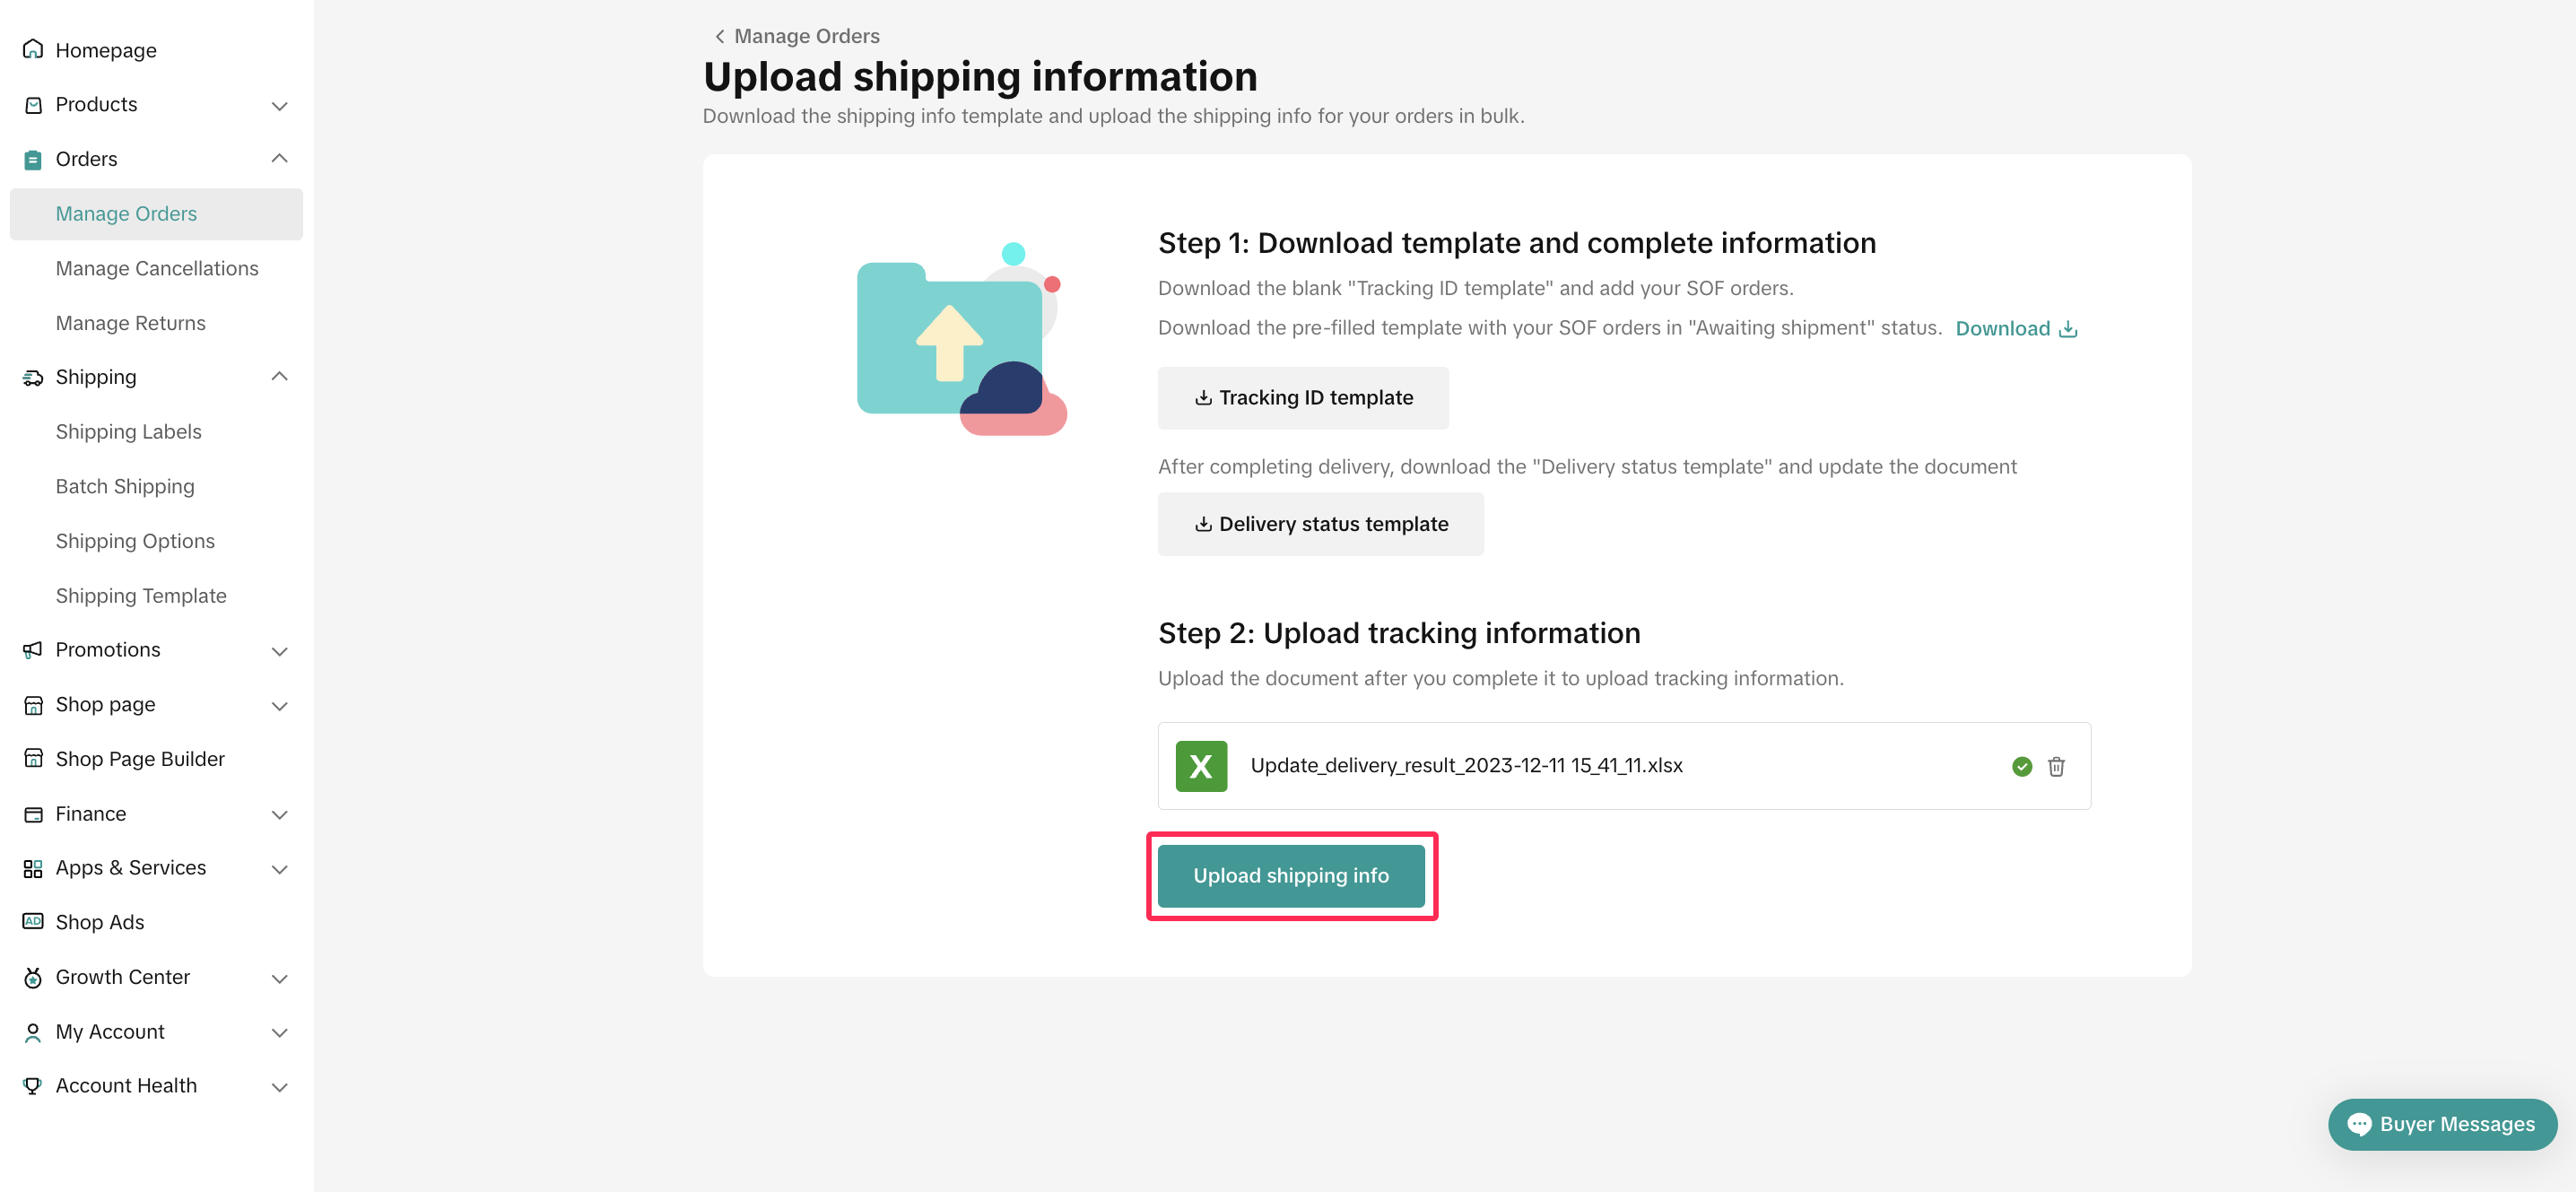
- To upload shipping information in bulk, visit the Manage Orders page. On the upper right corner, click 'Upload' to download the template. Step-by-step instructions will guide you through the process.

- Click 'Download' to get the template for orders shipped by the seller in awaiting shipment status. Alternatively, you can select 'Download Template' for a blank template.
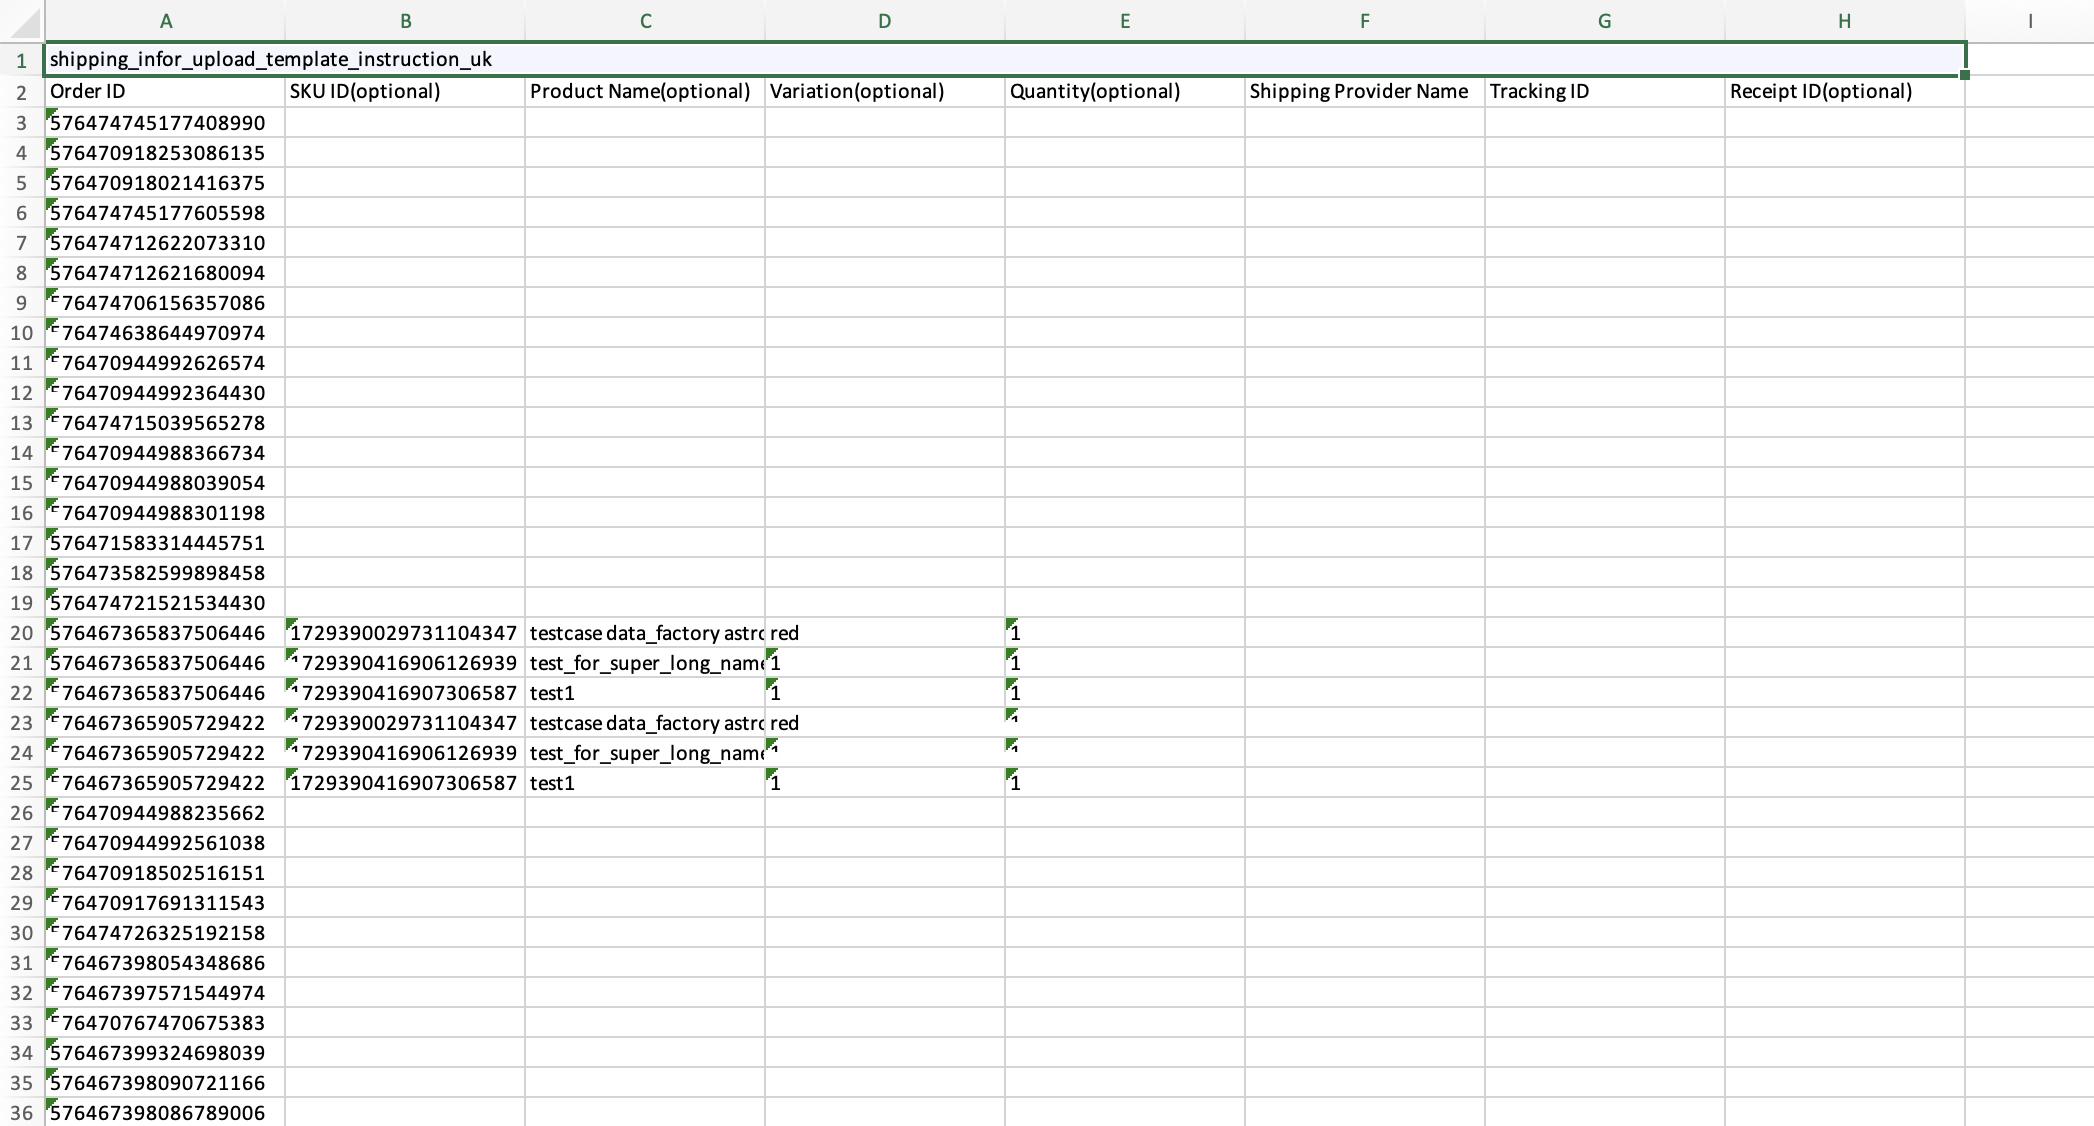
- Open the downloaded spreadsheet, which includes columns like Order ID, SKU ID, Product Name, Variation, Quantity, Shipping Provider Name, Tracking ID, and Receipt ID. You need to add Shipping Provider Name and Tracking ID. Be cautious not to delete or move any columns, as doing so may result in errors during the upload process.
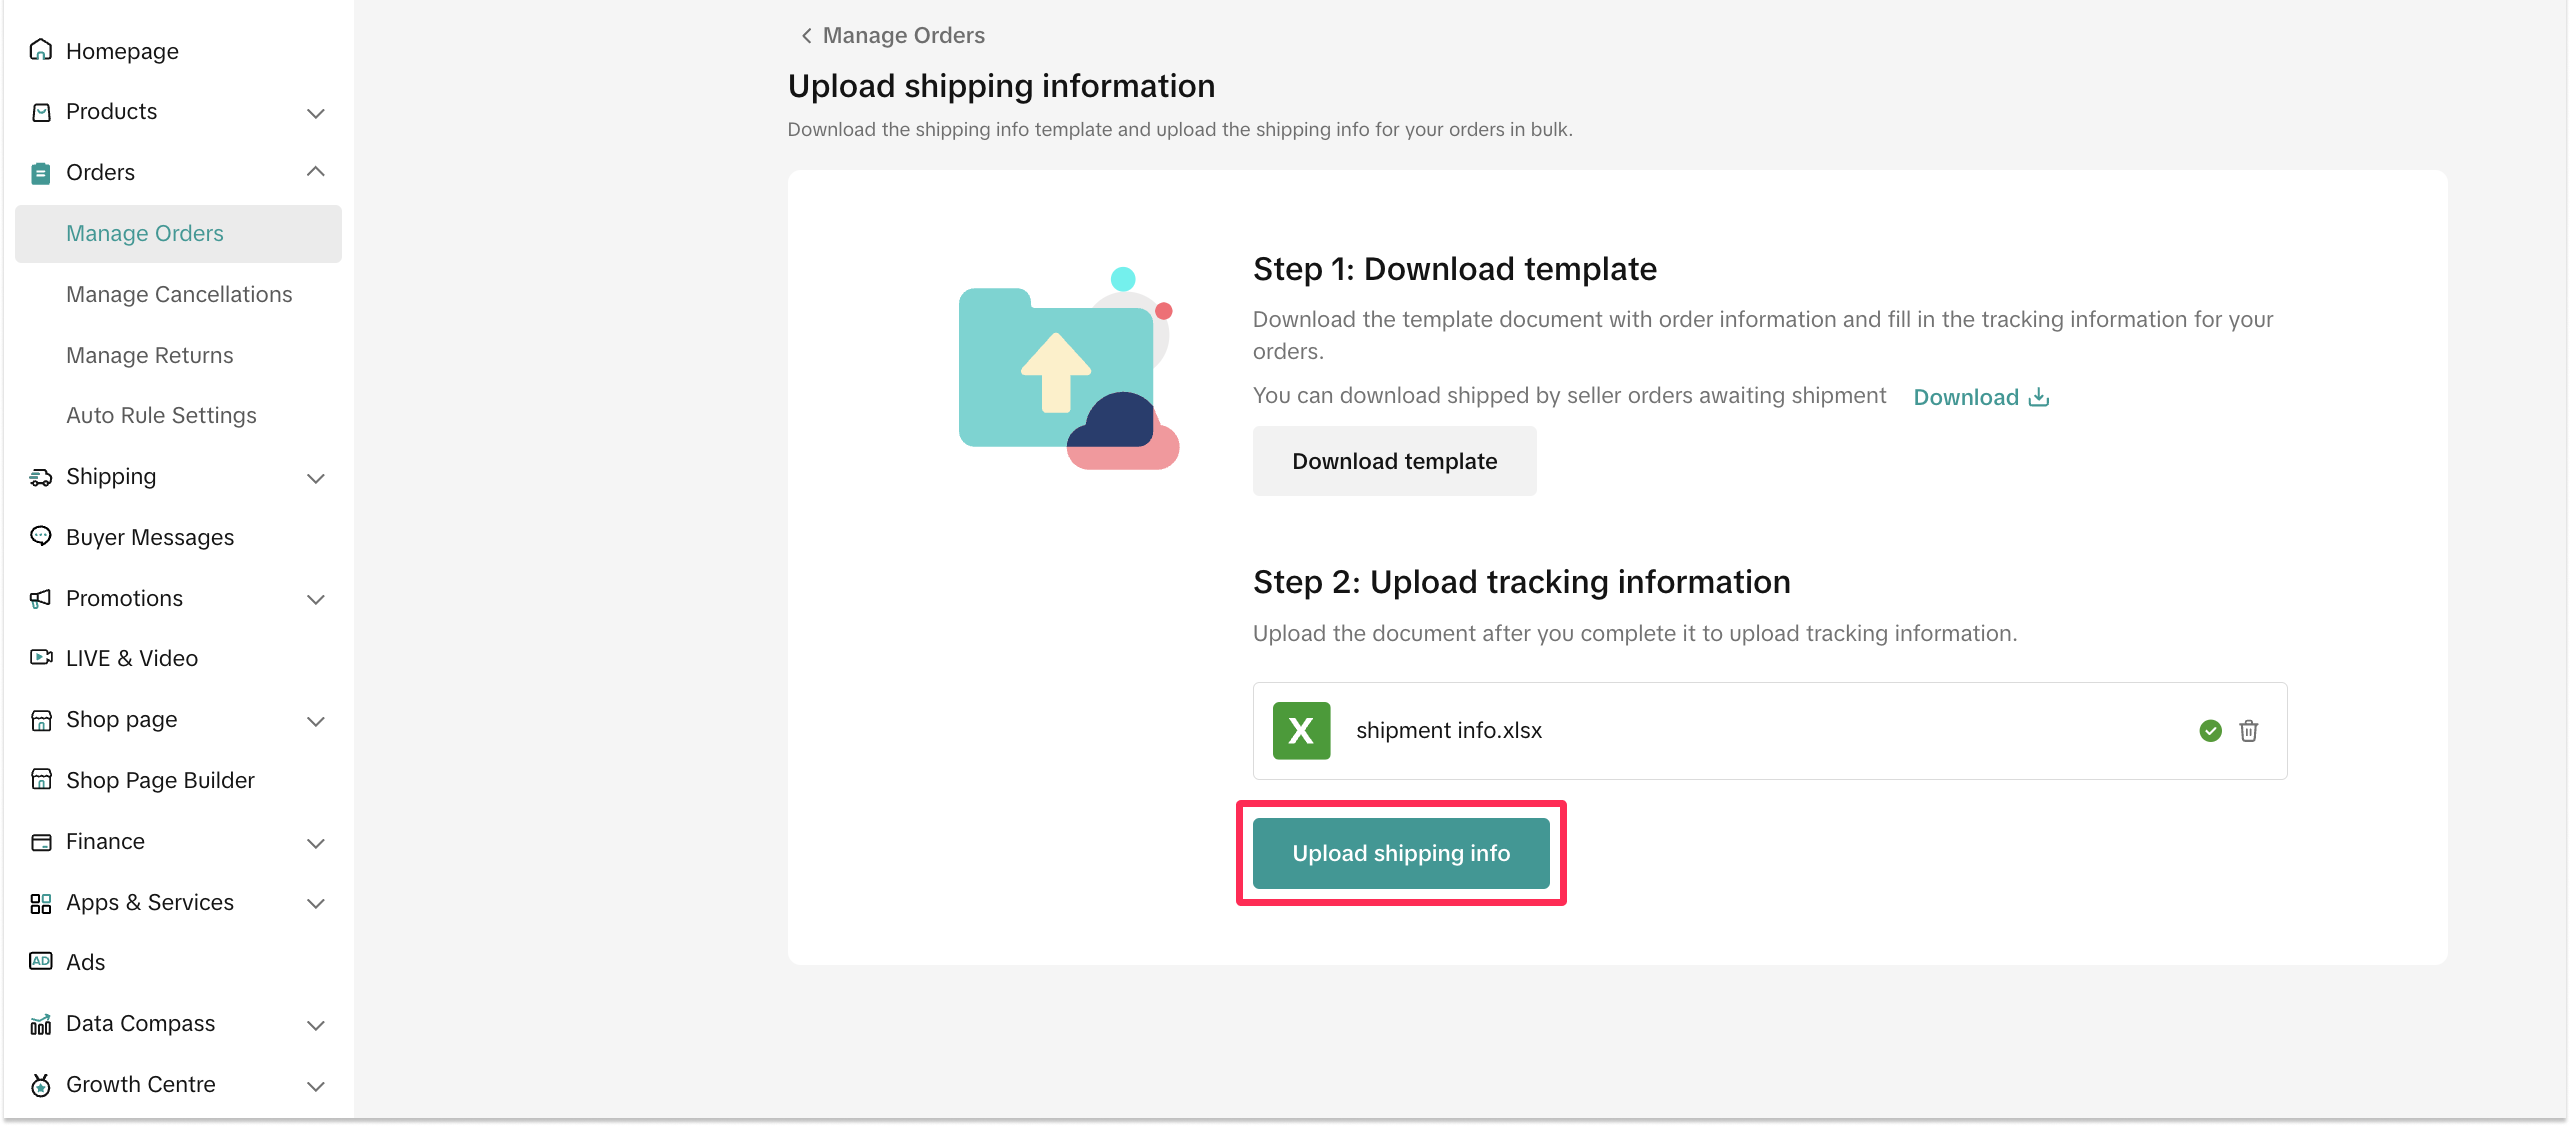
- To upload the completed spreadsheet, click 'Select File' and choose your spreadsheet. Then, click 'Upload Shipping Info.'
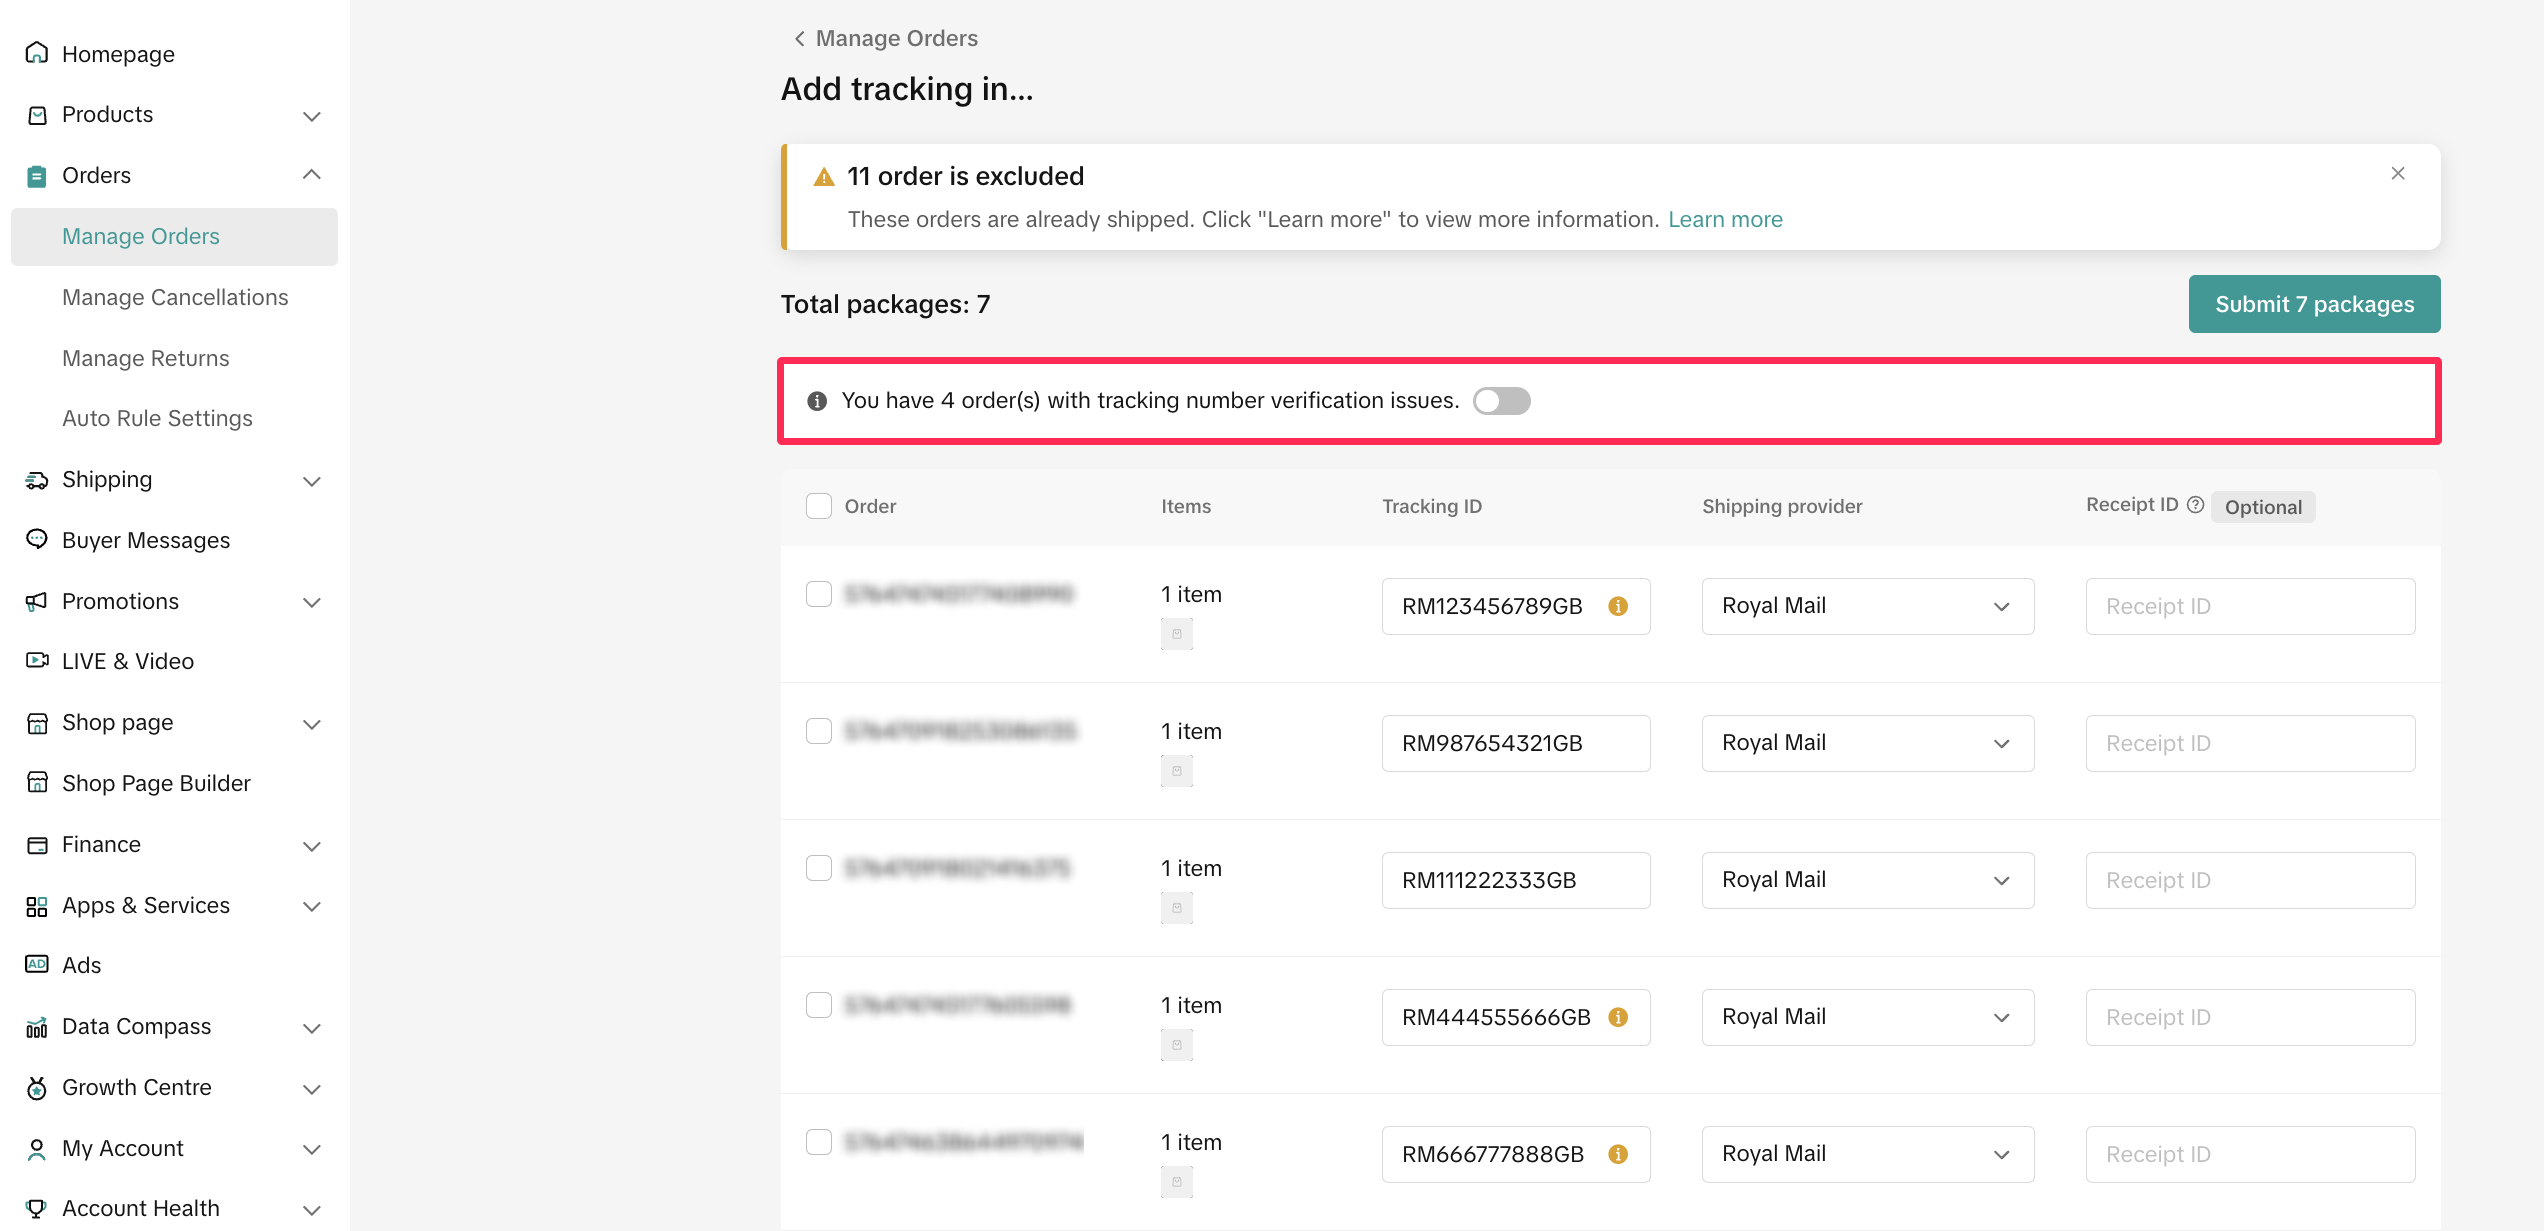
- After uploading, the system will display all the orders and prompt you if there are any issues with the tracking number or shipping provider information. Review the details, make necessary changes, and click 'Submit Packages' to confirm the shipping information.
Upload Shipping Information One-By-One
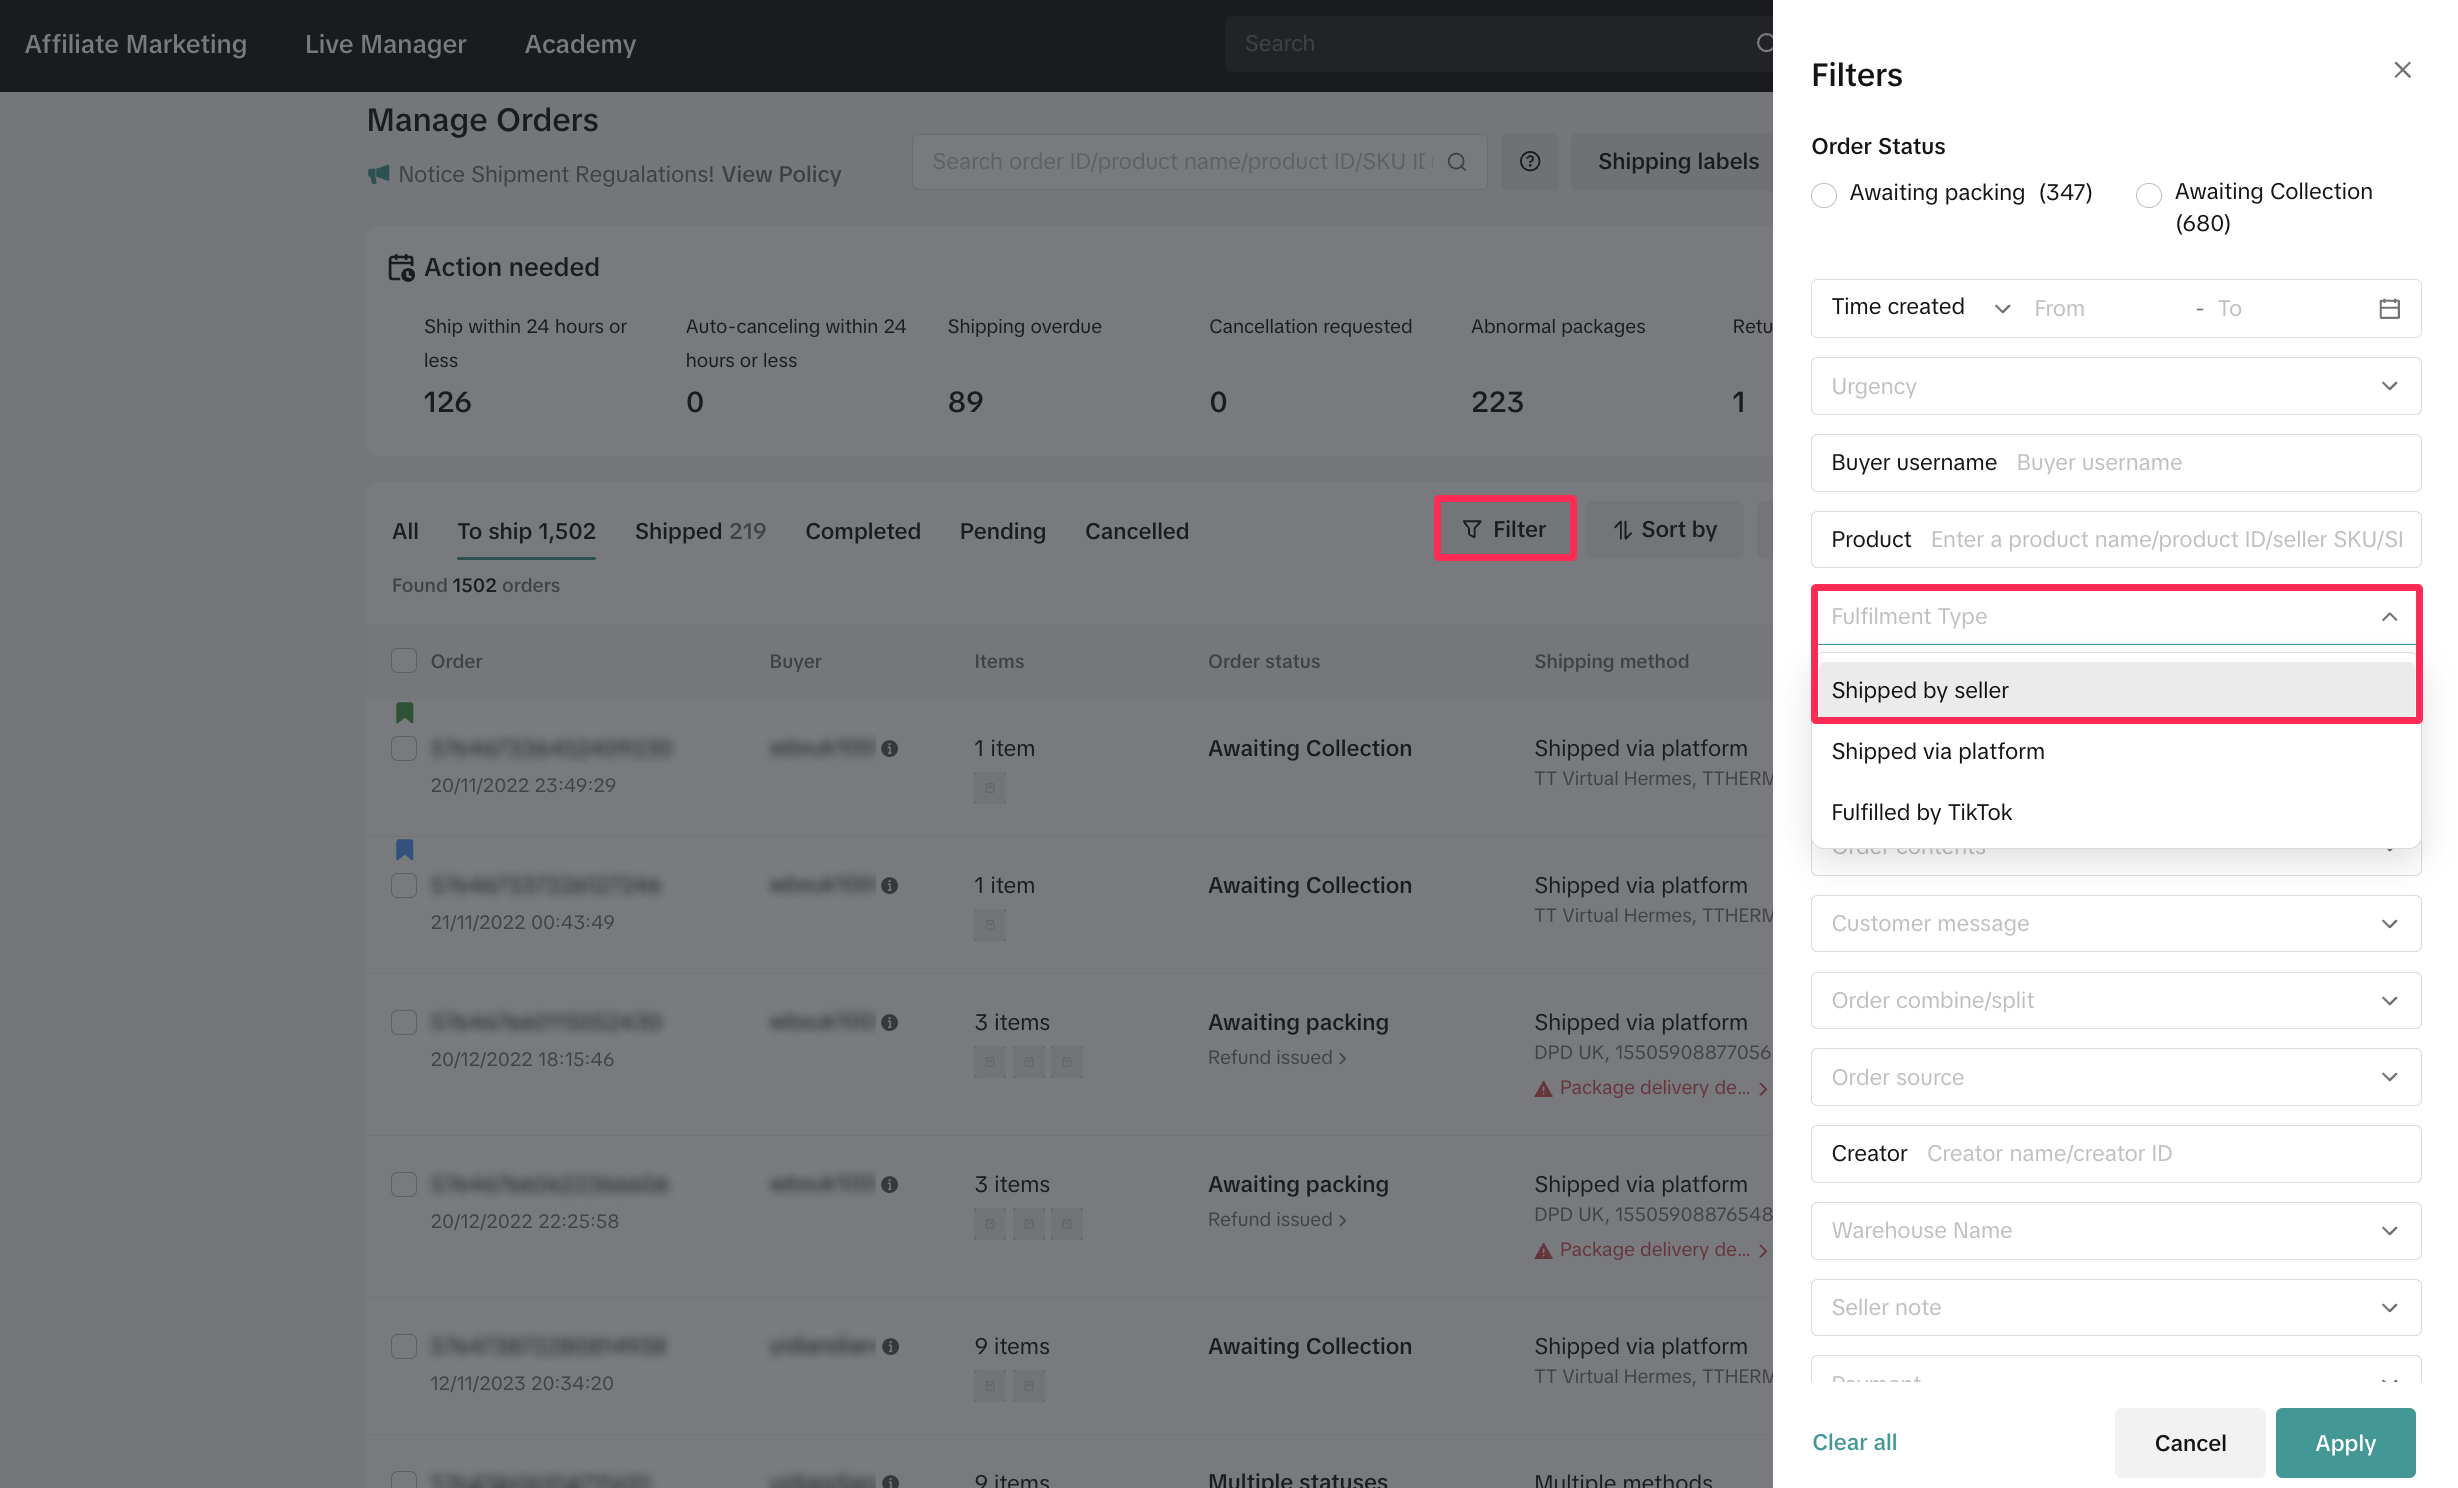
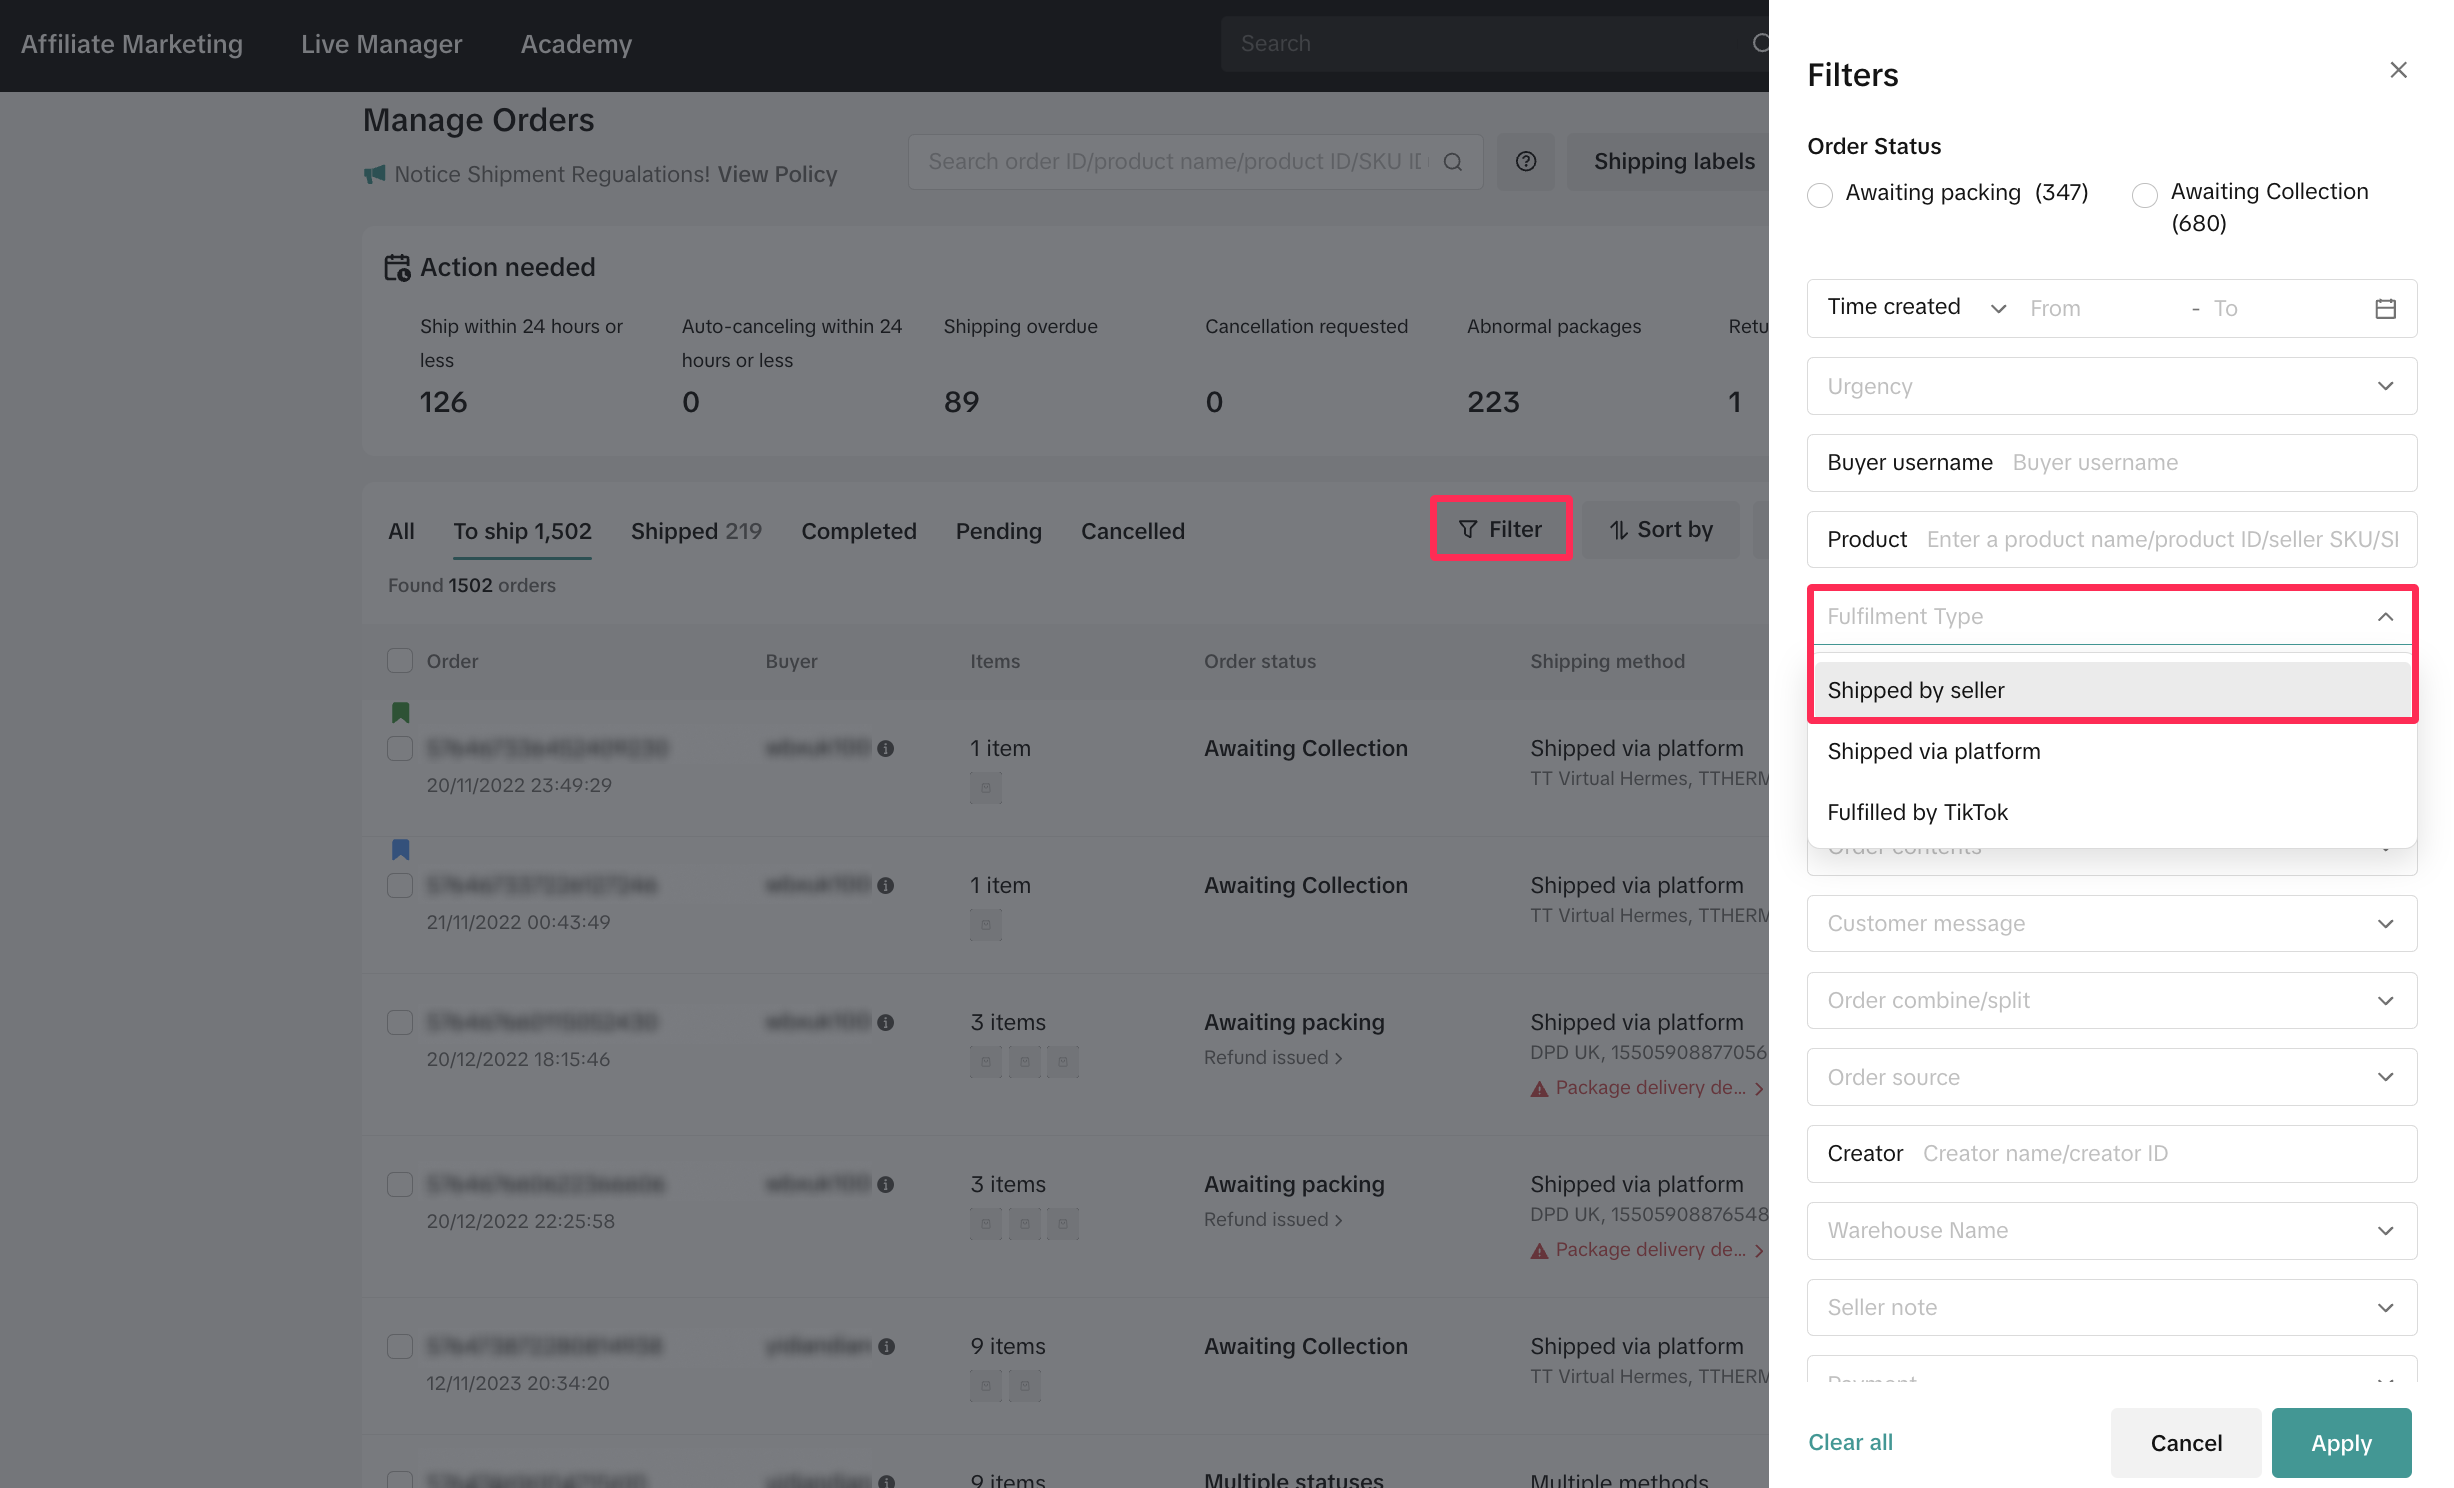
- For individual uploads, you can visit the Manage Orders page and filter 'Shipped by Seller' orders.
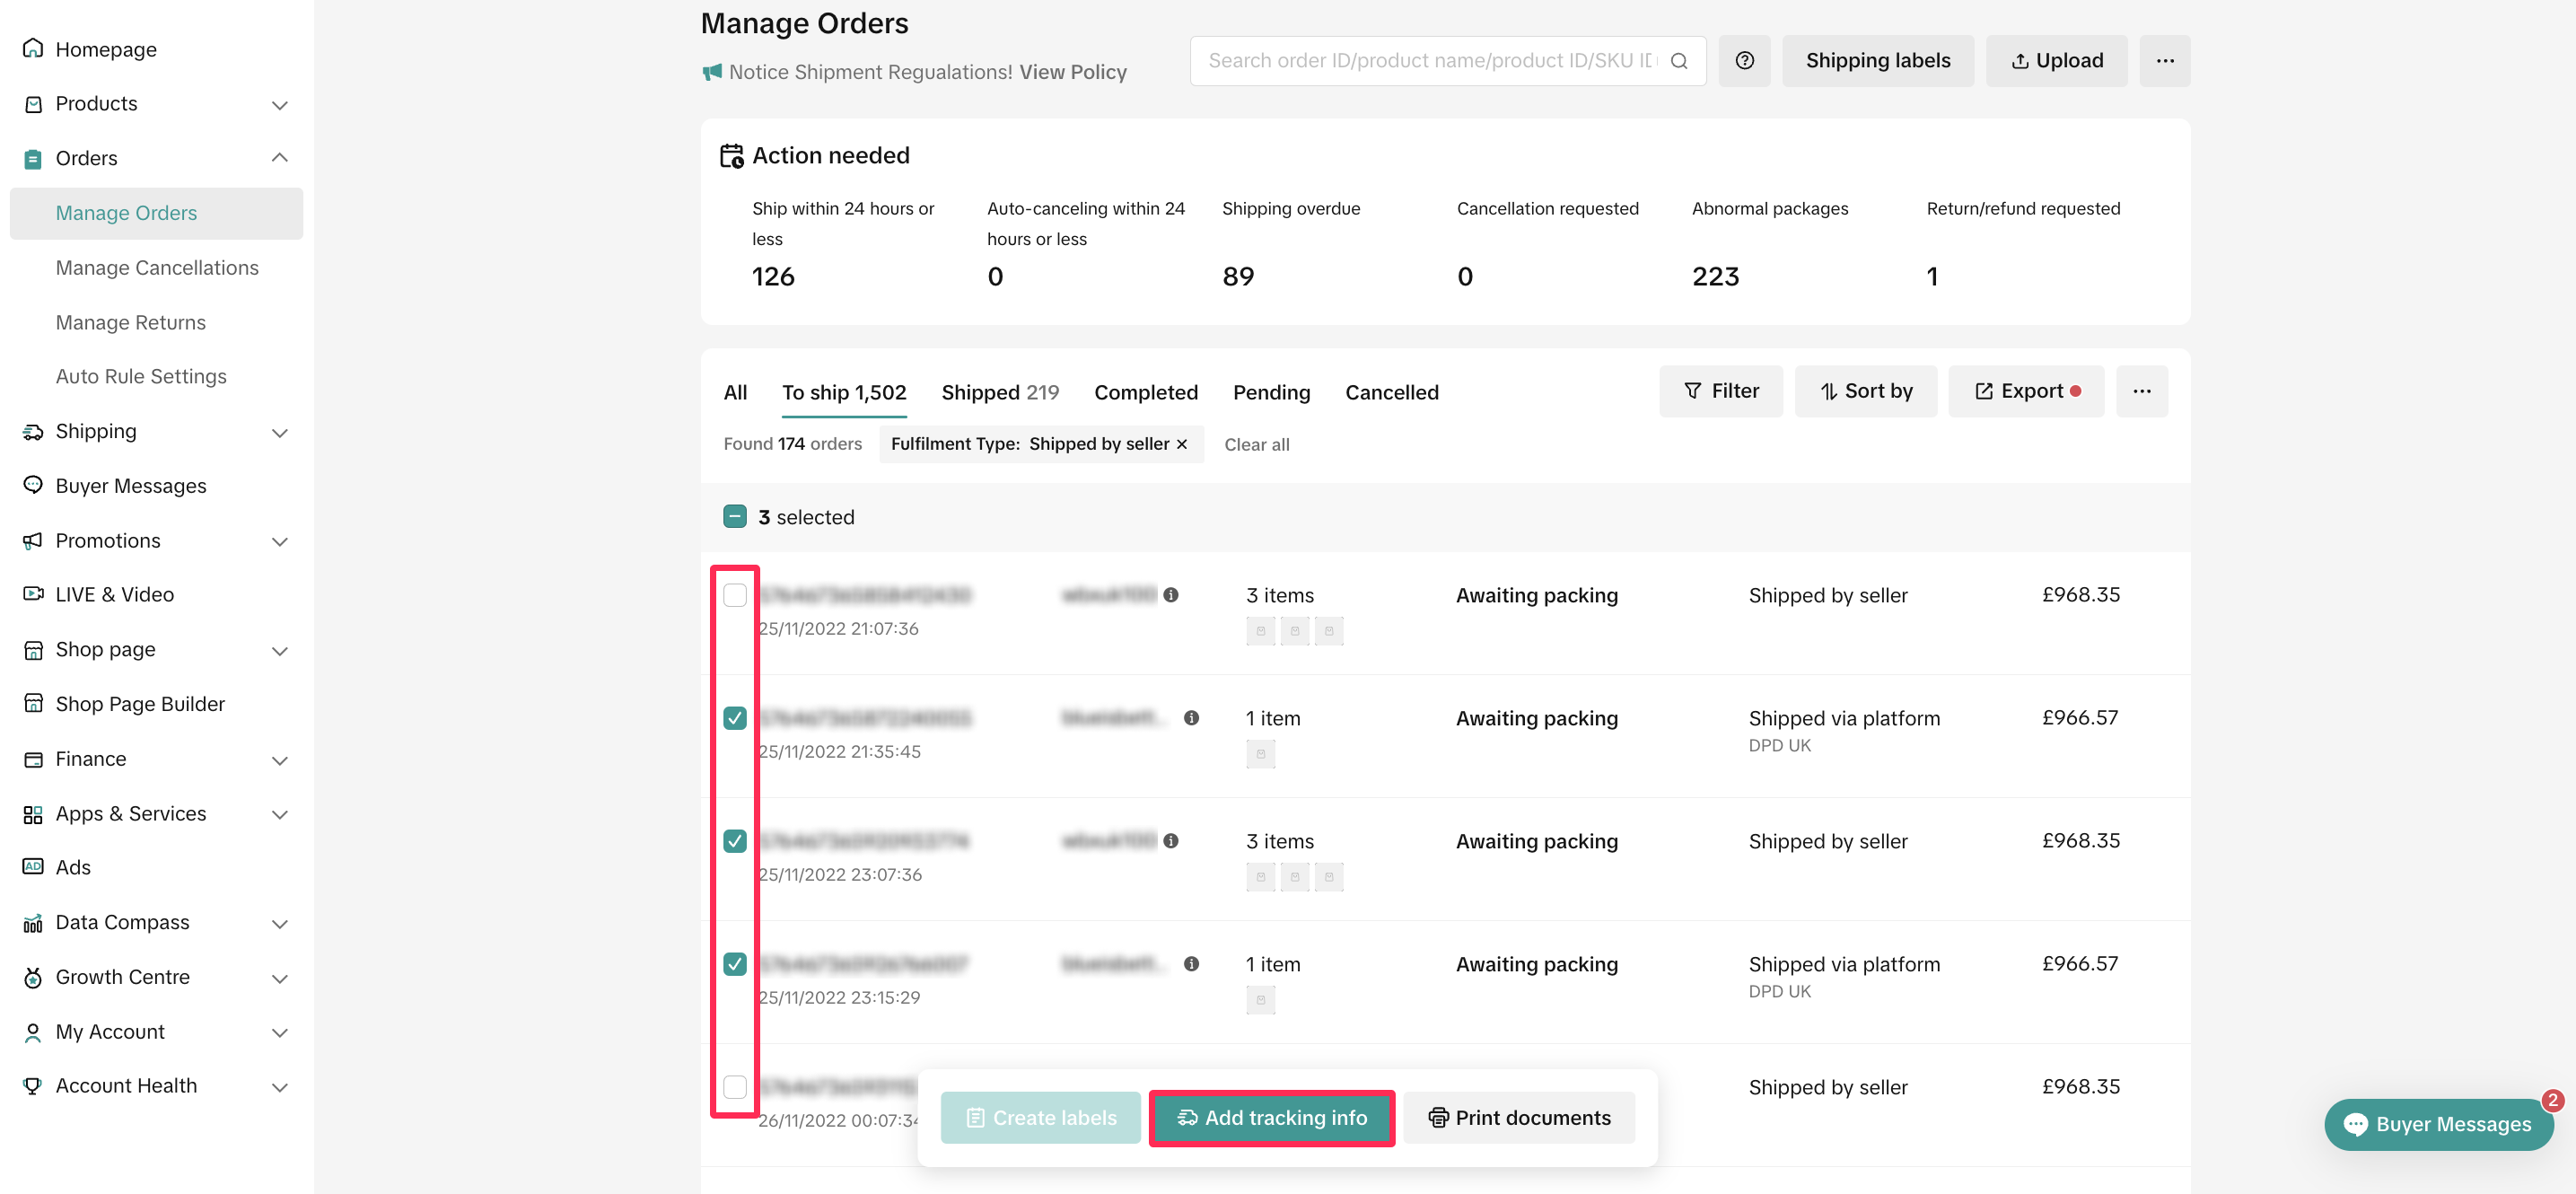
- You can easily multi-select orders by adding checkmarks to the desired orders and click 'Add Tracking Info.'
- The system will redirect you to the Add Tracking Info page, where you can input the tracking ID and select the shipping provider. Once completed, click 'Submit Package.'
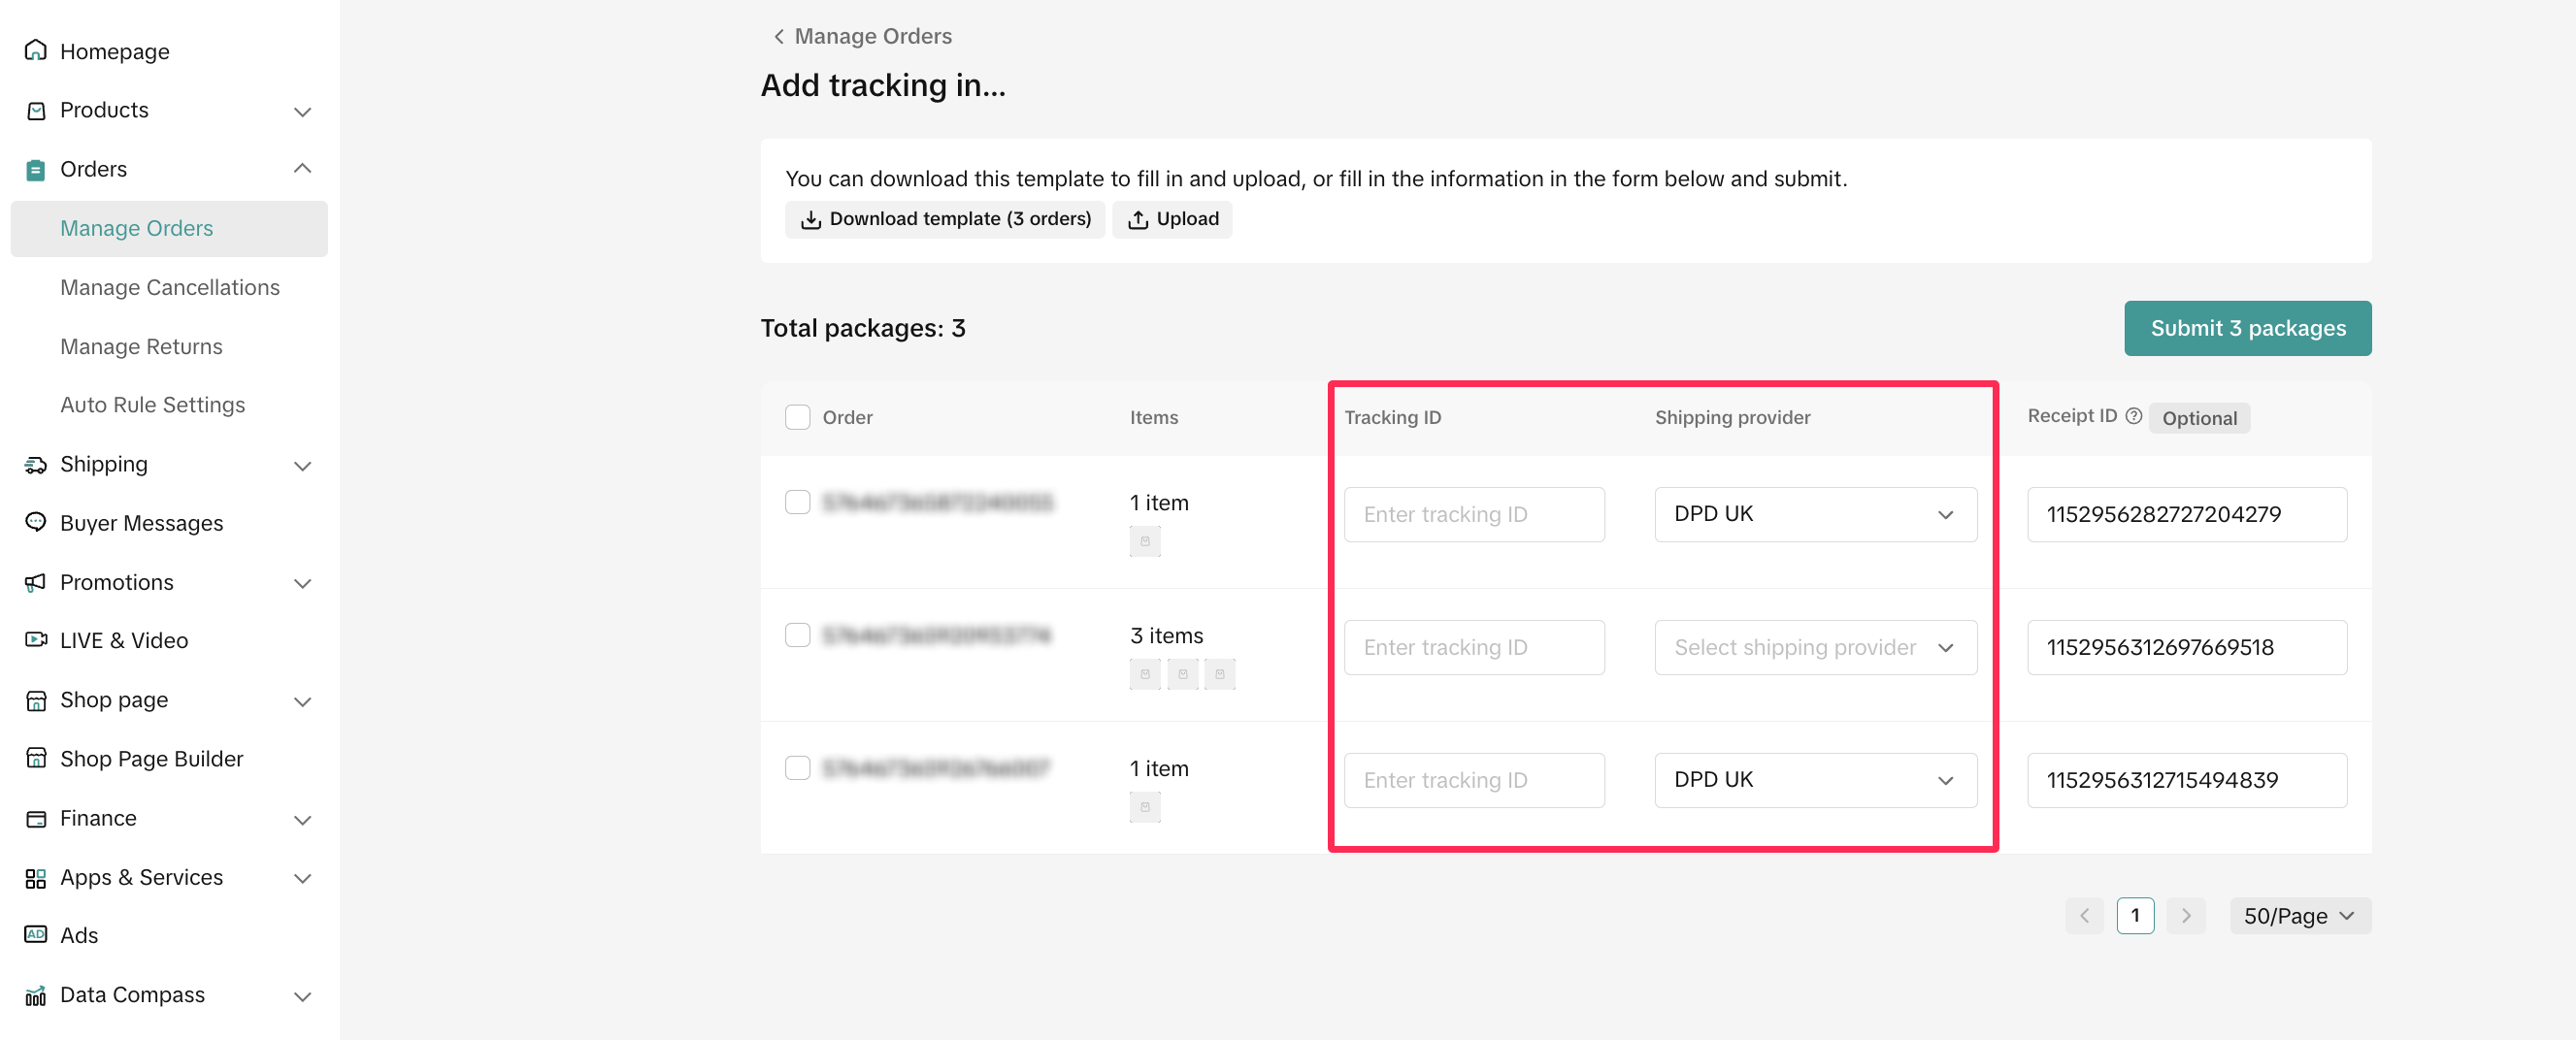
- The system will display all the orders and prompt you if there are any issues with the tracking number or shipping provider information. Review the details, make necessary changes, and click 'Submit Packages' to confirm the shipping information.

Update Delivery Status
After your orders have been delivered, it's crucial to update the delivery status, indicating whether the delivery was successful or unsuccessful. There are two methods to update the delivery status.Update Delivery Status in Bulk
- To upload shipping information in bulk, go to the Manage Orders page. In the upper right corner, click 'Upload.'
- Two templates will be available for download. Choose the 'Delivery Status Template' to download the spreadsheet.

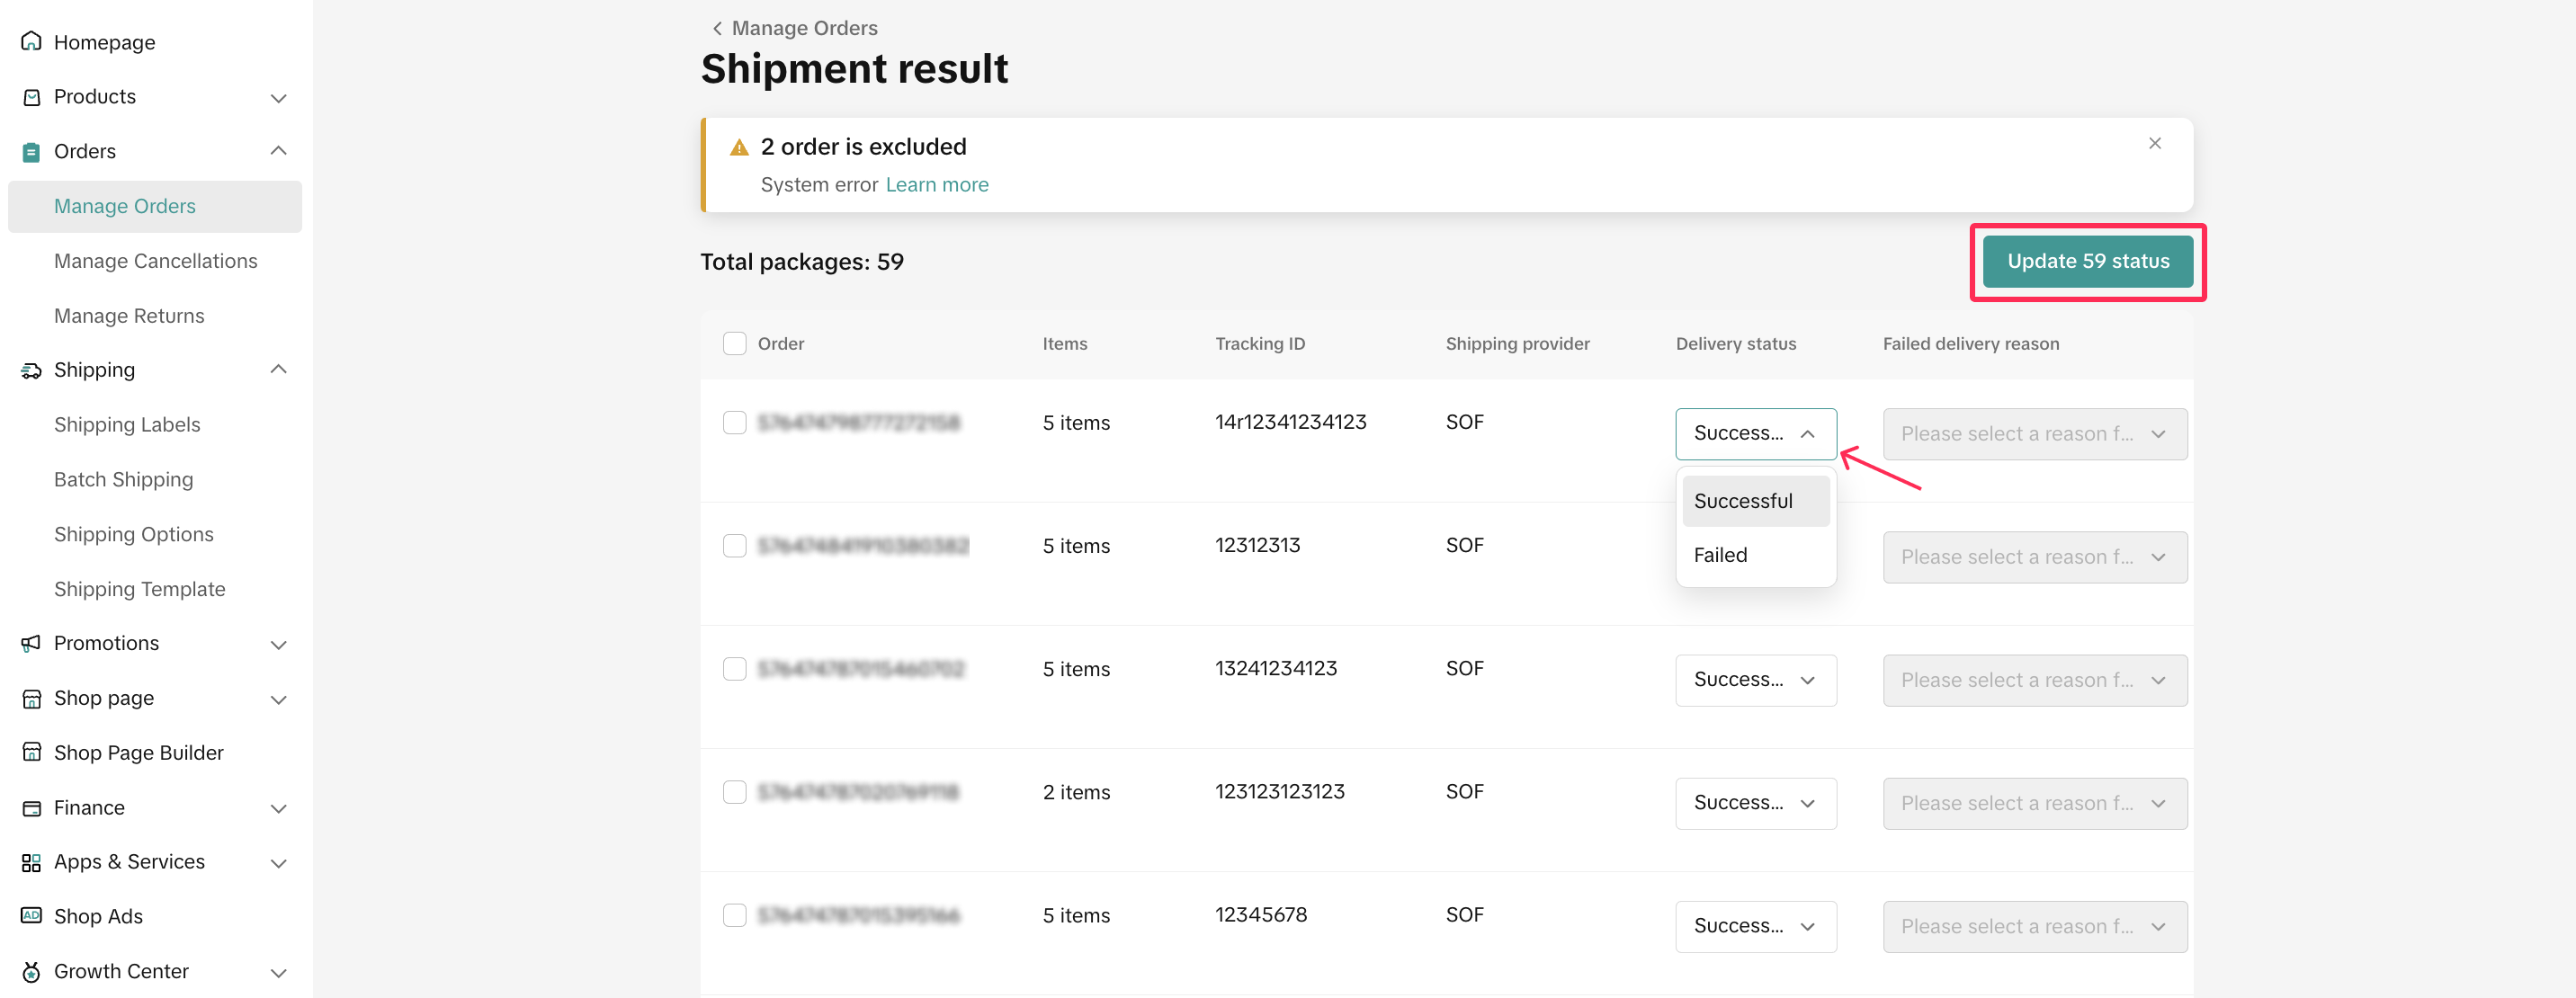
- Open the downloaded spreadsheet, which includes columns such as Package ID, Order ID, Product Name, Variation, Quantity, Shipping Provider, Tracking ID, Delivery Result, and Delivery Failed Reason. Add information to the Delivery Result and Delivery Failed Reason columns. Verify that the correct status is uploaded, and be careful not to delete or move any columns, as this may result in errors during the upload process.

- Once the spreadsheet is complete, upload it to Seller Center to update the delivery.
- The system will prompt you to review the upload status. Check the details, make necessary changes, and click 'Update Status' to confirm the delivery status.
Update Delivery Status One-By-One
- You can also update the delivery status one by one. Just go to the Manage Orders page and filter 'Shipped by Seller' orders.
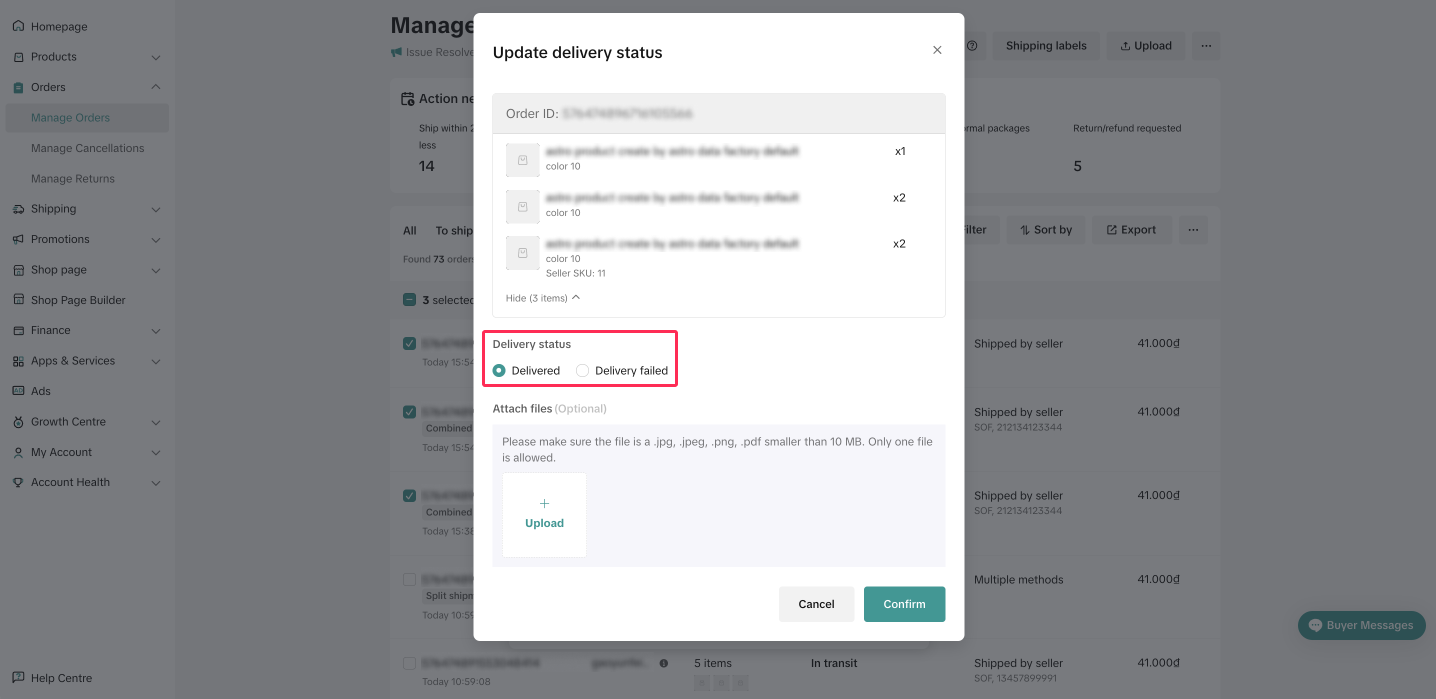
- Select the orders you want to update and click 'Update Delivery Status.'
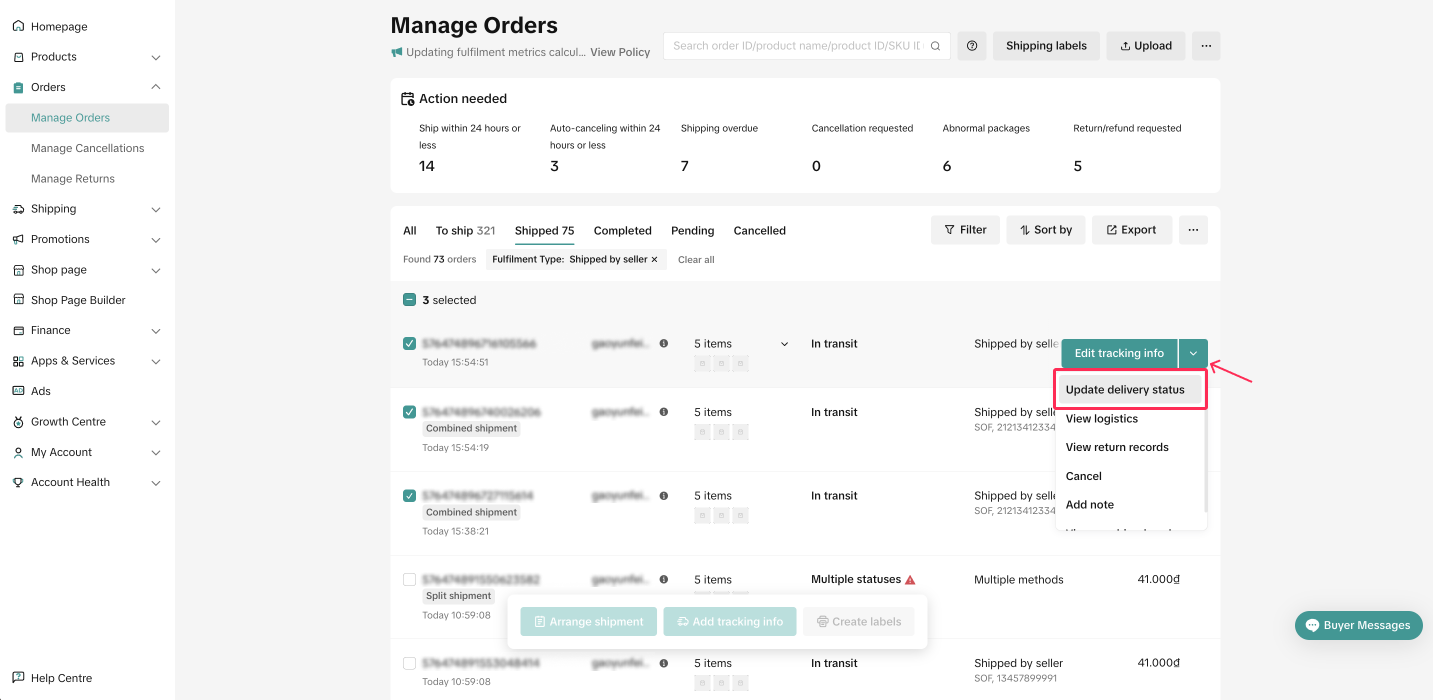
- You will be redirected to the Update Delivery Status page, where you can choose the delivery status and attach photos. Once done, click 'Confirm.'
You may also be interested in

Managing Orders on Seller Center App
In this article, we will introduce you to the new Orders page on the Seller Center app and how you c…

Managing Failed Delivery Orders
In this article, we will guide you on how to manage and keep track of failed delivery orders. You wi…

What should I do if wrong information is printed on the ship…
Unfortunately, if you made a mistake on your pickup/return warehouse address on the shipping label,…

Can I switch between the "Ship by Platform" and "Ship by Sel…
Currently, we don't support switching the shipping method for existing orders. Please proceed with…

When is an order status considered "Abnormal"?
It is likely that the order is still in transit for seven (7) days or more. If the order is still wi…

What do I do if my order is lost or damaged?
Only Shipped via Platform orders are eligible for reimbursement. You will be reimbursed under the fo…

What if a buyer rejects my order?
If a buyer rejects your order, the course of action you take depends on whether the order is Cash on…

Managing Orders
This article will guide you through our new Manage Orders page to help you become familiar with the…

Combining Orders into a Single Package
This article provides a simple guideline on combining multiple orders into a single package, giving…

Late Dispatch Rate (LDR)
Note: Orders with Instant, Sameday, and Sameday 8-hour delivery are only available via Tokopedia. Cl…