

Auto Rule Settings for Cancellation Requests
03/23/2026

Creating New Rules
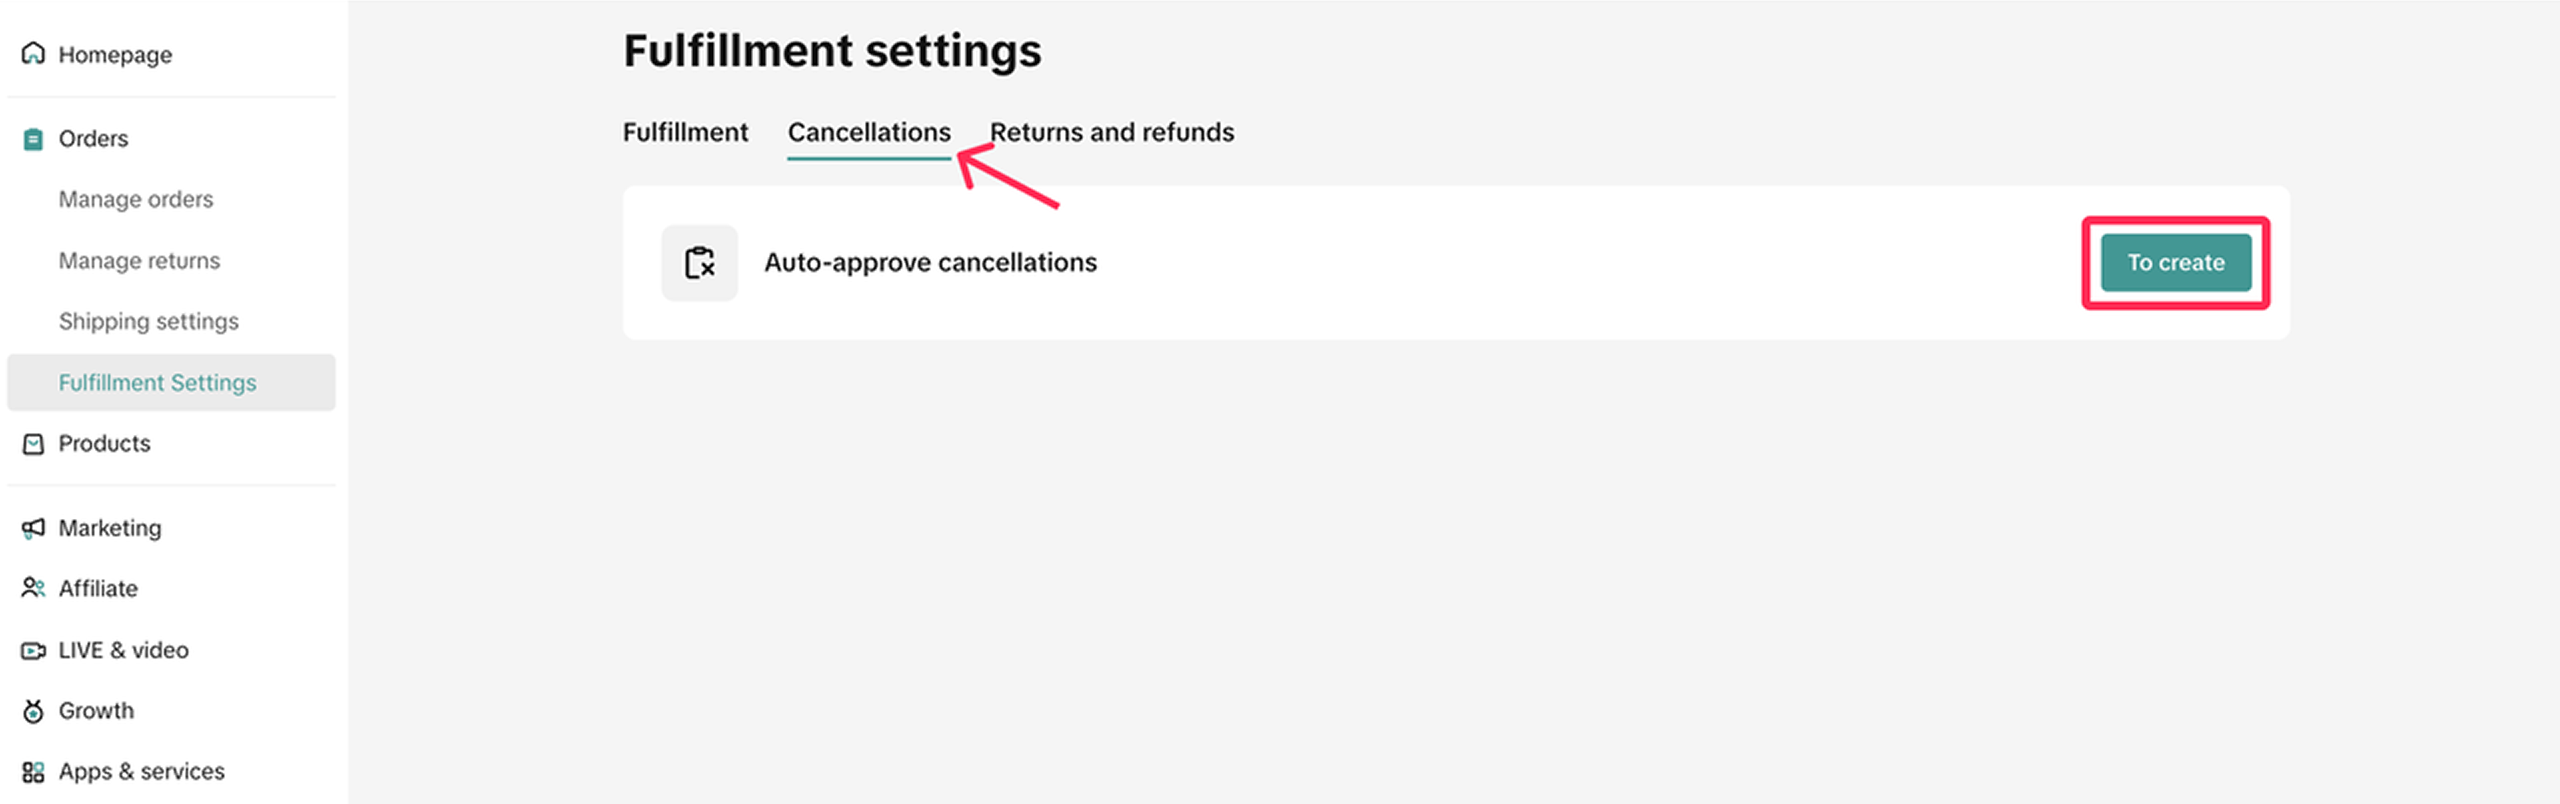
- Go to Orders > Fulfilment Settings. Navigate to the Cancellations tab and click 'To Create'.
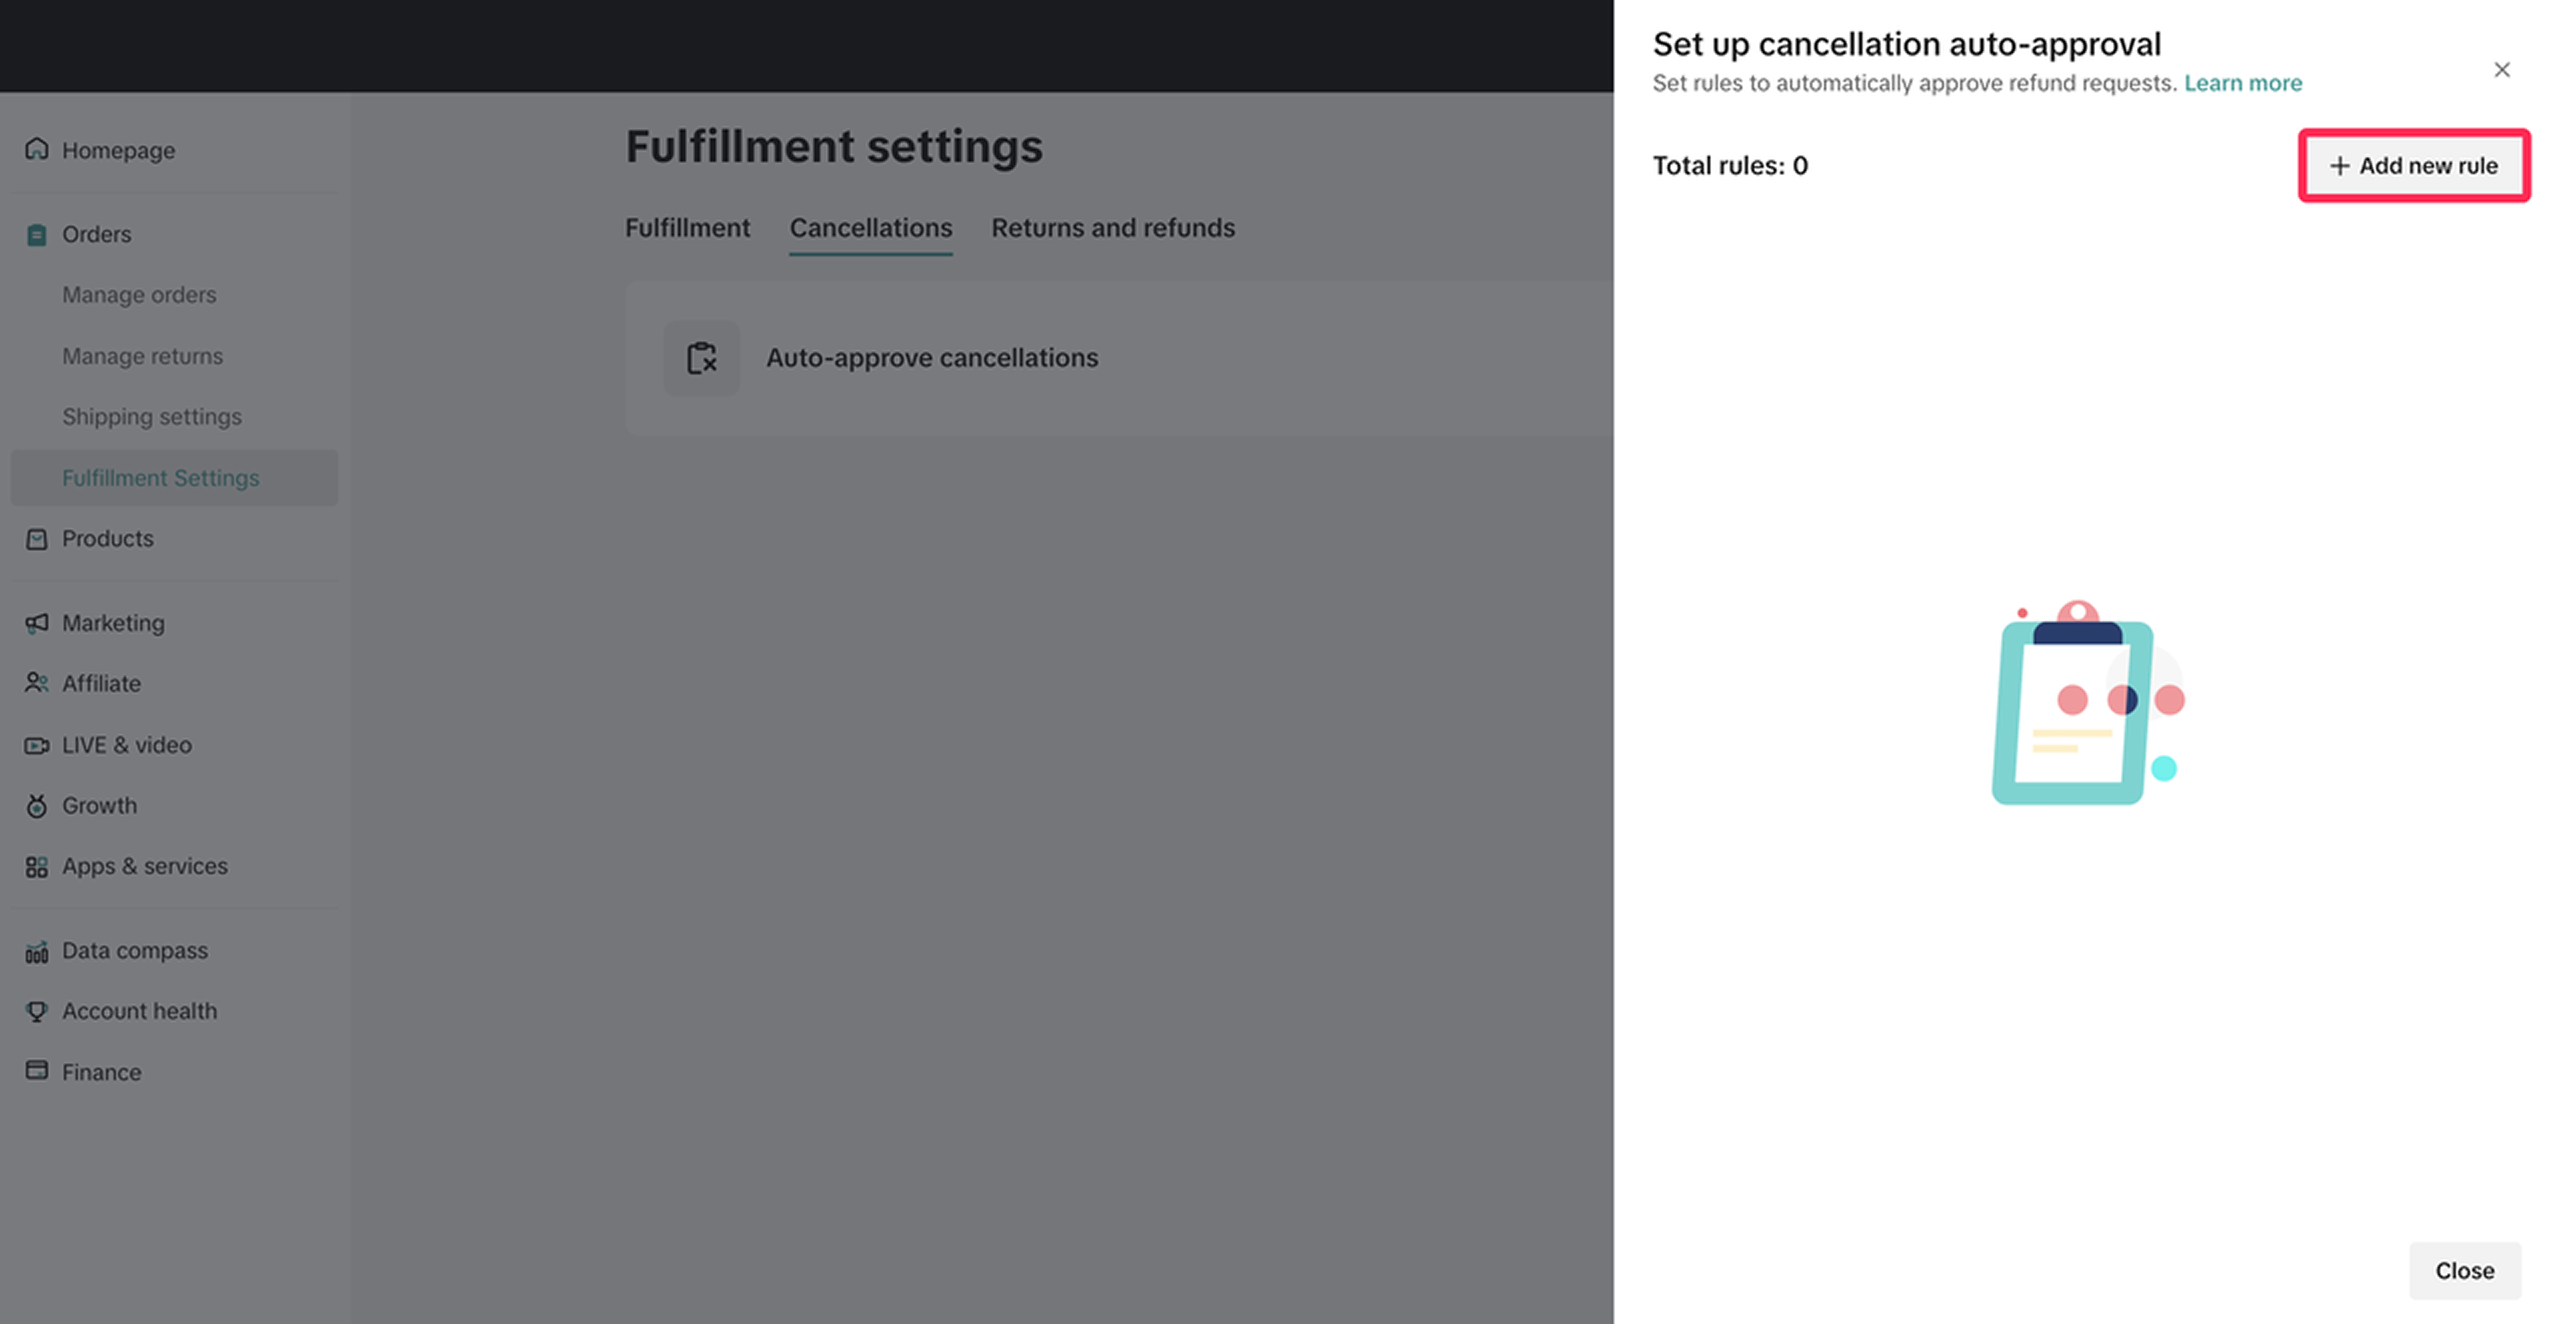
- You will see the Auto-Approved Cancellation tab. Click 'Add New Rule' to access the rule setting options.
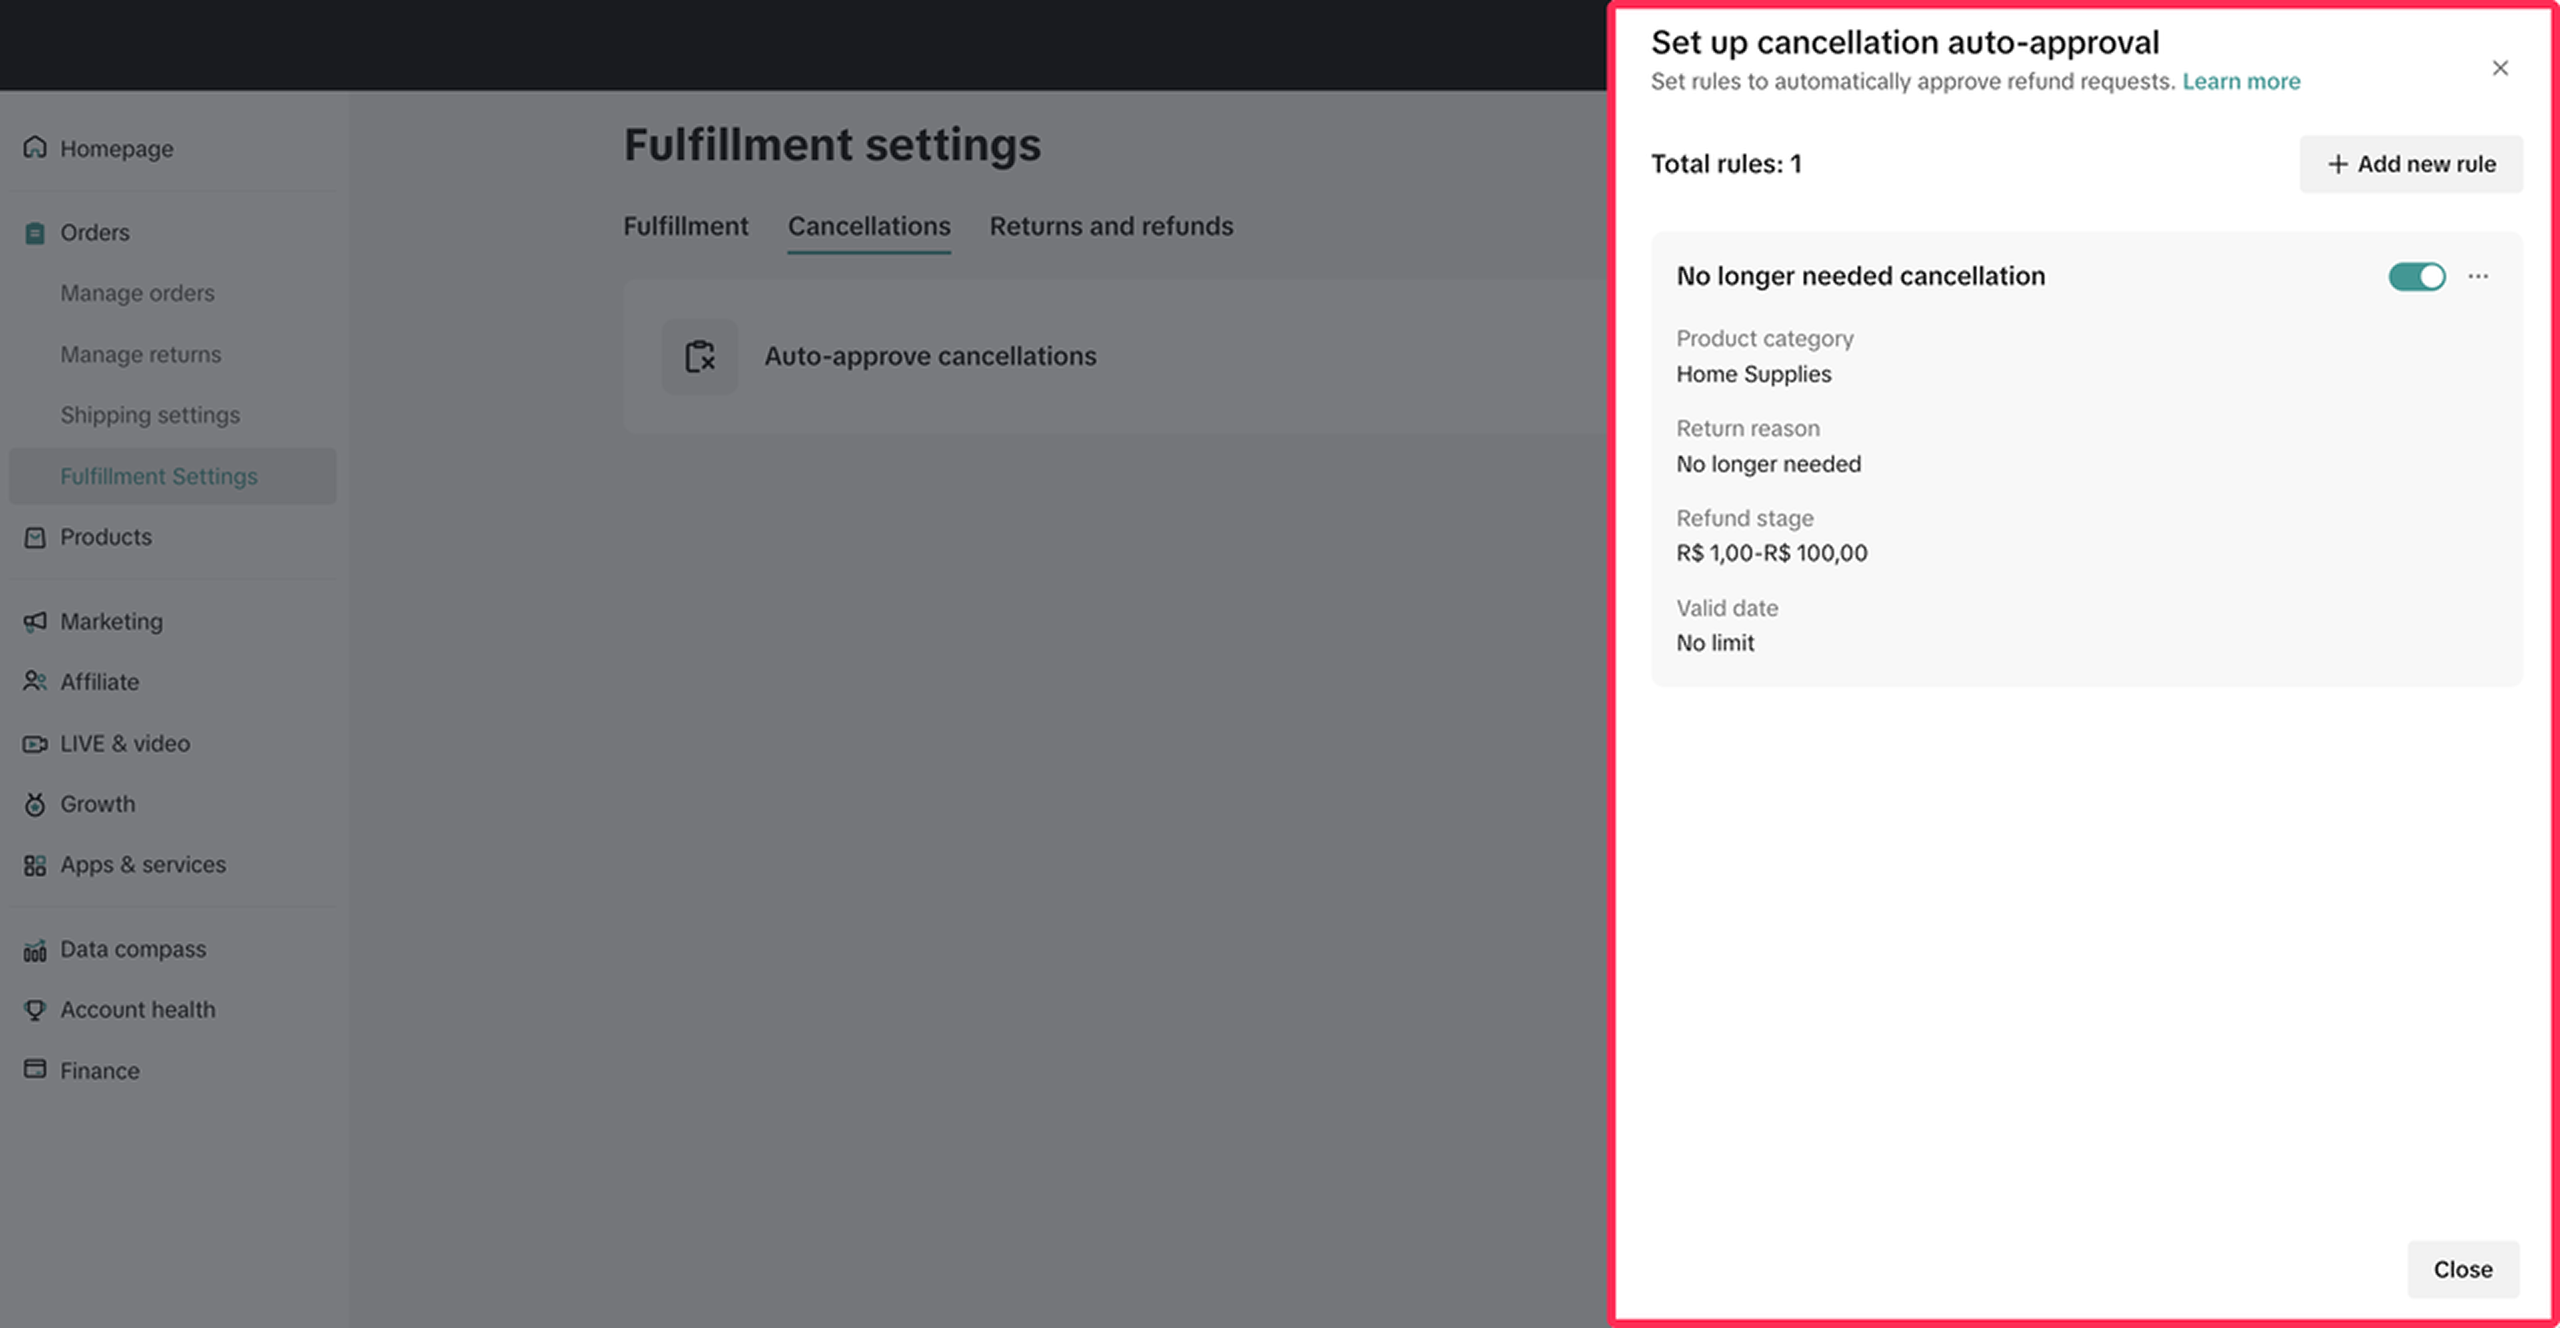
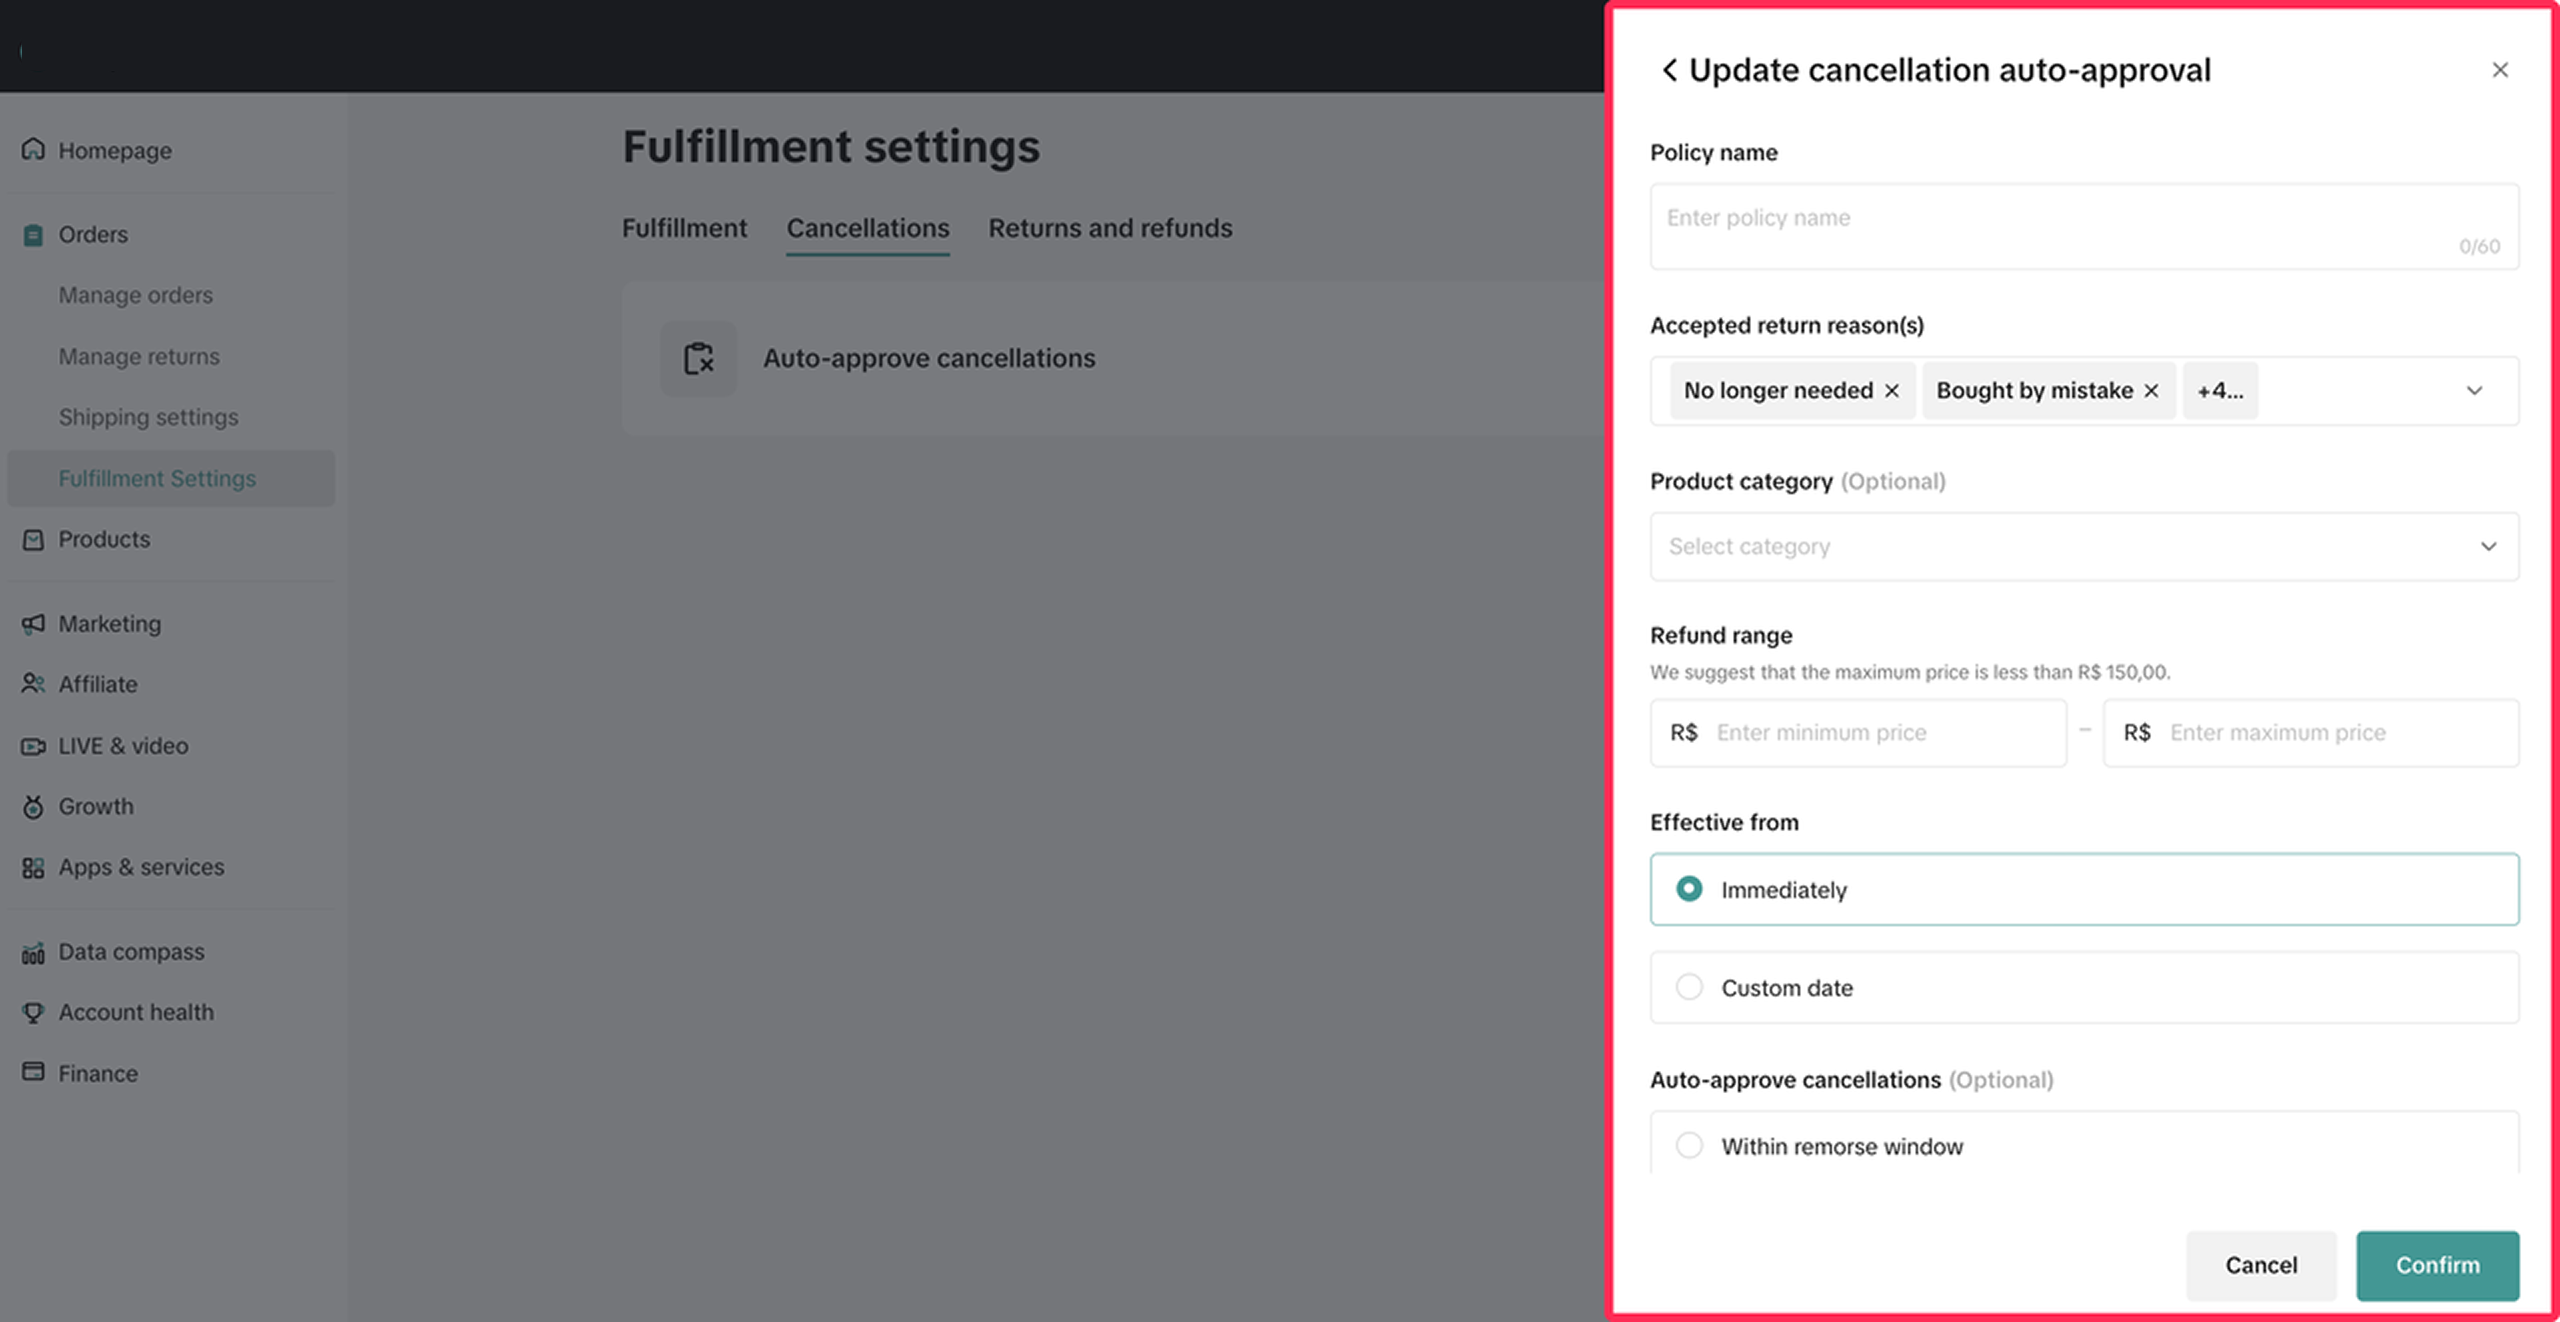
- On this page, you can set the policy name and select the accepted reasons, product categories, price range, effective date, and conditions. The cancellation request will be automatically accepted when the buyer's reason aligns with your settings. Please review your selections carefully before clicking 'Confirm' to enable the cancellation rule.

- Once you have set up the cancellation rule, it will be activated. You can easily toggle these rules on or off by adjusting the toggle switch.

Editing Rules
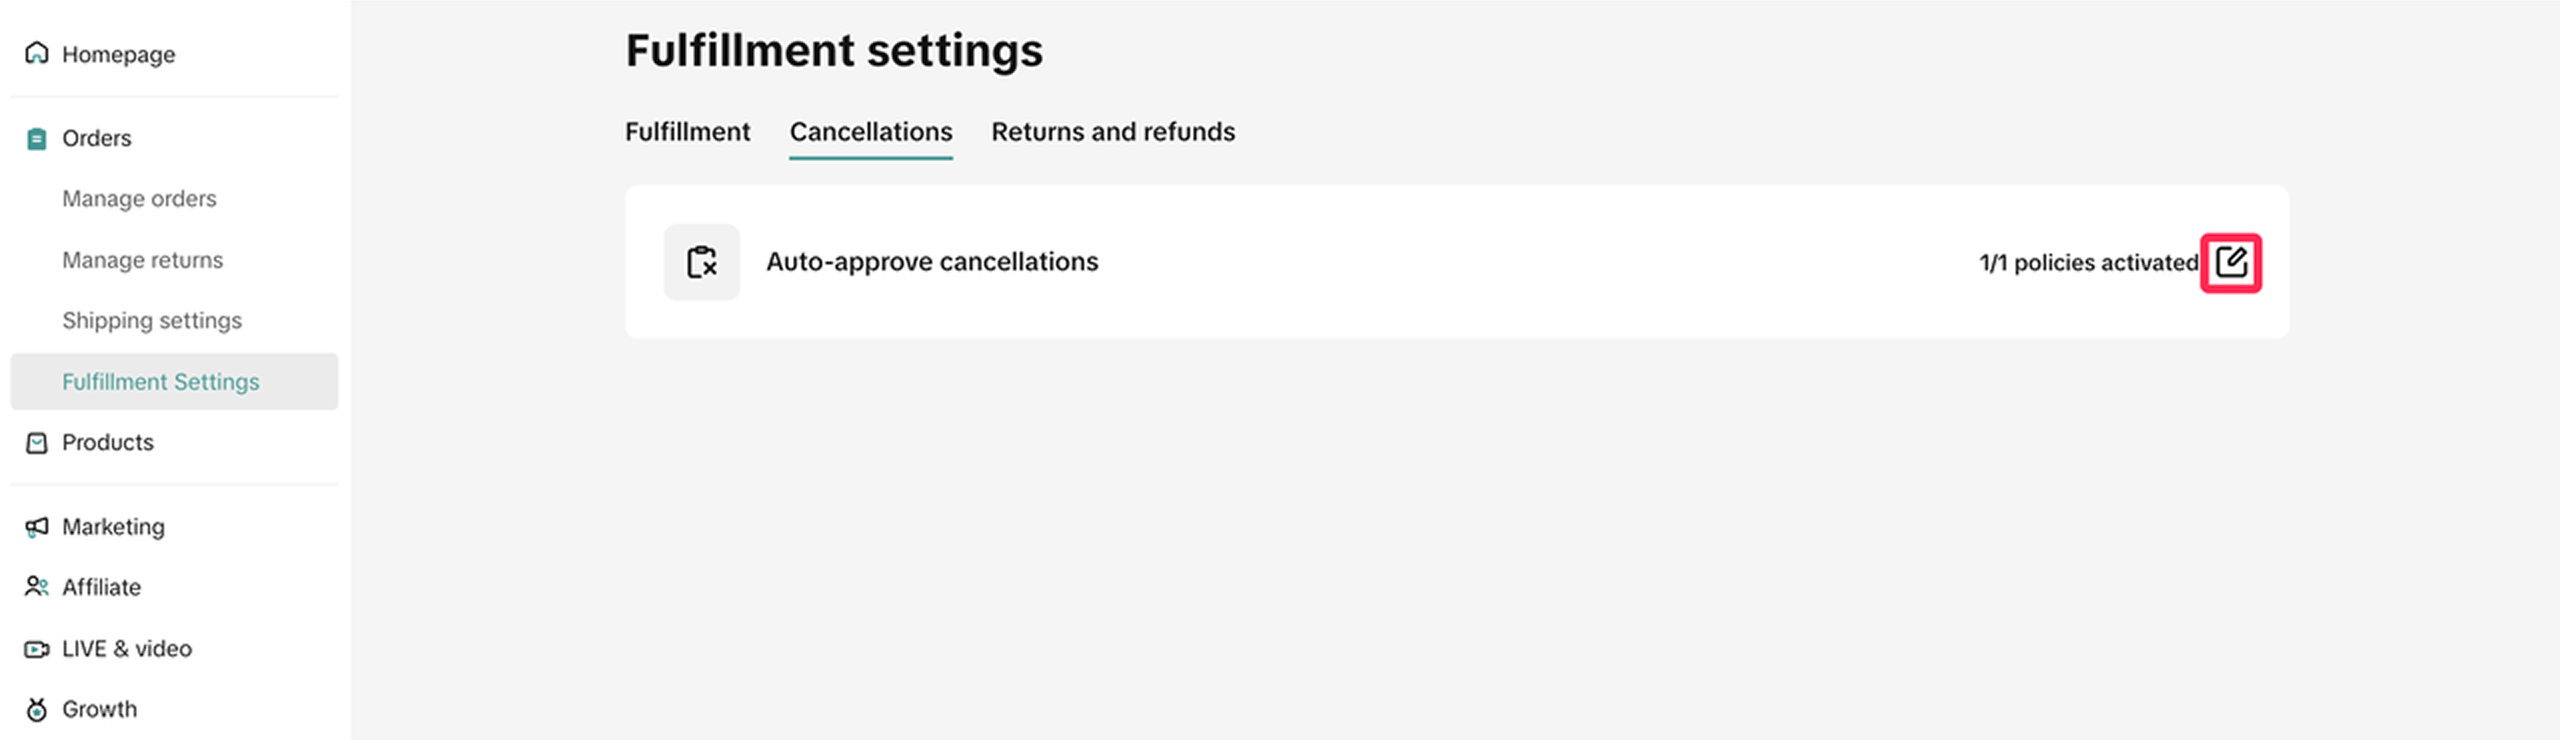
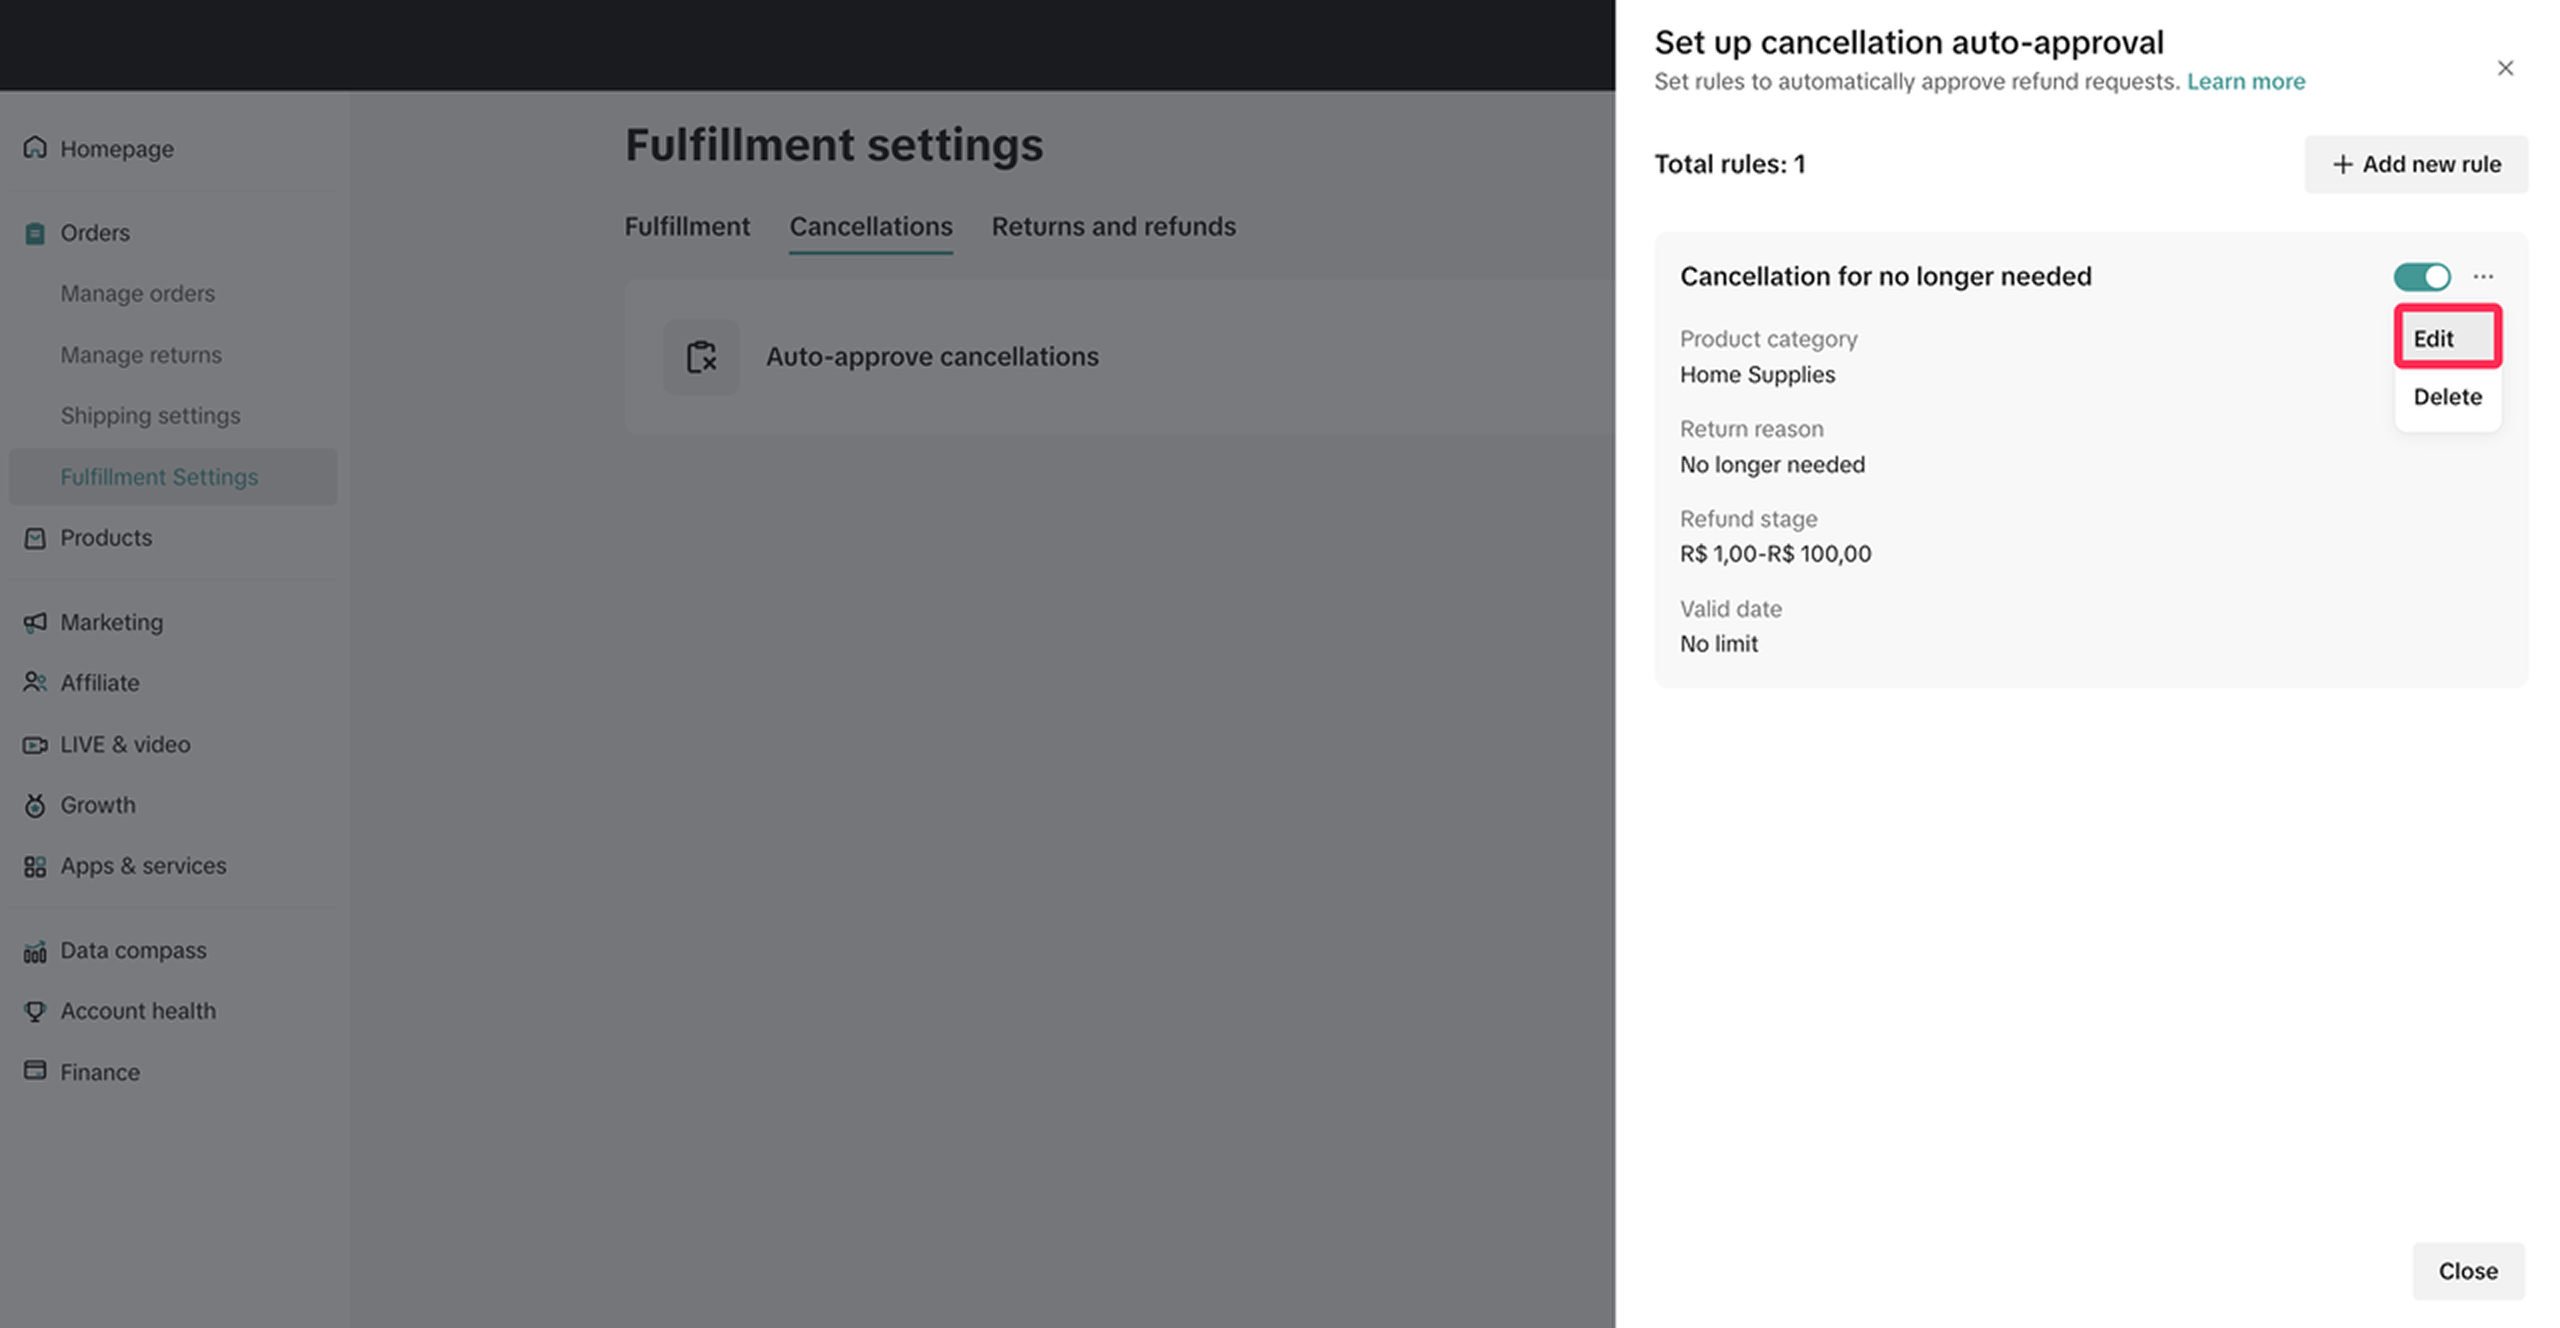
- To edit existing rules, navigate to the Fulfilment Settings page. Under the Cancellations tab, click on the edit icon.
- You will see a list of rules that you created. Click on the three-dot icon (...) next to the rule and select 'Edit.'
- Make the desired changes to the rule settings. Once you have updated the settings, click 'Confirm' to save your new configuration.

Deleting Rules
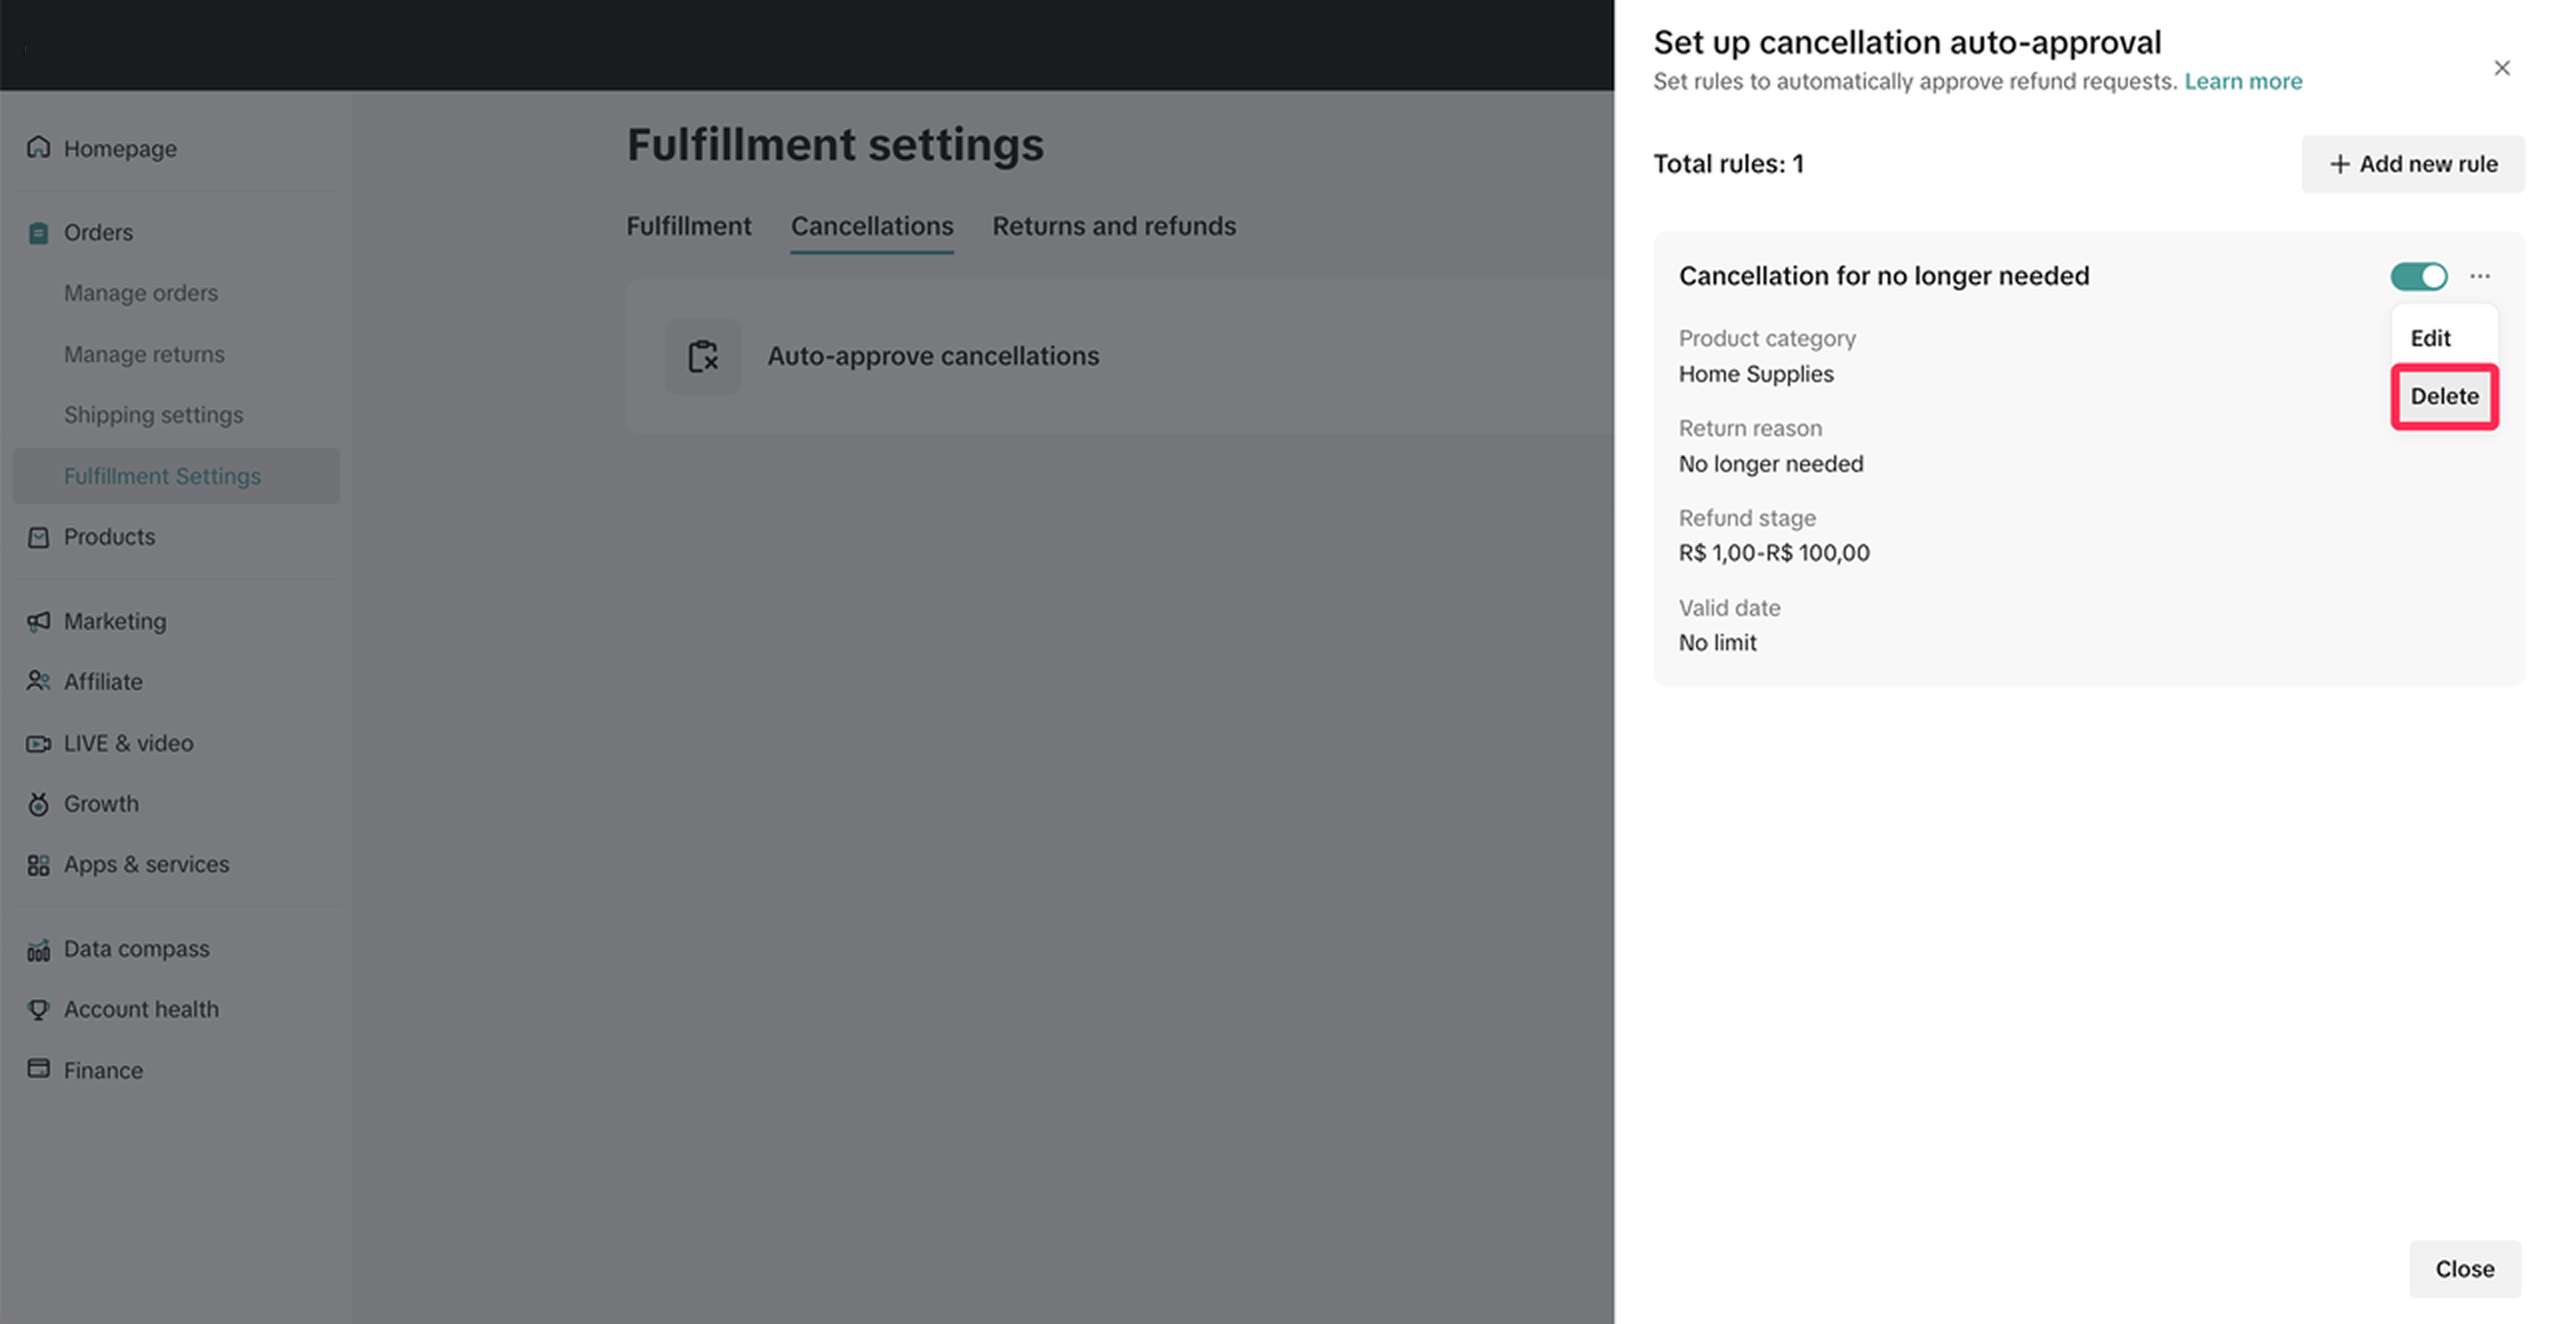
- To delete the existing rules, navigate to the Fulfilment Settings page. Under the Cancellations tab, click on the edit icon.

- You will see a list of rules that you created. Click on the three-dot icon (...) next to the rule and select 'Delete.'
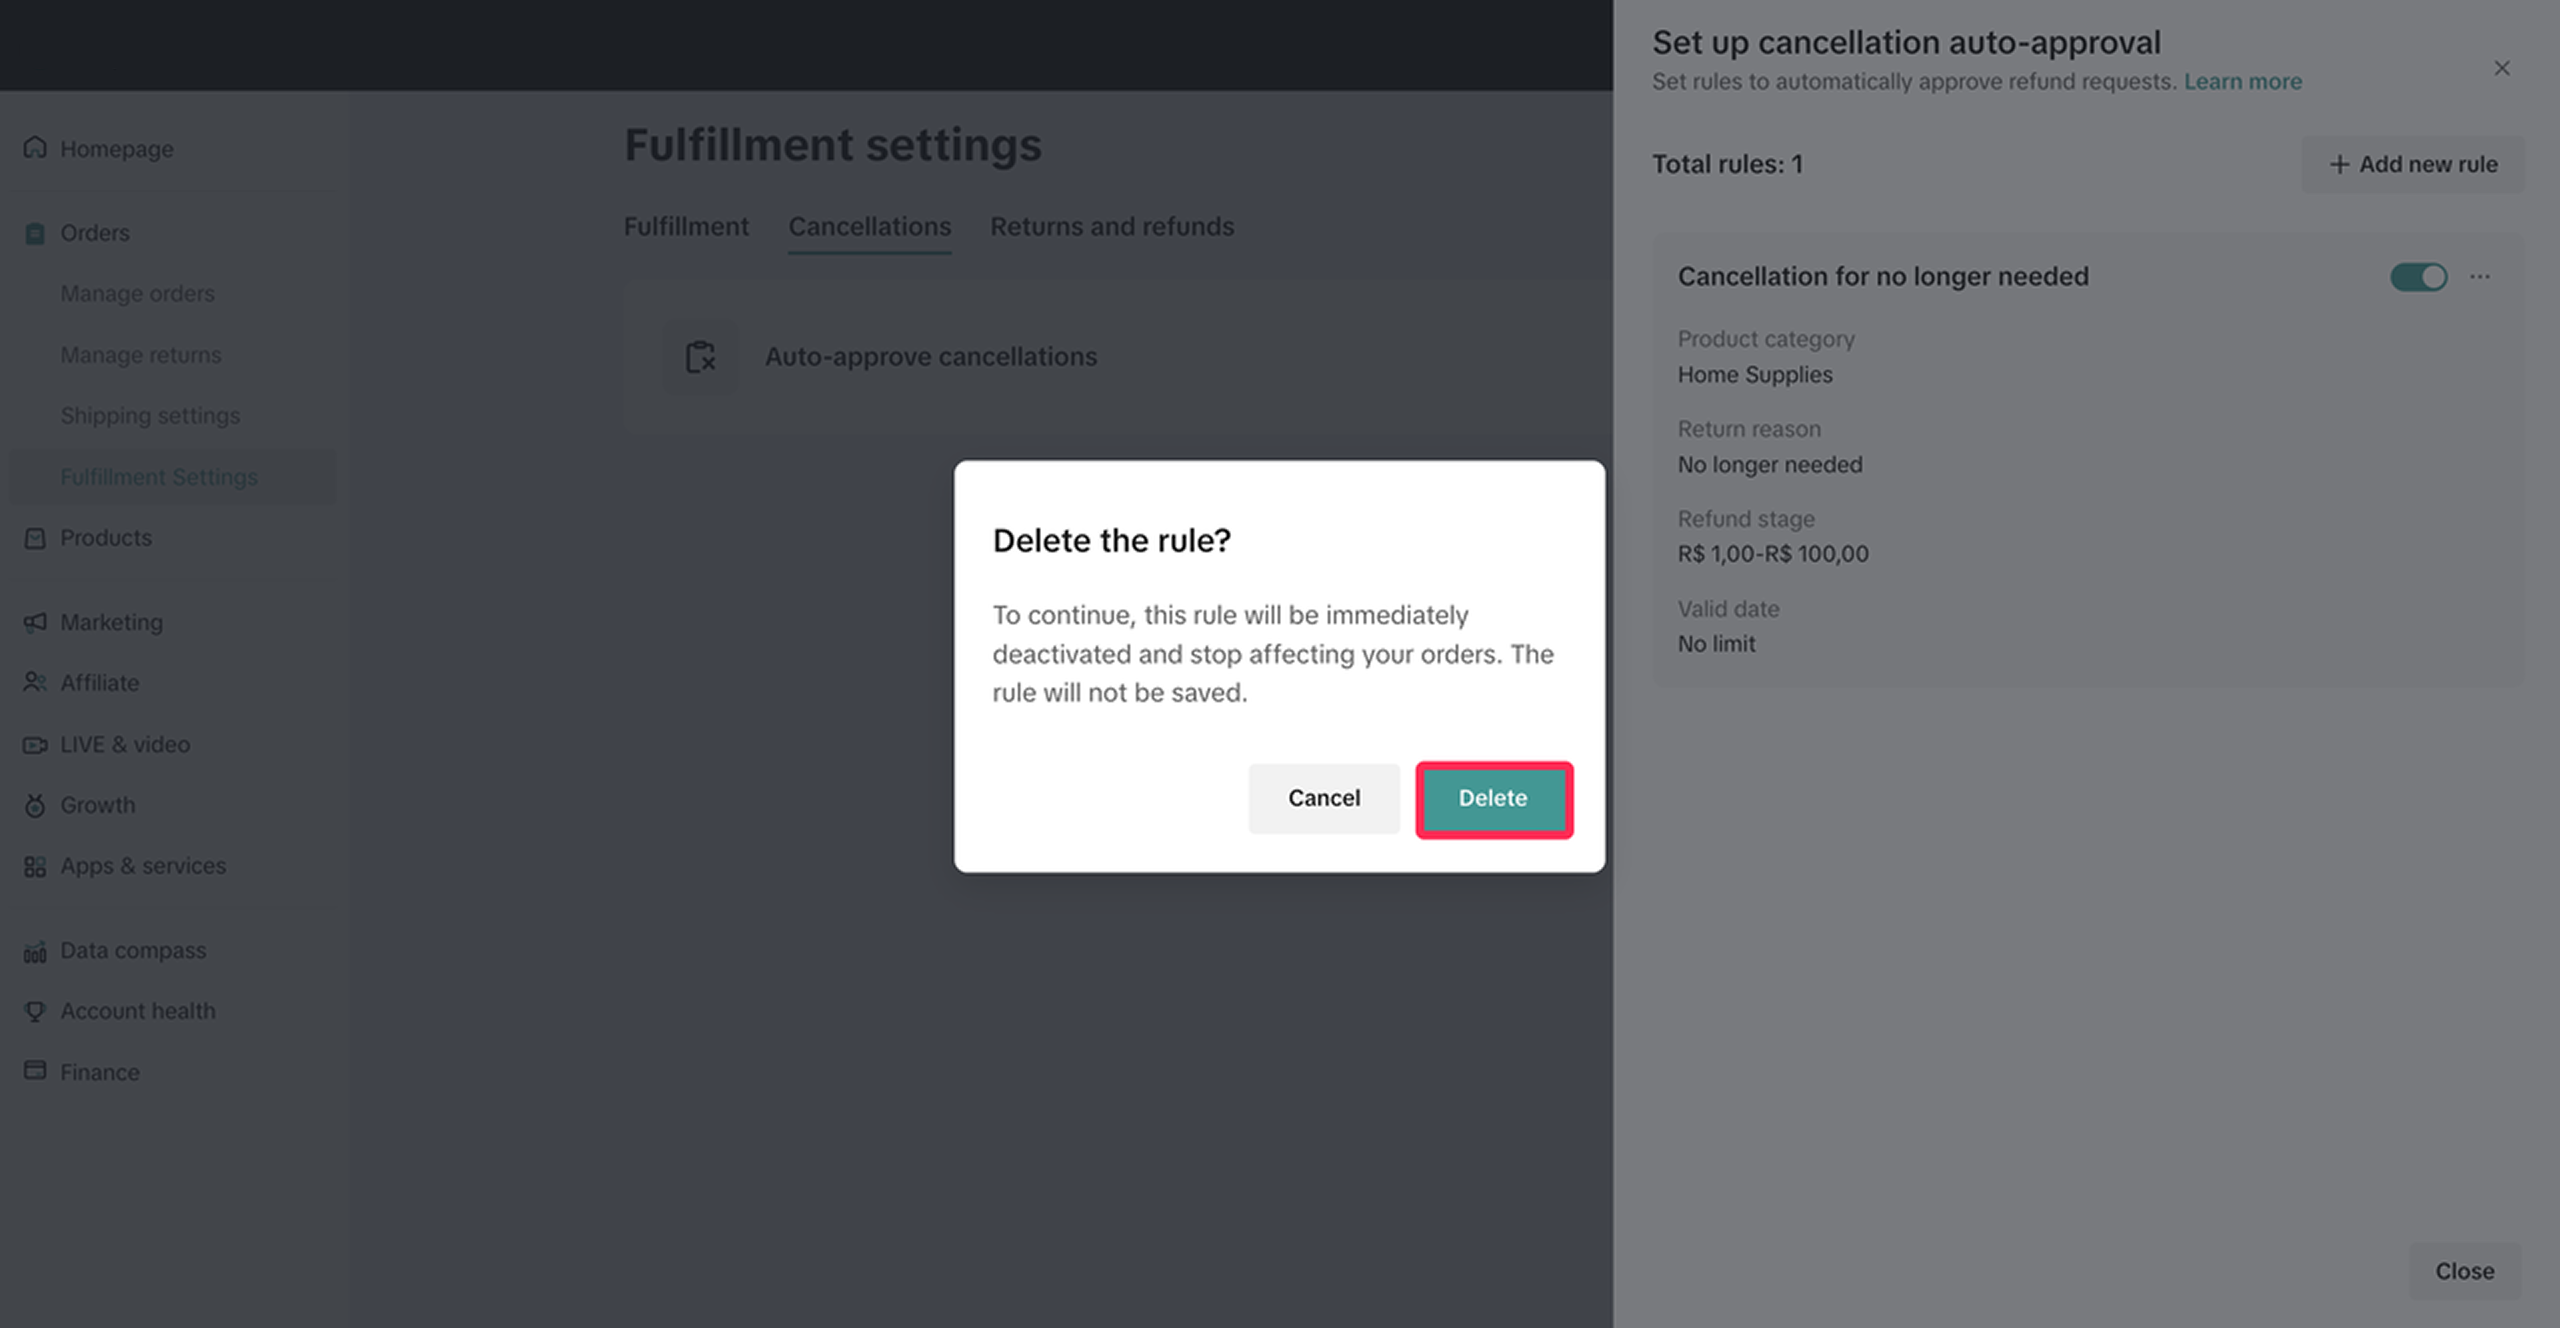
- A pop-up window will appear asking for confirmation. Click Delete to confirm and proceed with deleting the rule.
You may also be interested in
Managing Exchange Requests
Explore this guide to understand the essentials of managing exchange requests, equipping you with th…
Managing Reshipment Requests
This guide offers a step-by-step approach to handling reshipment requests, helping you address custo…

Managing Refund-Only Requests
This article provides a clear overview of the refund-only process, giving you the tools to respond e…

Introduction to Aftersales
This article provides a quick overview of the various types of aftersales requests and guidance on h…
Initiating an Appeal for Return/Refund Requests
This article aims to improve seller's understanding regarding appeal management on Seller Center fro…

Why can't I locate the Appeal button on the "Manage Returns/…
If you're unable to find the Appeal button on the "Manage Returns/Refunds" page, it could be due to…

What if the buyer returns incomplete, used, or incorrect ite…
No compensation for incorrect items returned by buyer: Buyers must ensure that they enclose the corr…

When can a buyer raise a return/refund request?
Timeframe for return/refund requests: For products purchased through Mall: Buyers can submit a retur…

What is the process for handling return and refund requests?
We encourage sellers to handle all after-sale issues and communicate with buyers appropriately. If a…
Returns & Refund Methods
This guide will provide you with a clear understanding of the return process, various return methods…