

Mastering After-Sales Requests: to Handle Refunds, Exchanges, and Reshipments
10/03/2025
After-sales requests can directly affect your customer satisfaction, return rate, and even shop rating. Instead of just reacting, let’s turn every request into a chance to build trust—through smart operational moves.

Key Timelines That Impact Your Response
Before we dive into the request types, here are some important timelines you must remember: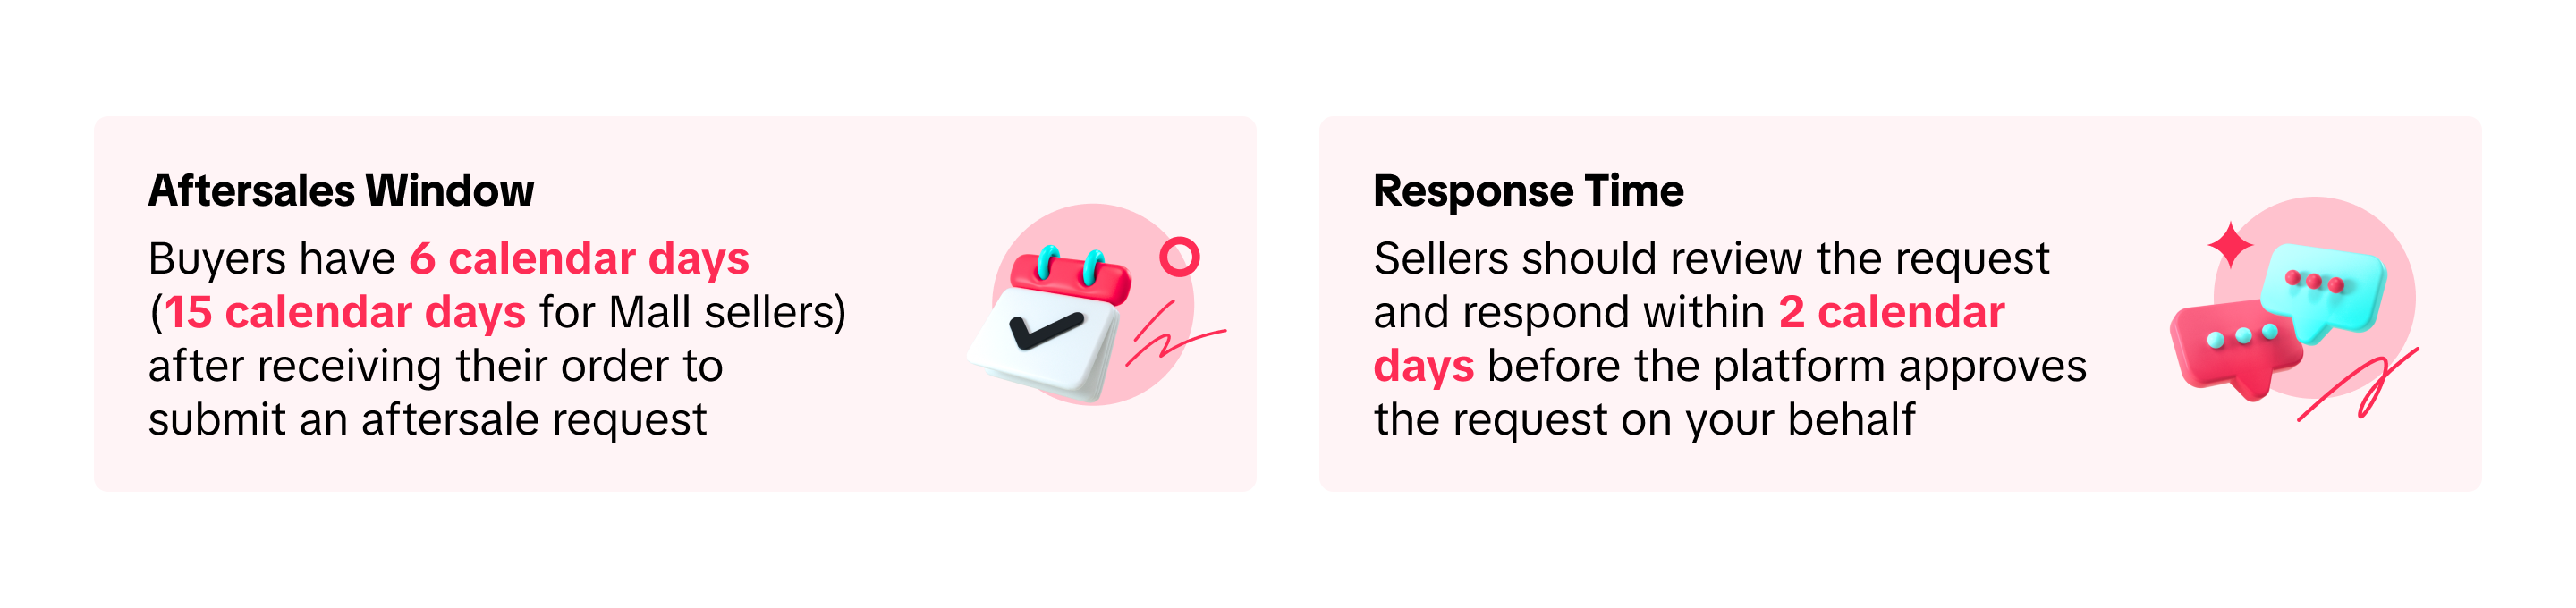

Identify the Right Type of Request First
Before acting, verify the request type to avoid taking the wrong action.Request Type | Key Sign to Spot | Ops Behavior |
| Refund Only | Buyer doesn’t want to return the item | Check proof (e.g., video/photo) before approving; don’t assume buyer is right.See our step-by-step refund-only feature guide |
| Return + Refund | Buyer wants to send item back | Confirm item condition on arrival before clicking “approve.” Keep unboxing video if needed.See our step-by-step return and refund feature guide |
| Reshipment | Buyer received wrong/damaged/missing item | Recheck warehouse logs & packing slip to avoid repeating the same mistake.See our step-by-step reshipment feature guide |
| Exchange | Buyer wants different size/model | Confirm inventory & prepare return label early to reduce processing time.See our step-by-step exchange feature guide |

Operational Habits to Improve Efficiency
Managing aftersales doesn’t have to be messy. With the right operational habits, you can speed up response time, avoid internal confusion, and improve customer satisfaction. Start with these best practices:Habit | What to Do | Why It Matters |
| Create a Standard Response Template | Save common reply formats in Seller Center (e.g., "We’re reviewing your request…") | Saves time and ensures consistent tone when responding to buyers |
| Build a Returns SOP with Your Ops Team | Align with team on who checks product, confirms damage, and processes refund | Avoids internal confusion and speeds up resolution |
| Use Return Reason Tracking Sheet | Log all return/refund cases with reason tags | Helps you detect recurring issues (e.g., damaged packaging) and fix them |
| Assign One PIC for After-Sales Handling | One person per shift monitors the “Returns/Refunds” dashboard | Prevents delay or missed requests, especially during campaign days |
| Label Returned Products Properly | Place returned items in a labeled, separate shelf | Avoids mistakenly reselling defective or incorrect items |

Mistakes to Avoid & How to Fix Them
Even a small error in handling aftersales requests can lead to auto-approved refunds, lost revenue, or dissatisfied buyers. Here's a quick list of common mistakes and how to avoid them:Mistake | What Happens | ✅ How to Fix It |
| Ignoring Request Over 2 Days | System auto-approves request, loss of revenue | Set reminder alarms, check dashboard twice a day |
| Clicking Wrong Button (e.g., Refund instead of Reject) | Irreversible action, item not returned | Double check request type + buyer’s comment before clicking |
| Accepting Without Clear Proof | Buyer may misuse policy | Ask for clear images or videos of product issue first |
| Not Updating Return Status | System sees it as seller delay | Always click "Confirm Receipt" after item arrives |

Final Checklist for After-Sales Excellence
Before you log off today, make sure you’ve covered the key tasks that keep your after-sales operations strong:- Respond to all requests within 2 working days, even if you're still investigating
- Double check the request type before clicking any button (refund, reject, etc.)
- Coordinate with your warehouse or ops team for every return case
- Use Data Compass to track refund reasons and identify recurring product issues
- Use response templates to ensure fast, consistent communication with buyers
You may also be interested in
Registering to be a Seller
Your seller journey with TikTok Shop by Tokopedia begins with account registration. You can register…

Can I link my TikTok account with another social media accou…
Click on the Profile page, and click Edit Profile. Select either of the options under Social to link…

Why was my brand authorisation application rejected?
All submitted trademark information will be verified against the World Intellectual Property Organis…

What will happen to my existing orders while on "Holiday Mod…
"Holiday Mode" does not apply to existing orders. All existing orders, made prior to Holiday Mode be…

Which types of brand authorisation are accepted within the T…
There are 6 accepted types of brand authorisation: Trademark ownership National exclusive 1st level…

Why am I unable to sell the products of a particular brand?
The platform is committed to protecting the intellectual property rights of both organisations and i…

How to Create your Commission Account
After your successful Creator Account creation, you will need to set up your Commission Account to d…

How to register?
To become a platform seller, you need to create a Shop | Tokopedia account. Please follow the steps…
Setting Up Your Shop Profile and Name
Setting Up Your Shop/Seller Profile Setting up your TikTok Shop by Tokopedia profile is an important…

Seller Registration
Registration process in Tokopedia & TikTok Shop is very convenient. You can sign up with your existi…