

How to Create a Facebook CPAS Campaign
07/11/2025
Toppers, make sure you’ve successfully connected your Tokopedia account with Facebook Business Manager. If you haven’t, you can connect it by following the steps provided [here].
Here’s how to create a Facebook CPAS campaign: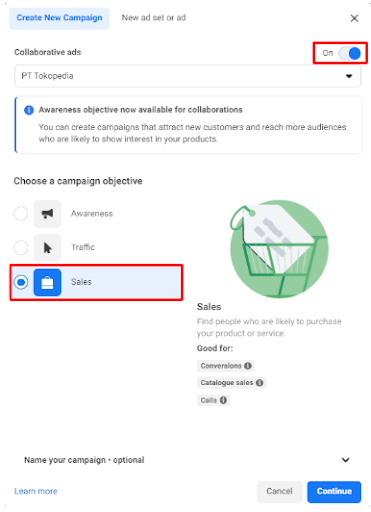
 Our Recommendation:Do not combine prospecting and retargeting audiences in the same campaign. This can result in the retargeting ad set receiving more results and the prospecting ad set performing poorly. To get the best results for both audiences, create two separate campaigns—one for prospecting and one for retargeting—so each can perform better and deliver more optimal results.
For more complete information about how to create a campaign, you can also follow this detailed guide [insert link if available].
Here’s how to create a Facebook CPAS campaign:
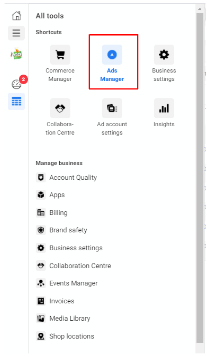
- Log in to your Facebook Business Manager account, then click on the Ads Manager page.
- Next, click Create to start creating your promotional campaign.

- Set the Campaign Level. For the objective, choose Sales, because the CPAS feature can only be used with this type.
Don’t forget to activate the Collaborative ads toggle, and click Continue.
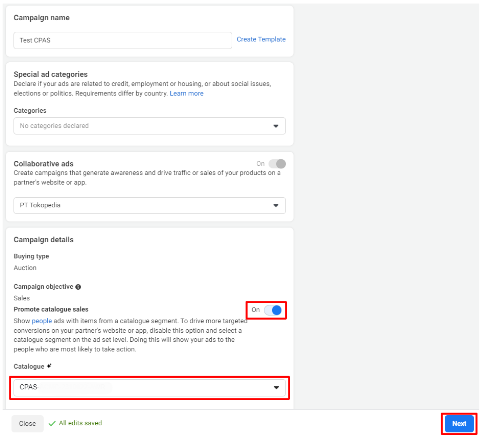
- You will be directed to the Campaign page.
Here, you can rename the campaign.
Don’t forget to turn on Promote Catalog Sales, and select the catalog that Tokopedia has shared with you in the format (CPAS-XXXXXX) – 6 characters.
After that, click Next.
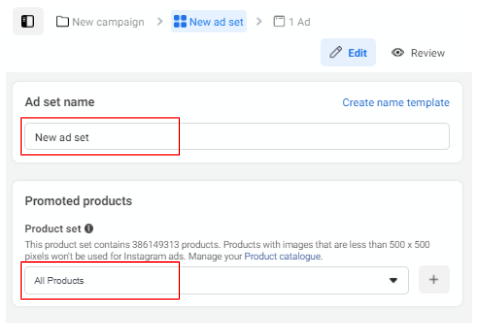
- In the Ad Set Level section, enter the name of the Ad Set.
Under Promoted product, click All Products to select all products in the catalog.
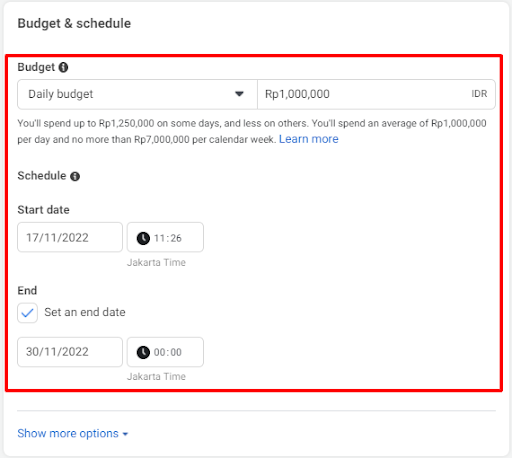
- You can also set the Budget and Schedule in the Budget & Schedule section.
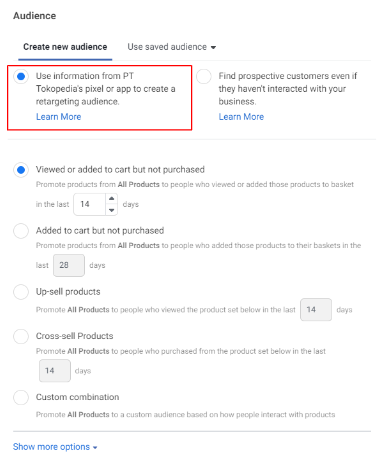
- For Audience, there are 2 types available: prospecting and retargeting.
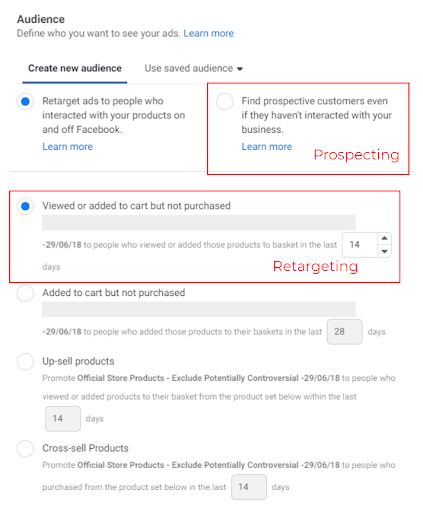
We recommend using the audience provided by Tokopedia (Retargeting).
However, you may also choose other types of audiences, as shown in the image.
Click Next to proceed to the next step.
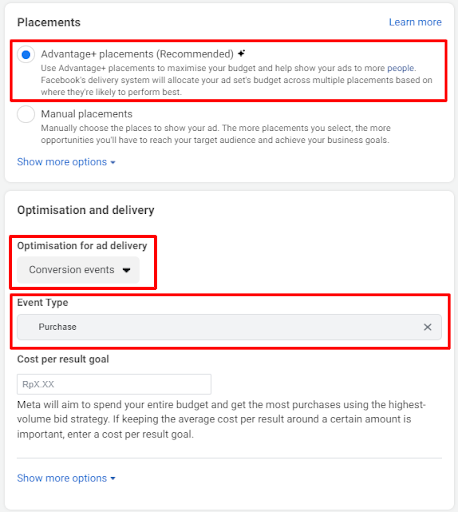
- For Placement, select Advantage+ placements.
In Optimisation and delivery, there are two sections.
- For Optimisation for ad delivery, we recommend choosing Conversion events.
- For Event Type, we recommend selecting Purchase.
Then, click Next to continue.
- In the Ad section, fill in the Ad name. Enter your Facebook Page and Instagram account (if any). We recommend using at least 3 ad formats per Ad Set (Single Image, Carousel, and Collection).
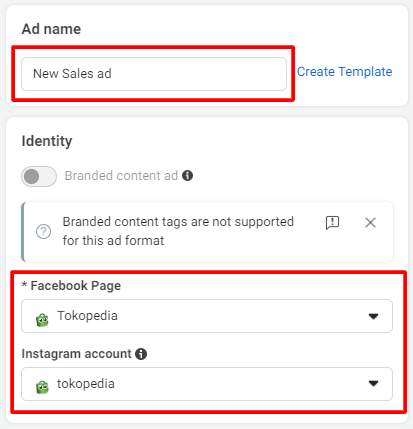

- Fill in the Headline and Primary Text (Caption) for your ad. Select the product name and other attributes from your catalog by clicking the + button on the Headline.

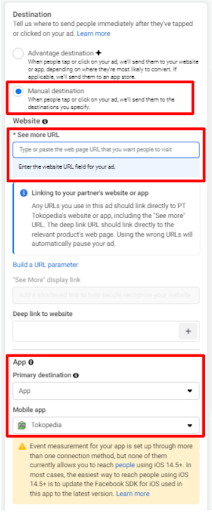
- In the Destination section, Facebook will automatically choose Advantage Destination by default. So, you need to change it to Manual destination and enter your URL in the See More URL field. Then, in the Primary destination under App, choose App, and in the Mobile app section, select Tokopedia.
- In the Tracking section, if the domain is not automatically filled, you can select tokopedia.com as the domain. For the URL Parameter, the URL Parameter/UTM will be automatically filled if you’re using the catalog from Tokopedia. So you do not need to add the UTM yourself.
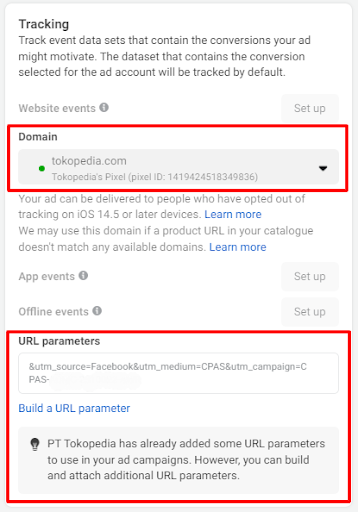
⚠️ Note: If the UTM is not automatically implemented, you can contact your Account Manager / Relationship Manager / Tokopedia Care. Do not input the UTM manually.
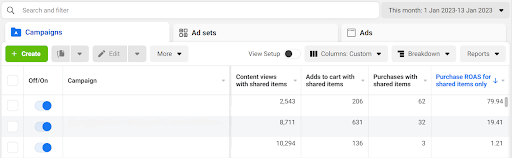
- After that, click Publish. Congratulations, you’ve successfully created your ad campaign! You can see your campaign performance in the Campaigns section, as shown below, once results are available.
For more complete information about how to create a campaign, you can also follow this detailed guide [insert link if available].